What’s up, everyone!
Managing Cloud PC’s using Microsoft Endpoint Manager is pretty easy! But did you know Microsoft has approved partners for Windows 365 which add specific value? One of these partners is Nerdio. Let’s take a look at what cool features Nerdio Manager has!
/offtopic
I wrote about Nerdio Manager (for Enterprise) with Azure Virtual Desktop in a previous blog series, check it out if you want to learn more about Nerdio!
This post is part of a series about Windows 365! (Also known as Cloud PC) In this series I will explore this awesome technology. If you are curious what Windows 365 can do for you and your organization, this series might be for you!
Series – Windows 365 with Nerdio Manager
- Part 1: An Introduction To Windows 365
- Part 2: Windows 365 Business vs Enterprise
- Part 3: Configure Windows 365 Business
- Part 4: Configure Windows 365 Enterprise
- Part 5: How To Migrate From Citrix Or VMware To Windows 365
- Part 6: Use Universal Print on Windows 365
- Part 7: Monitor And Improve Performance For Windows 365 Cloud PCs
- Part 8: Use Windows Autopatch To Keep Your Cloud PCs Up-To-Date
- Part 9: Manage Windows 365 Using Nerdio Manager
Requirements
Nerdio Manager for MSP
Let’s start with Nerdio Manager for MSP, or NMM from now on. NMM makes a lot of sense if you want to manage multiple customers from a single management pane. You can add accounts, or customers, to NMM and configure and manage their Cloud PC environment from there. Let’s take a look.
NMM has two levels where we can configure settings;
- The MSP level: These ‘global’ settings can be made available for connected accounts, or customers if you prefer.
- The customer level: these settings only apply to the specific customer.
You are at the MSP level if you login for the first time. Let’s add an account.
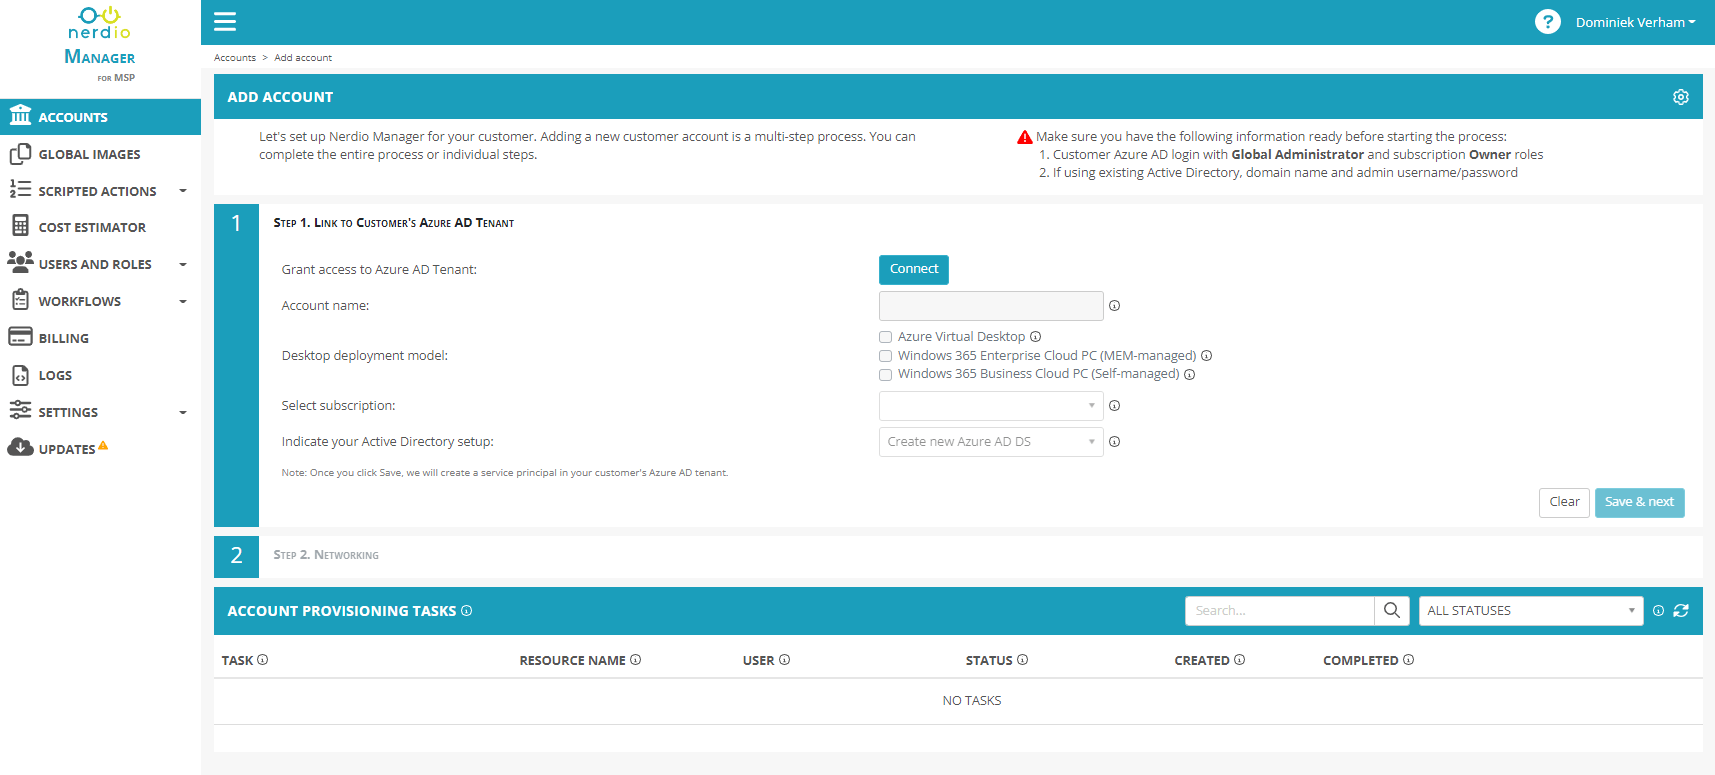
Add Accounts (Customers)
Make sure the account has the Global Administrator role assigned in the tenant of the customer, and has the Owner role assigned on the subscription.
The steps are pretty self-explanatory:
You successfully added the first customer! That should look something like this:
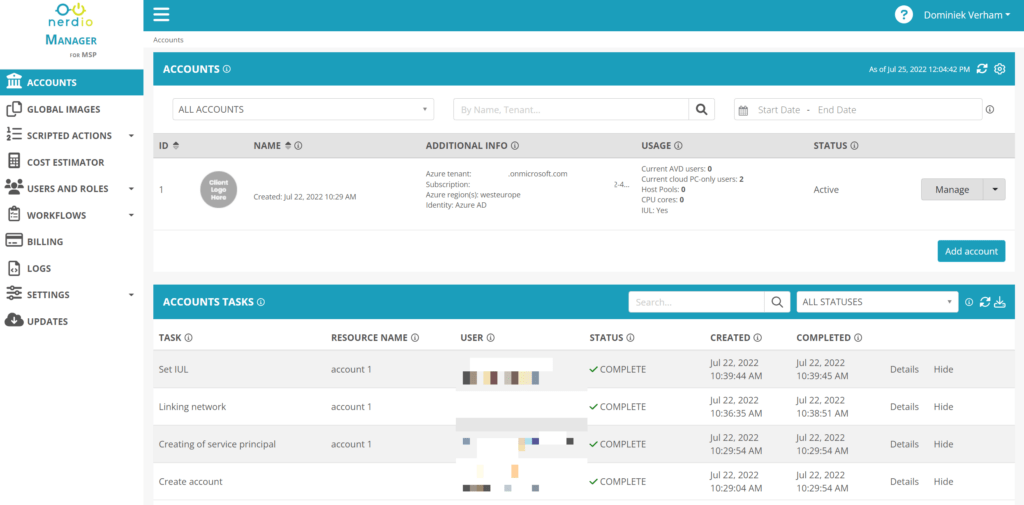
Click on the ID to go to the customer level.
Settings On the Customer Level
Now that we are on the customer level, we can configure NMM to support the deployment model that we need. Head over to Settings, Integrations.
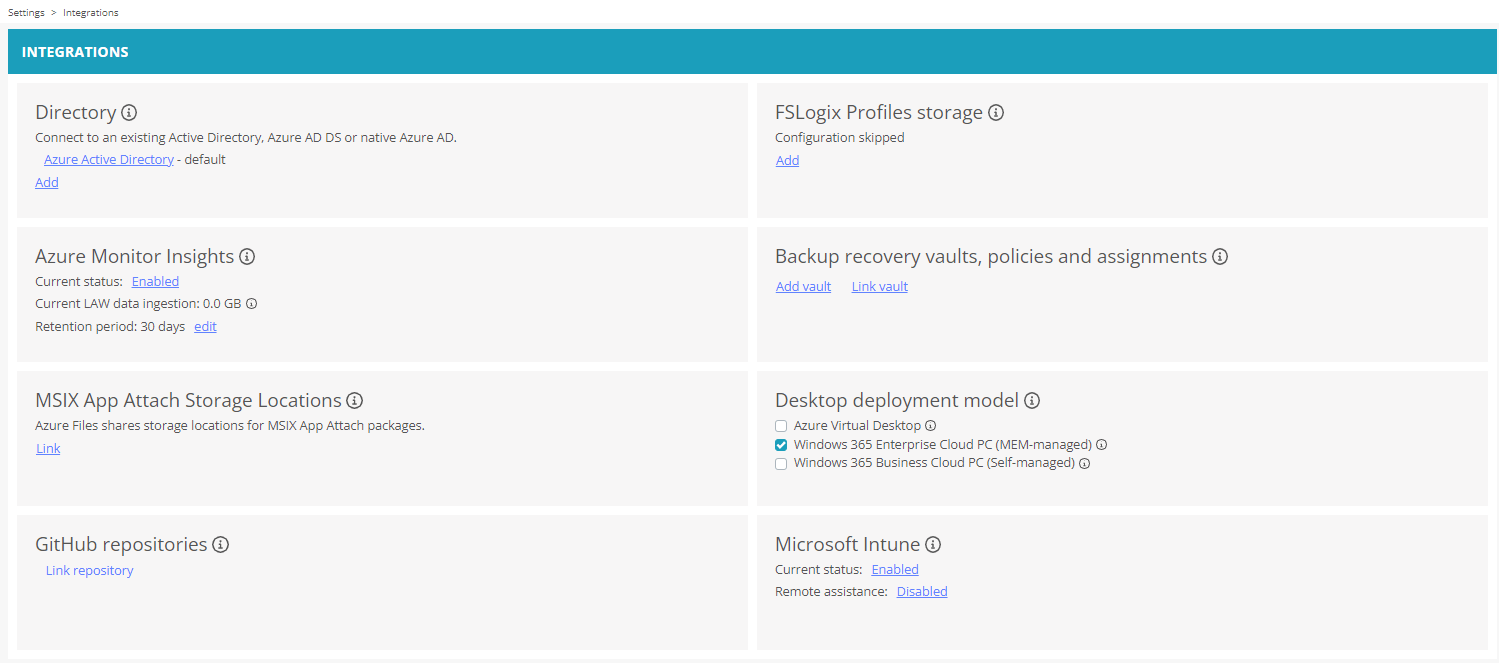
Here we can see a couple of options, let’s focus on the deployment model.
We need to tell NMM if we are going to setup and manage;
- Azure Virtual Desktop
- Windows 365 Enterprise
- Windows 365 Business
- or a combination…
For this demo I will stick with Windows 365 Enterprise and I already have the Windows 365 Enterprise licences in my tenant.
You can configure and select a location for you MSIX packages if you want to use MSIX App Attach.
Next up is to configure Windows 365. Go to Settings, Windows 365.
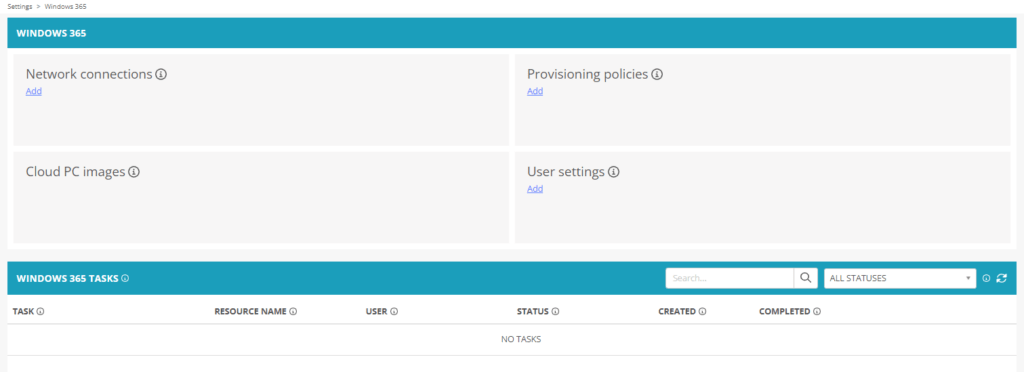
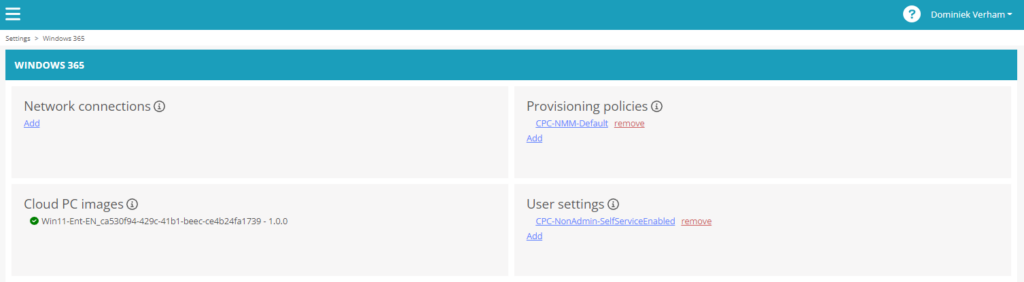
If you are familiar with Windows 365 Enterprise or if you followed this series, you should see some familiar options here.
The Network Connections box helps us to setup the Azure Network Connection. The Azure Network Connection is used to connect to the on-premises customer network.
The Cloud PC Images box shows us which images we can assign to our endpoints.
The Provisioning Policies box gives us an overview of the existing provisioning policies and we can create new ones by clicking the Add link. Provisioning policies are used to select a network connection and a desktop image and assign them to a group or multiple groups.
The User Settings box gives an overview of the User Settings policies. We can create new ones as well. User settings determine if the user has local administrator rights on the Cloud PC and if the user can make use of self-service options.
Also make sure to checkout the Azure integration options. Go to Settings, Azure.
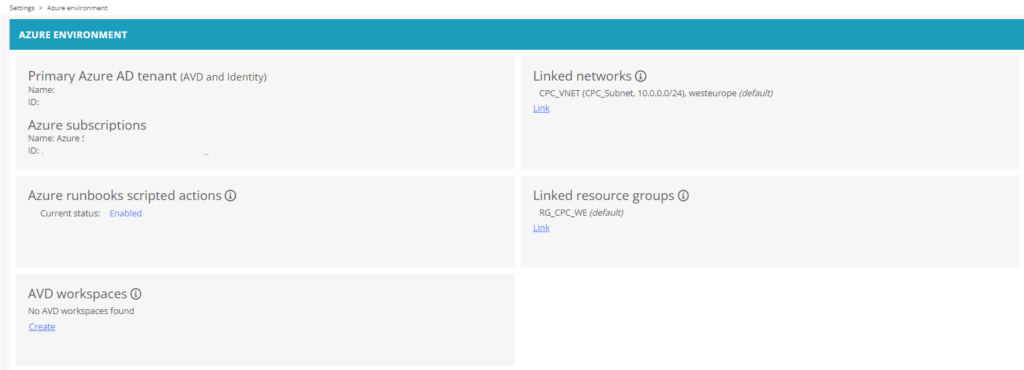
We can see information about our customer tenant and subscriptions. We can configure and link networks and resource groups, if needed.
These options help us to setup and manage the Cloud PC’s. But remember that a user still needs a Windows 365 license assigned before anything really happens. So let’s checkout the user options from the Users tab.
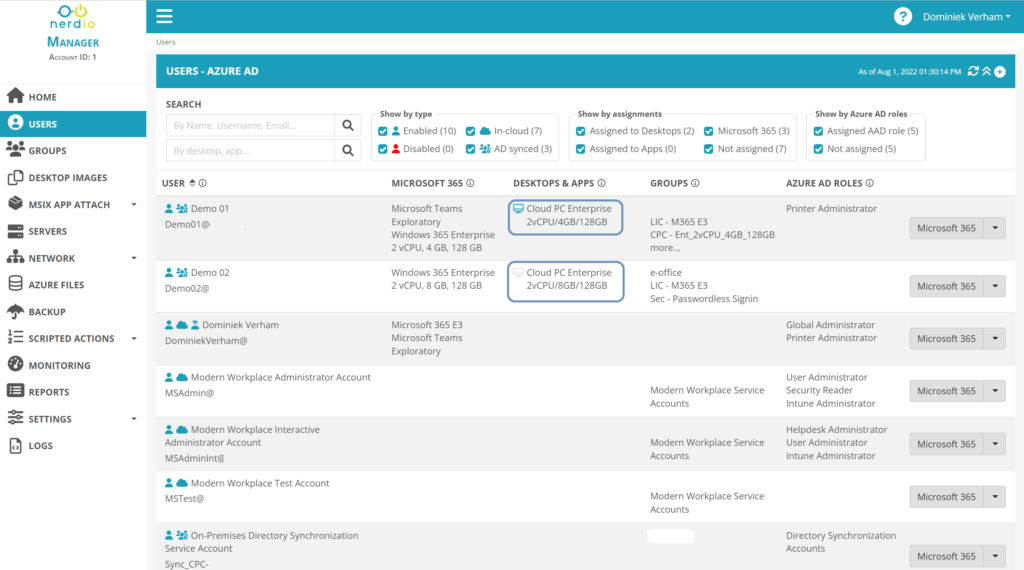
This page consist of a search and filter bar as well as an overview we can use to manage our user objects.
We can simply use the search and filter bar to search for a specific user or desktop or just set a filter for the options we want.
The overview part immediately gives us the most important information regarding the user. For instance, what licenses they have assigned, the status of the Cloud PC, what groups they are a member of and their Azure AD roles if they have any. And we can manage them directly from the button on the right.
One of the cool things here is the status of the Cloud PC. In the screenshot above we can see two colors;
- Blue: Provisioned or Provisioning
- Grey: Grace period
But there’s another status; Green: The user has a license assigned for a Cloud PC but it is not provisioned (for instance when the user does not meet a provisioning policy).

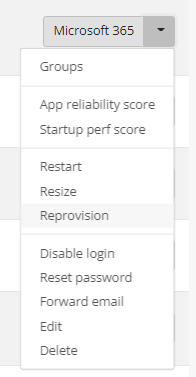
We have the following controls if we click on the dropdown box:
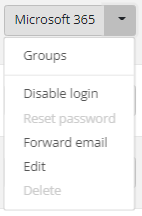
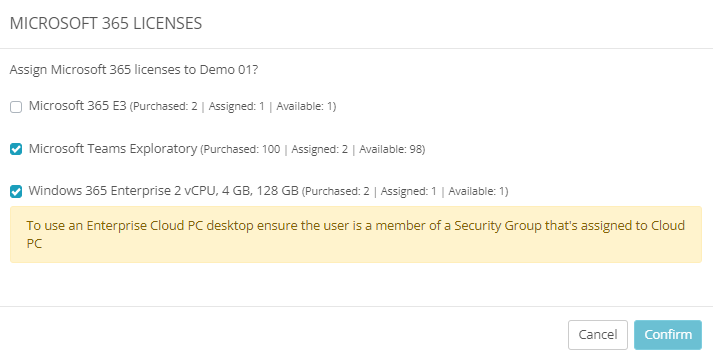
- Microsoft 365: We can assign licenses directly to a user.
- Groups: Shows the groups the user is a member of. We can also add or remove groups.
- Disable login.
- Forward Email: Add a user to forward email to. If configured, email with be delivered in the mailbox of the user and the mailbox of the user added as a forwarded contact.
Configure Windows 365
We know that our Demo user has a Windows 365 Enterprise license assigned and we can see in the overview that a Cloud PC can be provisioned.
Let’s configure Windows 365 and deploy our Cloud PC’s. Let’s head back to Settings, Windows 365.
I do not have an on-premises network that I need to connect to, so I will skip this part. We do need to configure provisioning policies and user settings, so start by clicking the Add button in the provisioning policies box.
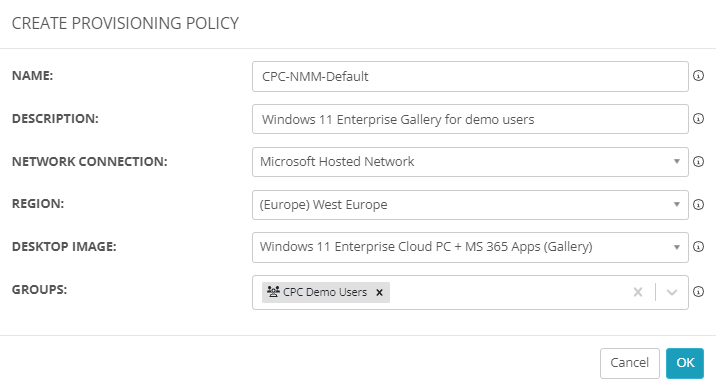
As mentioned before select our network connection and desktop image and assign it to users or groups. We can select the region where we want our Cloud PC’s to live in. Click Ok to save and click the Add button in the User Settings box.
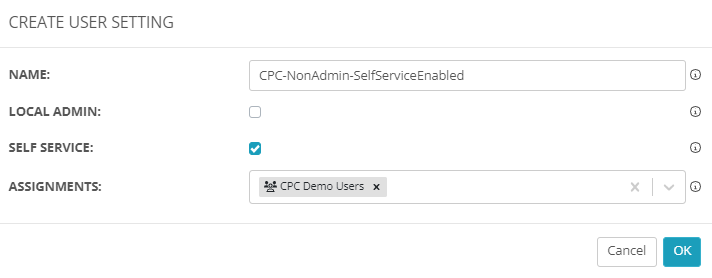
Give the User Settings profile a name. Check the box if you want to user to be a local admin (Microsoft does not recommend this) or if you want the user to be able to use self service options. Assign the User Settings to a group.
Everything is now in place to provision the Cloud PCs once you save the User Settings. If nothing happens, check the user membership of the group that you used. Everything checks out for this demo and I can see that a Cloud PC is being provisioned.

Now we have access to a Cloud PC using a gallery image.
Create And Use A Custom Image
Another possibility that we have is to create a custom image by clicking the Add from Azure VM button. This means we have the option to create a VM in Azure and customize it in every way we want. Maybe we have some applications that do not support unattended installations, we can install those manually in the virtual machine.
But this flexibility also comes with a bit of a cost, implementing and maintaining custom images requires a bit more technical knowledge and testing. For instance, you’ll need to periodically update the custom image with a newer Windows build or if a locally installed app requires an update. Also remember that gallery images are already optimized for Cloud PC’s with for example Teams optimizations. If you are going to use a custom image, you have to optimize the image yourself.
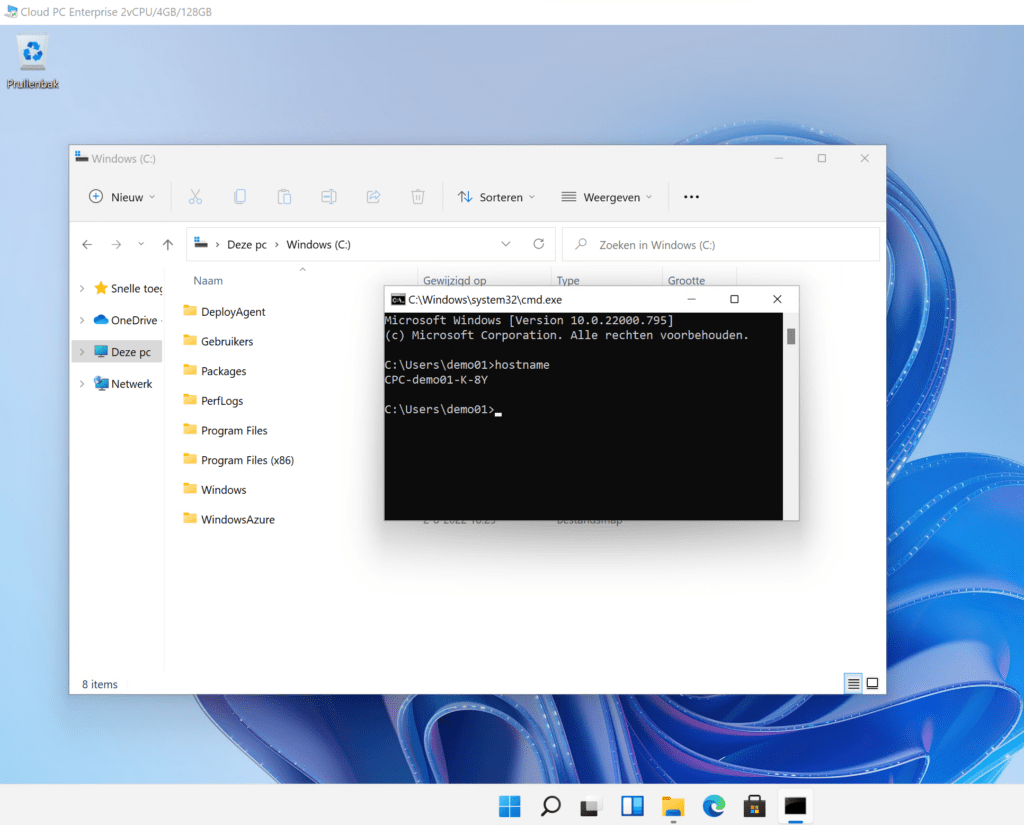
First we need to prepare a virtual machine. You can create one in Azure from the Marketplace. I created a folder on the C: drive and copied a wallpaper into it and set it as a background. If we capture this VM and use it as a custom image, we should see the folder and wallpaper on the C: drive. Since we will login as a different user, we won’t be seeing the image as the wallpaper.
We need to shut the VM down before start the capture process. We can give the VM a reboot before we shut it down to make sure all pending operations are committed to the image.
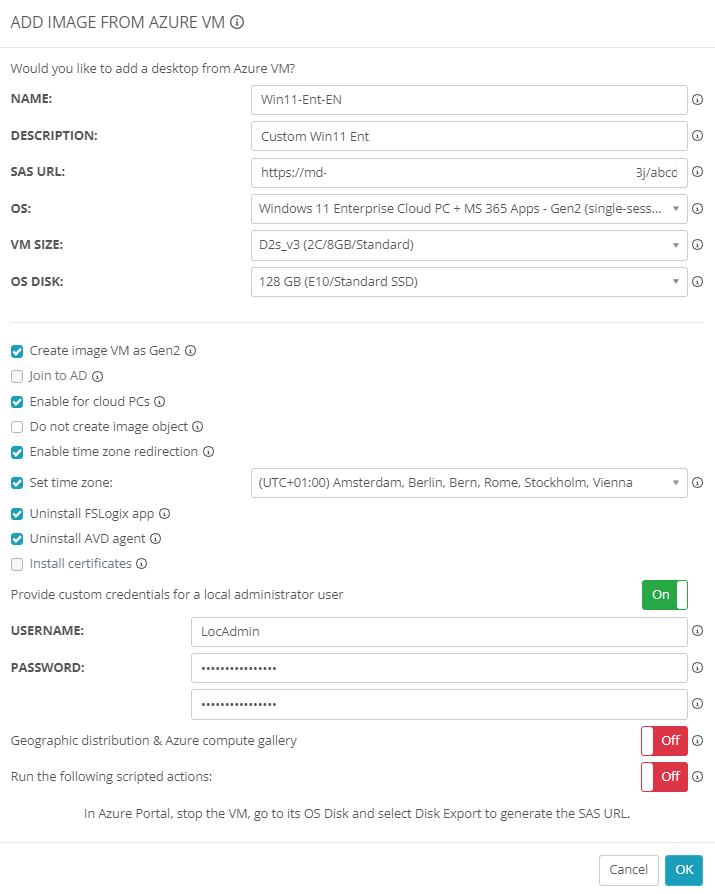
In NMM, go to Desktop Images and click the Add from Azure VM button. Most options are pretty self explanatory but there’s one option I would like to highlight. The SAS URL gives us access to the managed OS disk of the virtual machine. To create the SAS URL, we need to make sure the virtual machine is shutdown, go to the VM, Disks, Click on the OS Disk, Settings, Disk Export. Click the Generate URL button. Also make sure the link is valid for a couple of hours. Now we can copy the SAS URL into NMM.
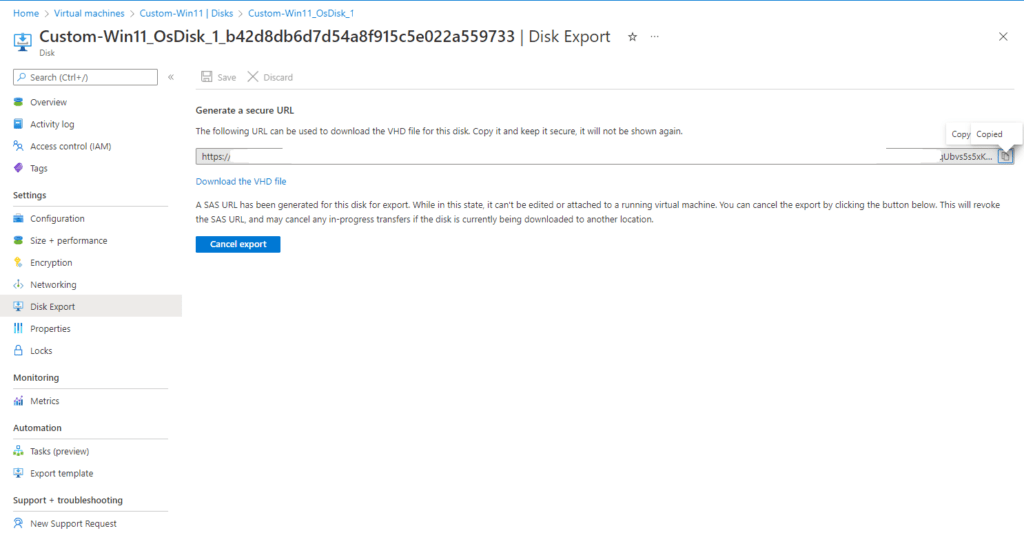
Here’s what it looks like from the Nerdio Manager side.
Tip; if you want to add some cool things, like enabling RDP Shortpath for Public networks, you can add the script from the Nerdio repository as a scripted action.
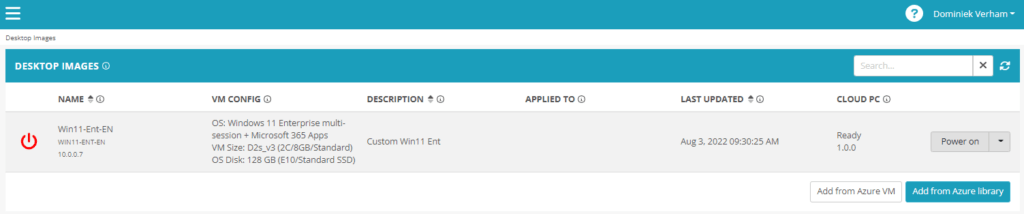
Click OK to start the capture process. This might take a while to complete. Once the process completes we can see the image from Desktop Images in the menu and the Cloud PC images box from the Windows 365 menu.
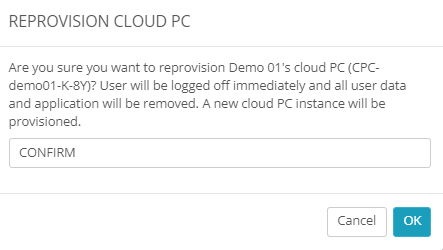
I will edit the existing provisioning policy and select the custom image we just captured. This means that newly provisioned Cloud PCs, that match this policy, will use the custom image. Go to Users in the menu, click on the dropdown box and select Reprovision. Type in CONFIRM and hit the OK button. You can track the progress of the task in the bottom of the screen.
And once the process completes we can login and see if our Cloud PC uses the custom image.

Once logged in I can see the folder and the image, as expected the image isn’t configured as a wallpaper.
That concludes the demo if you want to you Nerdio Manager for multiple customers. But… what options do we have for Enterprises?
Nerdio Manager for Enterprise
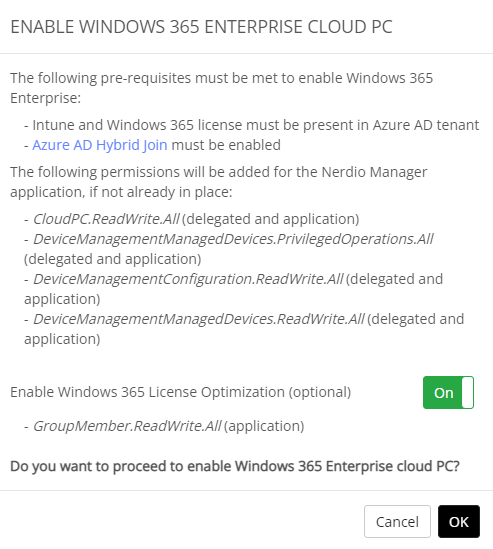
Windows 365 has a fixed per user/per month pricing model. But that doesn’t mean that we can’t optimize the way the company uses the licenses. Nerdio came up with a couple of great features to optimize the usage of Cloud PC licenses that help save money without impacting the user experience! These features are available in the Nerdio Manager for Enterprise (or NME from now on) solution. And we can see the first hint of the license optimization options when you install NME.
License Auto-Assignment
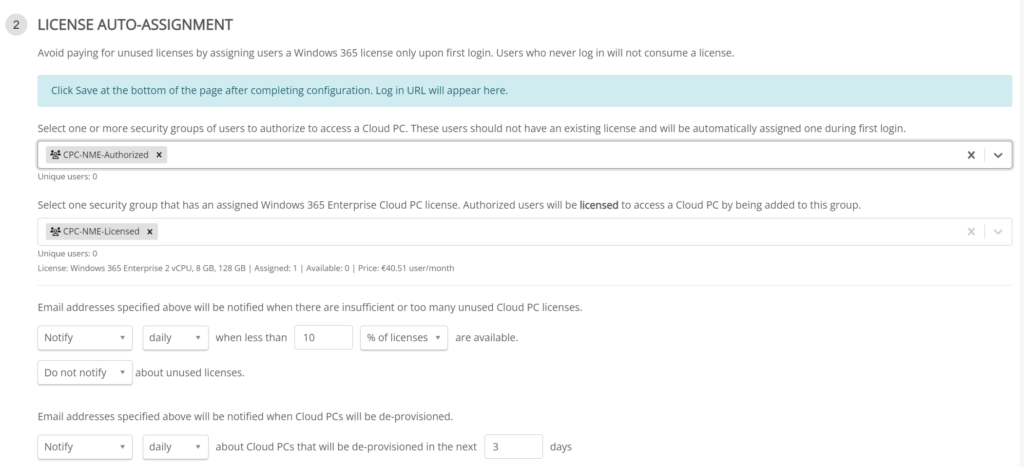
The first optimization Nerdio came up with is License Auto-Assignment. So the idea here is that we can automatically assign licenses for users. This process involves two security groups;
- Authorized users; this group will contain users that do not have a Cloud PC license assigned.
- Licensed users; users that are a member of this group will obtain a Cloud PC license once they login.
I’d recommend you check a couple of settings before you configure the license auto-assignment;
- Settings, Nerdio environment: Make sure you have email notitications setup and you linked a mailbox.
- Security Groups: Make sure you created a security group for the authorized users and a security group for licensed users. Also make sure you enabled group-based licensing for this group.
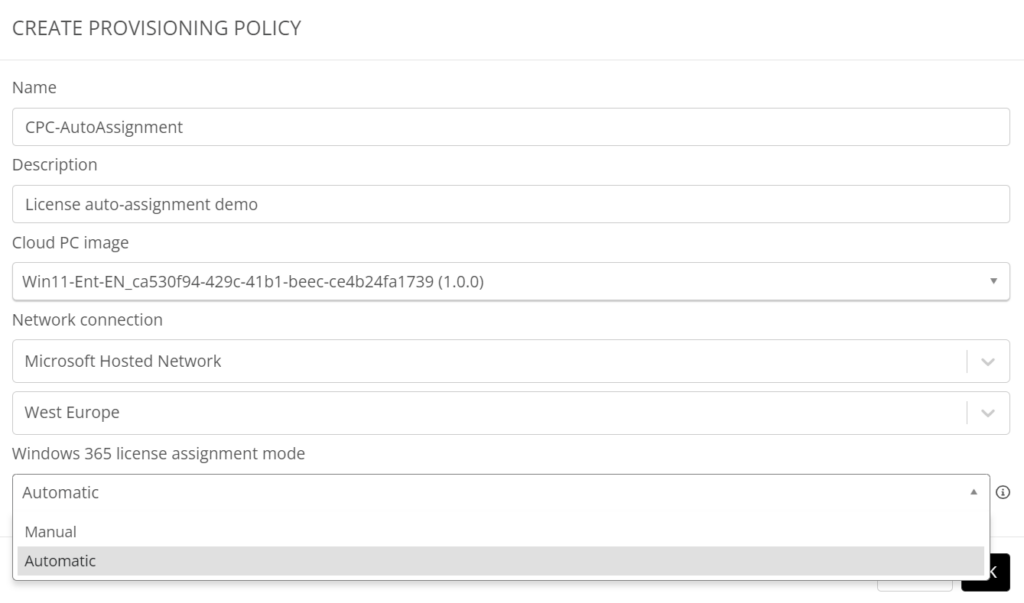
We can configure license auto-assignment from a provisioning policy. So go to Windows 365, Provisioning Policies. Add a new policy. Make sure to select Automatic in the Windows 365 license assignment mode.
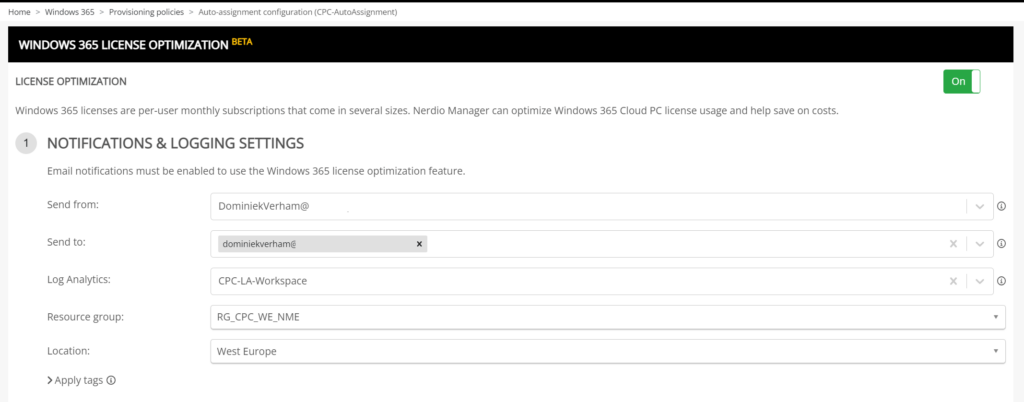
Click OK to continue to the Windows 365 license optimization options. Make sure the License Optimization switch is set to On (Top right corner).
Select the mailbox you configured before and enter a mail address you want to send the notification to. Just enter the address and make sure to click on the ‘add mail address to the list‘ notification.
Select an existing log analytics workspace or just create a new one by typing in the name and choose your resource group and location. Apply some tags if you need to.
We can configure the license auto-assignment in the second part of this screen.
Select your groups and configure the notifications. By default NME does not notify when a percentage of licenses isn’t used, but this information could help you to decide if you want to remove some Cloud PC licenses if they haven’t been used for a long time.
You can configure notifications to happen only once, daily, weekly or hourly and report on the percentage of the licenses or the actual license numbers.
Unused License Reclamation
This feature tracks how long it’s been since the user actually used the Cloud PC. If the user didn’t use the Cloud PC for a specified period of time, then Nerdio Manager will reclaim the license so it’s available for other users.
We can enable the unused license reclamation feature in the provisioning policy by setting the switch to On.
By default NME notifies us when a user hasn’t used their Cloud PC for 45 days. The Cloud PC will have a grace period of 7 days once the license is removed.
What happens when the user does login during the grace period? Well, the license is reassigned and the clock is reset.

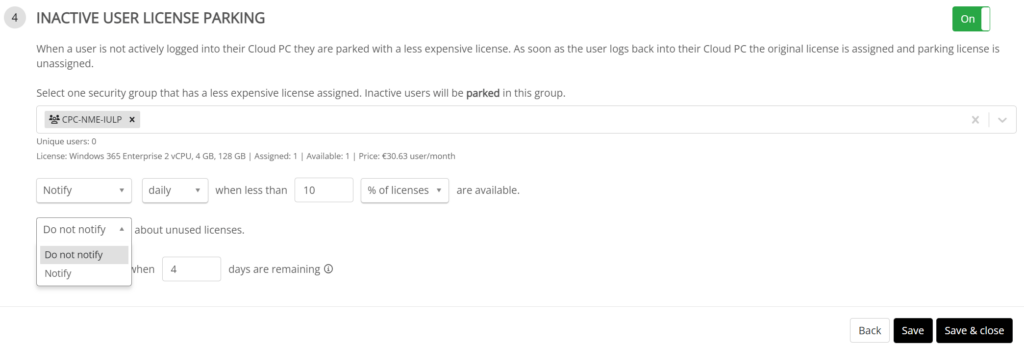
Inactive User License Parking
Microsoft has different sizes of the Cloud PC available and the price goes up for a higher spec model. So there’s potential for cost saving here. That’s where inactive user license parking comes in.
Let’s say our users use a 4vCPU/16GB/256GB Cloud PC. Nerdio uses log analytics to determine how many users actually use this license at the same time. Maybe there’s a situation where only 80% of the users use this license at the same time. That gives us the possibility to lower the 4vCPU/16GB/256GB Cloud PC licenses and replace them with a cheaper version, for instance the 2vCPU/4GB/64GB Cloud PC. This reduces the license cost for your organization.
How does this process work? When a user is not actively logged into their Cloud PC, the expensive license is replaced by a less expensive license. When the user logs in again, the less expensive license is replaced by the more expensive license. This process is really fast and the user doesn’t notice any delay since Nerdio does not actually resize the Cloud PC It just temporarily changes the license.
We can configure inactive user license parking as the fourth step in the provisioning policy. Make sure to create a new security group and enable group-based licensing by adding a license for the low-end Cloud PC model.
Select this group and configure your notifications. You can configure notifications to be send only once, daily, weekly and hourly and you can report on the percentage of licenses or on actual licenses.
Resources
I used the following resources;