What’s up, everyone!
Recently I wrote a post on how to reboot Cloud PCs using the new Microsoft Graph APIs for Windows 365 (link). It would be even better if there’s a way to automatically run this task and I decided I did not want to rely on having servers running somewhere. So in this post I will focus on creating a script that detects Enterprise Cloud PCs and executes a reboot for each Cloud PC. I will create a new Automation Account and show how to grant a system assigned managed identity the rights to sign into Microsoft Graph so the runbook can execute the PowerShell script correctly. Since we want to run this script automatically, I will finish up with creating a schedule.
I hope you enjoy the post!
The how?
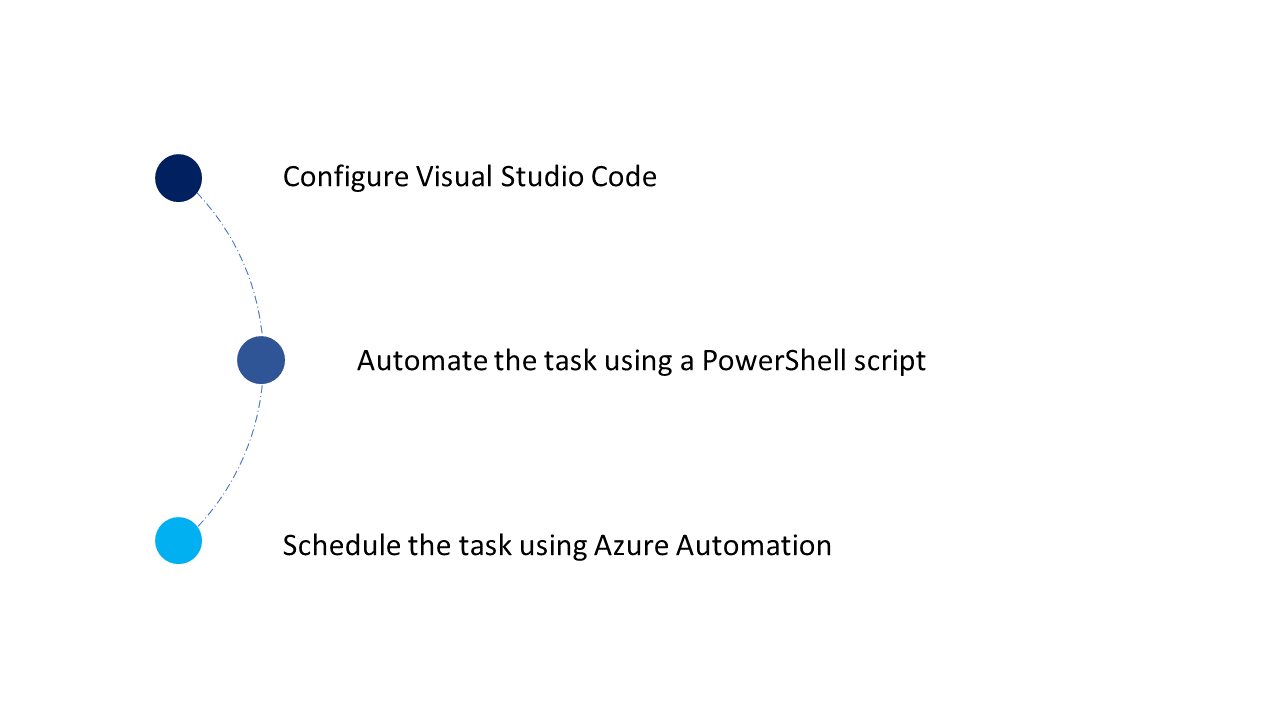
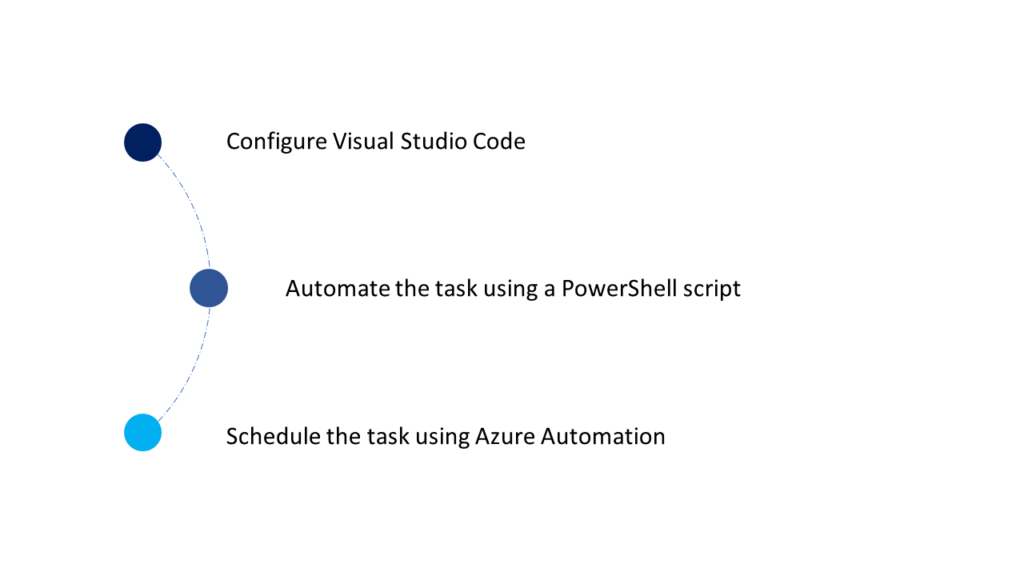
We will achieve awesomeness in three simple steps:
- Configure your favorite editor. In my case I’ll go with Visual Studio Code.
- Think about the task you need to automate. In my previous example I showed how to reboot a Cloud PC. Let’s continue with that and find a way to reboot all Cloud PCs.
- Let’s use Azure automation to schedule our PowerShell script.
Step 1: Configure Visual Studio Code
This is probably the easiest step, right? Just download the installer from the Microsoft site (link) and install the application. I won’t go into too much details as I expect that everyone already knows about VS Code. If you do want to learn more, just let me know in the comments.
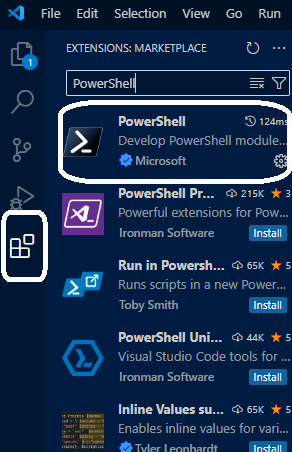
Follow the nice Welcome wizard and make sure to install the PowerShell extension from Microsoft:
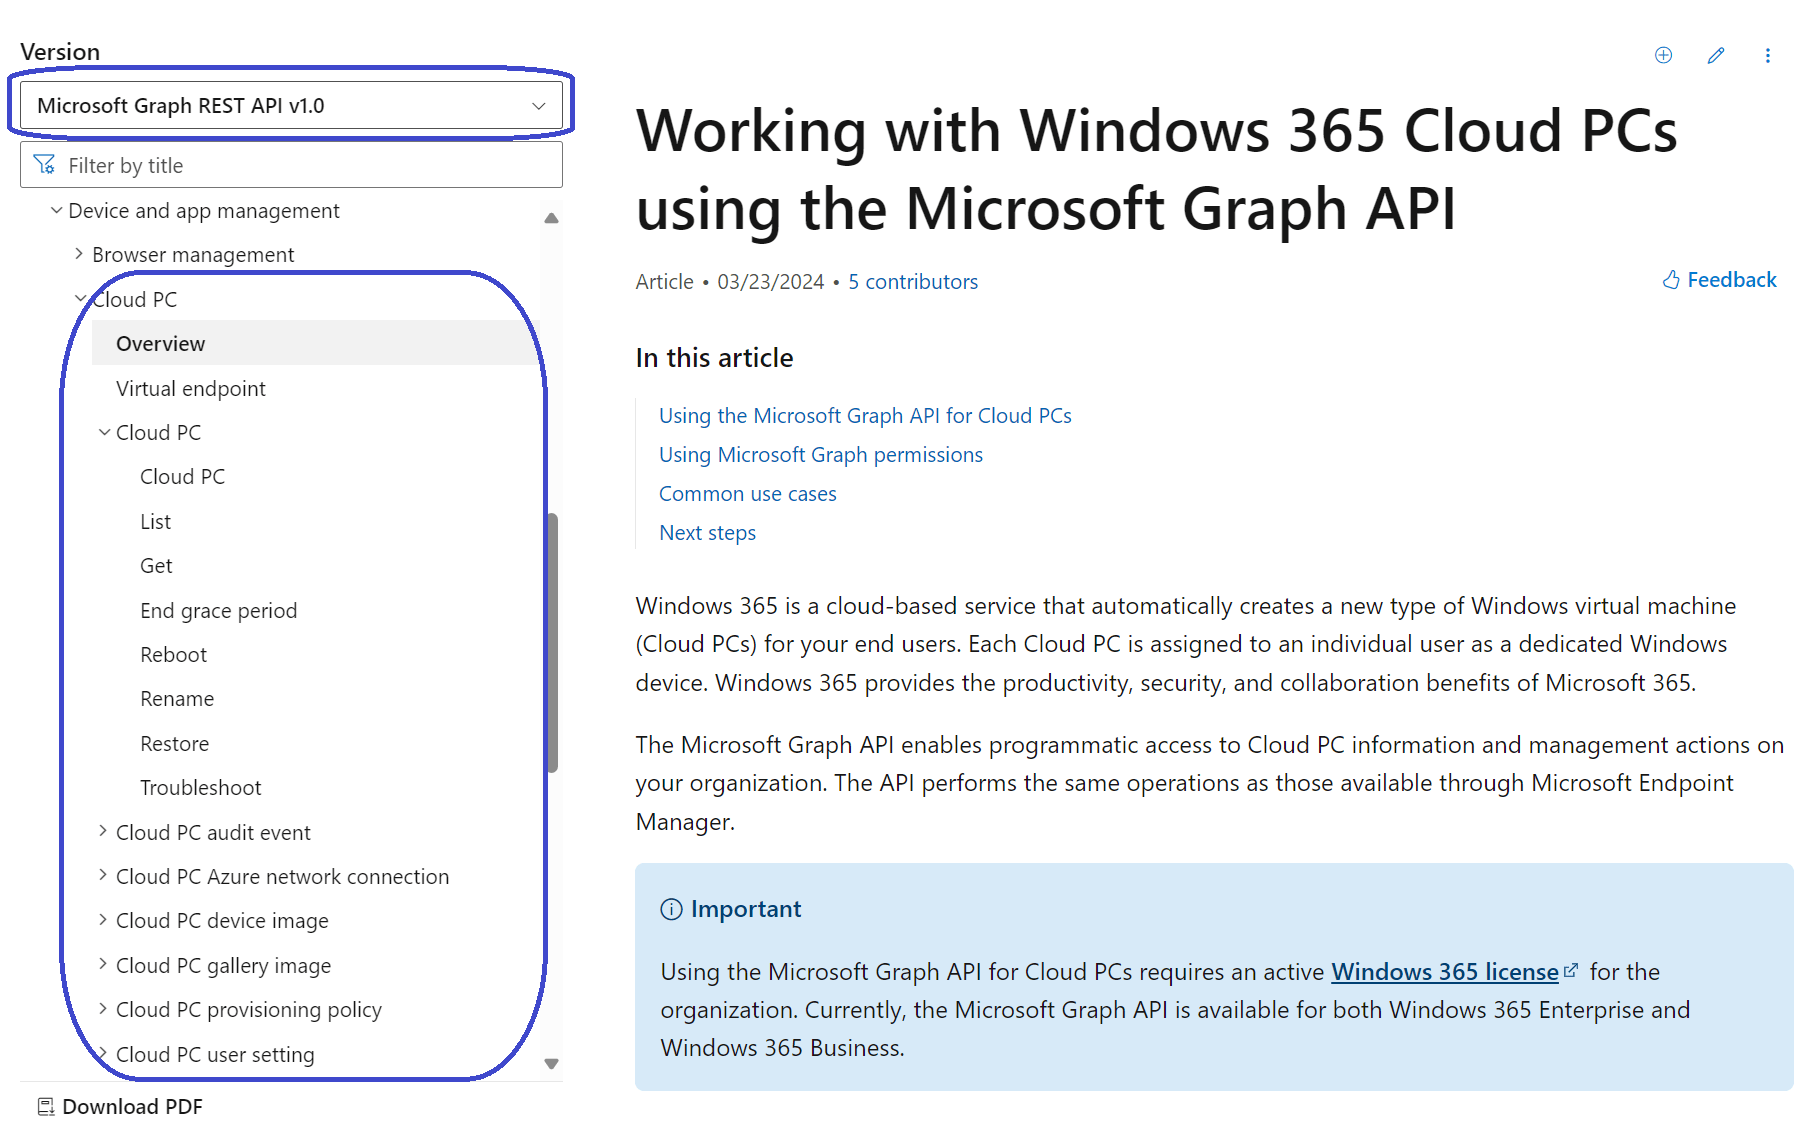
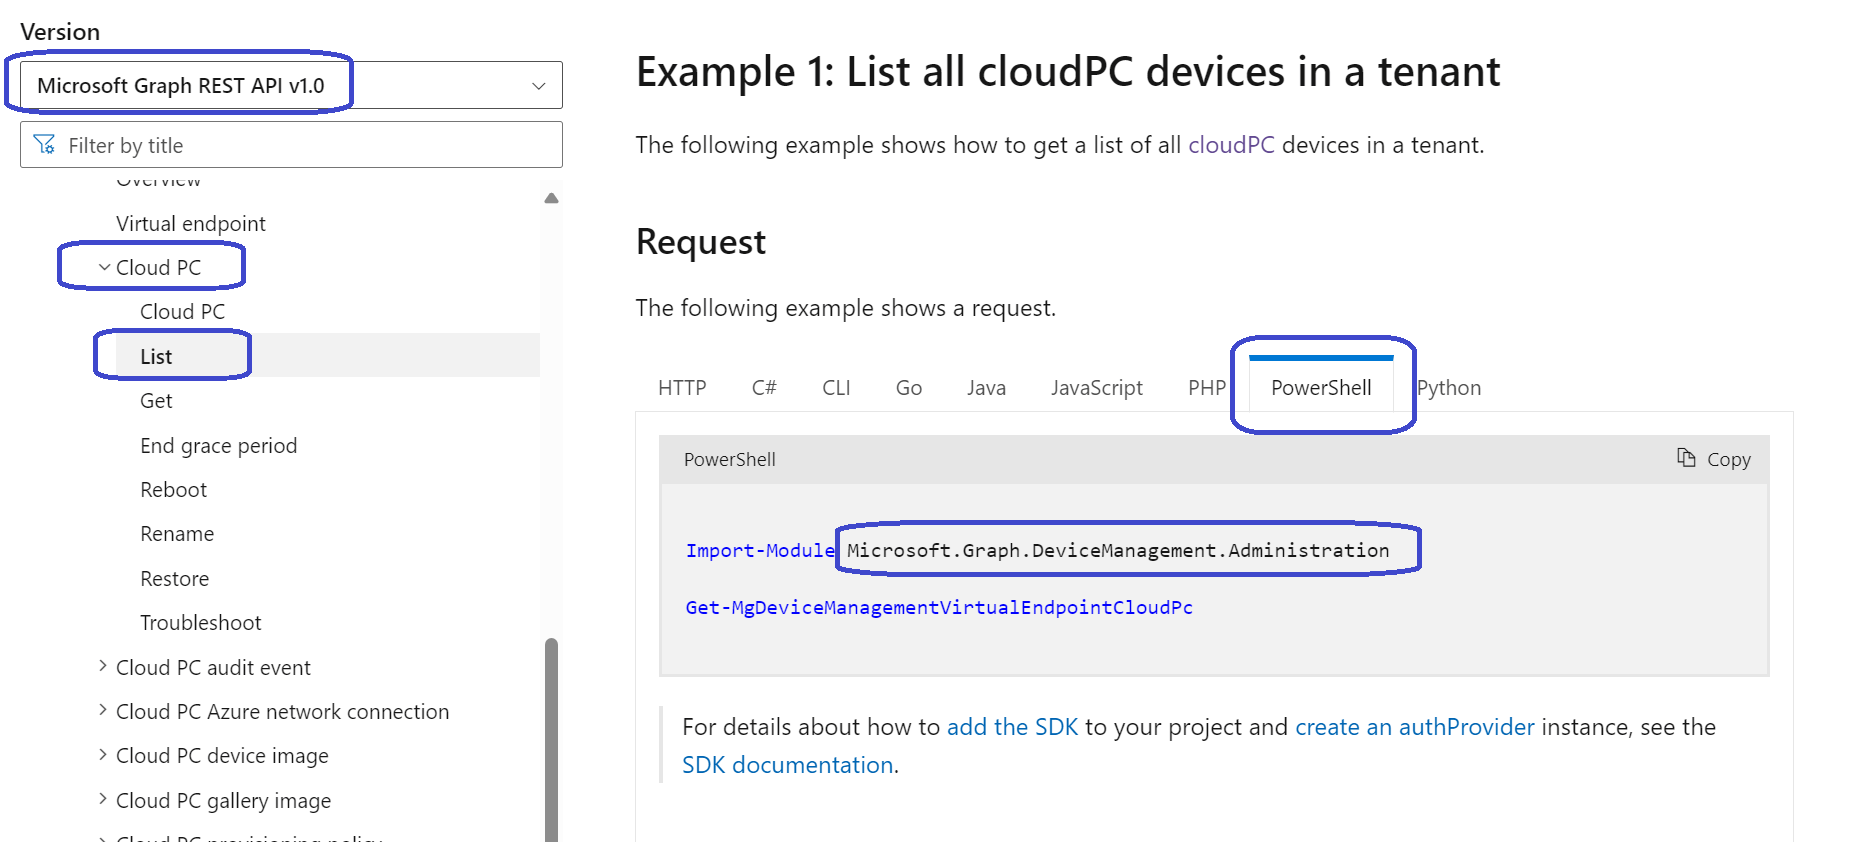
Now all we need to do is to find out which PowerShell modules we have to use. We already know that we will use Microsoft Graph and that we can use the new Windows 365 APIs. The following screenshot shows the official documentation (link):
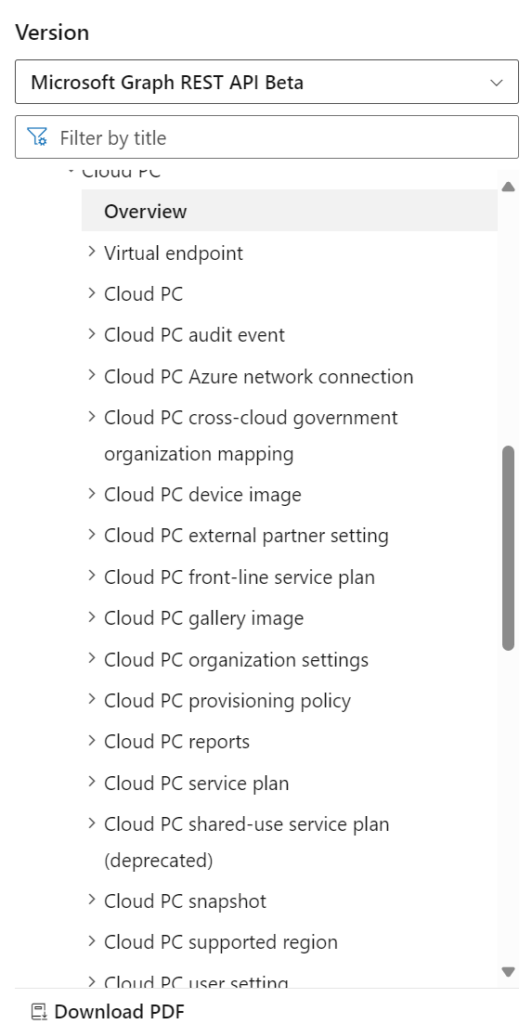
I just want to highlight that I will use the v1.0 version. If you want to, you can also try out the beta version which has some more features to fiddle around with:
Alright, back to finding out which modules we can use. The idea is that we will reboot our Cloud PCs so we need two things;
- Get an overview of our Cloud PCs.
- Find a way to reboot them.
Getting an overview of all our Cloud PCs is easy by using the List cloudPCs method. Scroll a bit down to Request and select PowerShell.
Here is our first module: Microsoft.Graph.DeviceManagement.Administration
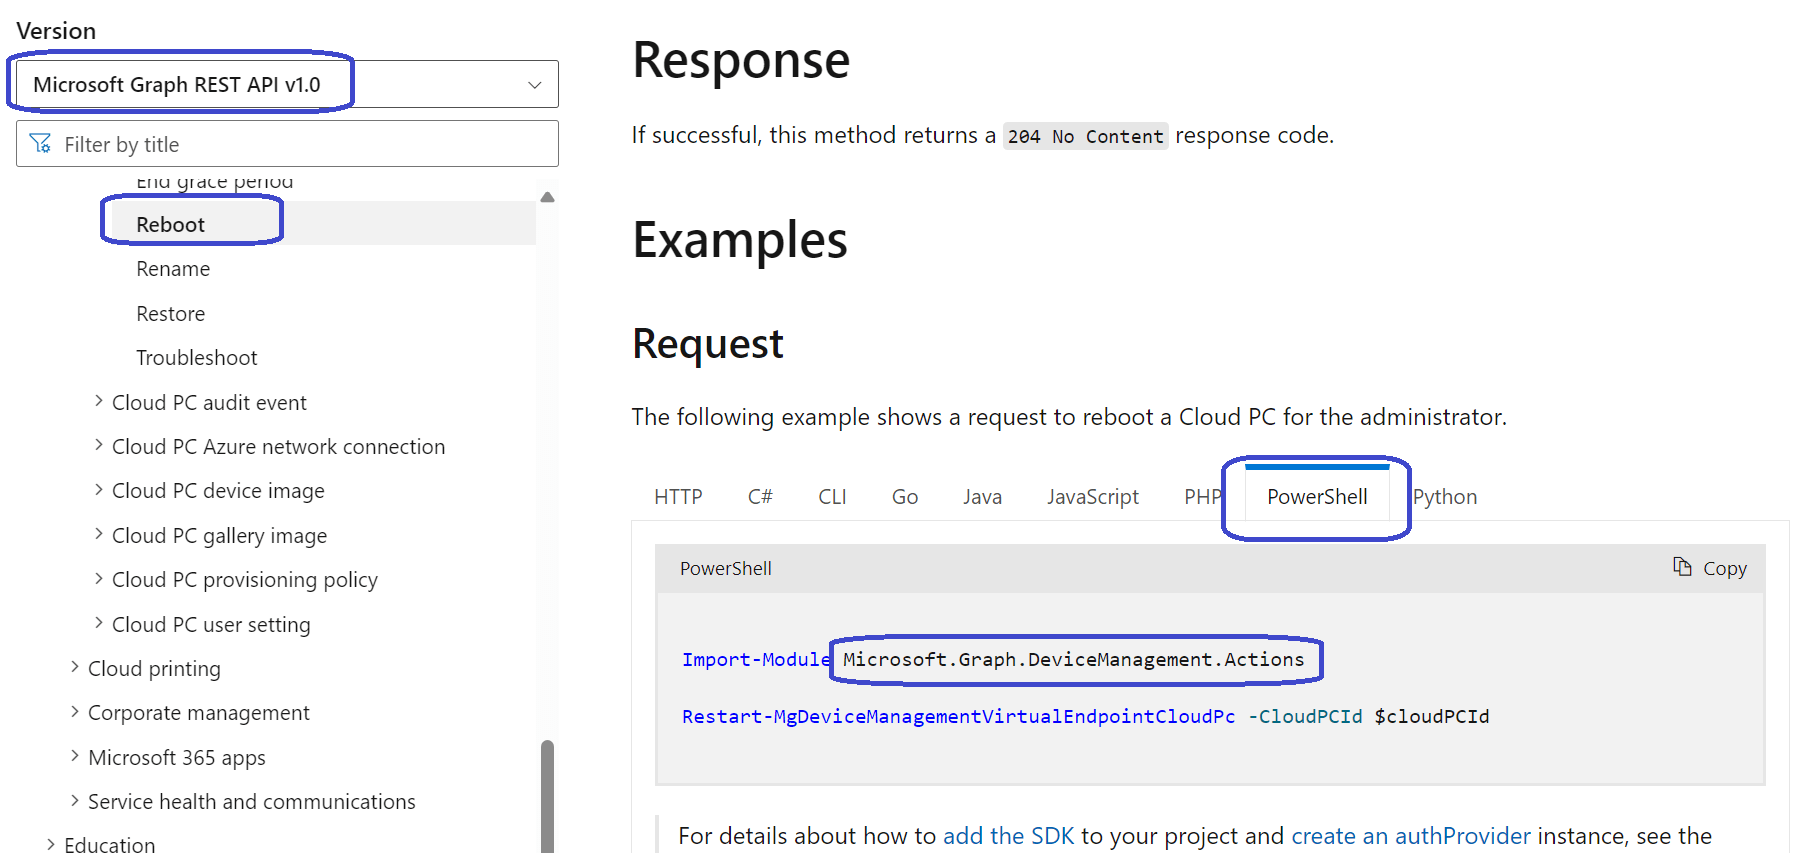
On to the second part which is rebooting the Cloud PC. We can use the Reboot method. Just scroll down a bit to Request and select PowerShell again. And there is our second module;
Microsoft.Graph.DeviceManagement.Actions
Let’s install these modules in advance. You can just go with an Install-Module command or go a bit more fancy with something like this:
$requiredModules = @('Microsoft.Graph.DeviceManagement.Administration','Microsoft.Graph.DeviceManagement.Actions')
foreach ($reqMod in $requiredModules) {
    if (!(Get-Module $reqMod -ListAvailable)){
        Install-Module $reqMod -Force
    }
}
Looks like we got everything up-and-running. Time for the next step!
Step 2: Automate the task using a PowerShell script
So what should the script look like? We need to do the following three things:
- Connect to Microsoft Graph.
- Get an overview of our Cloud PCs.
- Send a reboot command.
Remember it’s PowerShell, so feel free to add to these steps if you want to, like sending an email for example. Here’s a quick example what I came up with:
# Connect to Microsoft Graph
Connect-Graph
# Get an overview of Enterprise Cloud PCs
$CpcOverview = Get-MgDeviceManagementVirtualEndpointCloudPC | where {$_.ServicePlanName -match 'Enterprise'}
# Reboot Cloud PCs
foreach ($Cpc in $CpcOverview) {
    Restart-MgDeviceManagementVirtualEndpointCloudPc -CloudPcId $Cpc.Id
    Write-host 'The following Cloud PC is rebooting:' $Cpc.DisplayName
}
While this works perfectly when you run it for yourself, it’s not really suited for running from an automated solution. I will get back to this in the next step. For now I just want to know that this works:
Looks good! It finds my Cloud PCs and it reboots them.
Step 3: Schedule the task in Azure automation
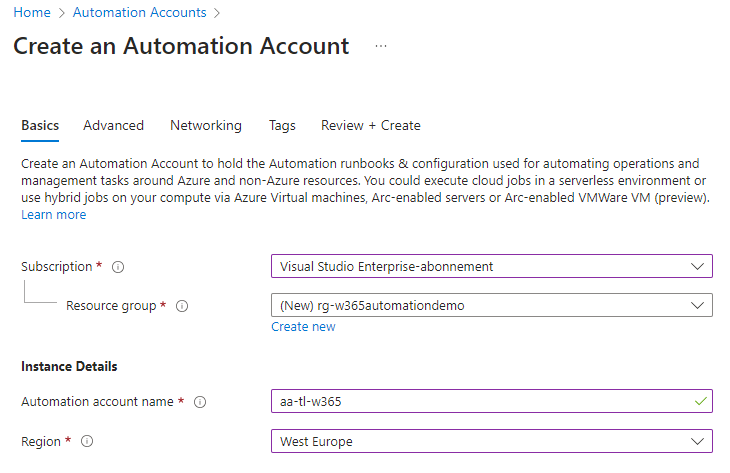
We will start by creating an automation account. From the Azure portal, search for Automation Accounts, + Create.
I left the other tabs (Advanced, Networking, Tags) to their defaults for this demo. Make sure the validation passes and create the automation account.
We need to take care of a couple of steps now that the automation account is created:
- Verify the system assigned managed identity.
- Grant the necessary Graph rights to the system assigned managed identity.
- Import the PowerShell modules in the runbook.
- Create a runbook.
- Create a schedule.
1. Verify the system assigned managed identity
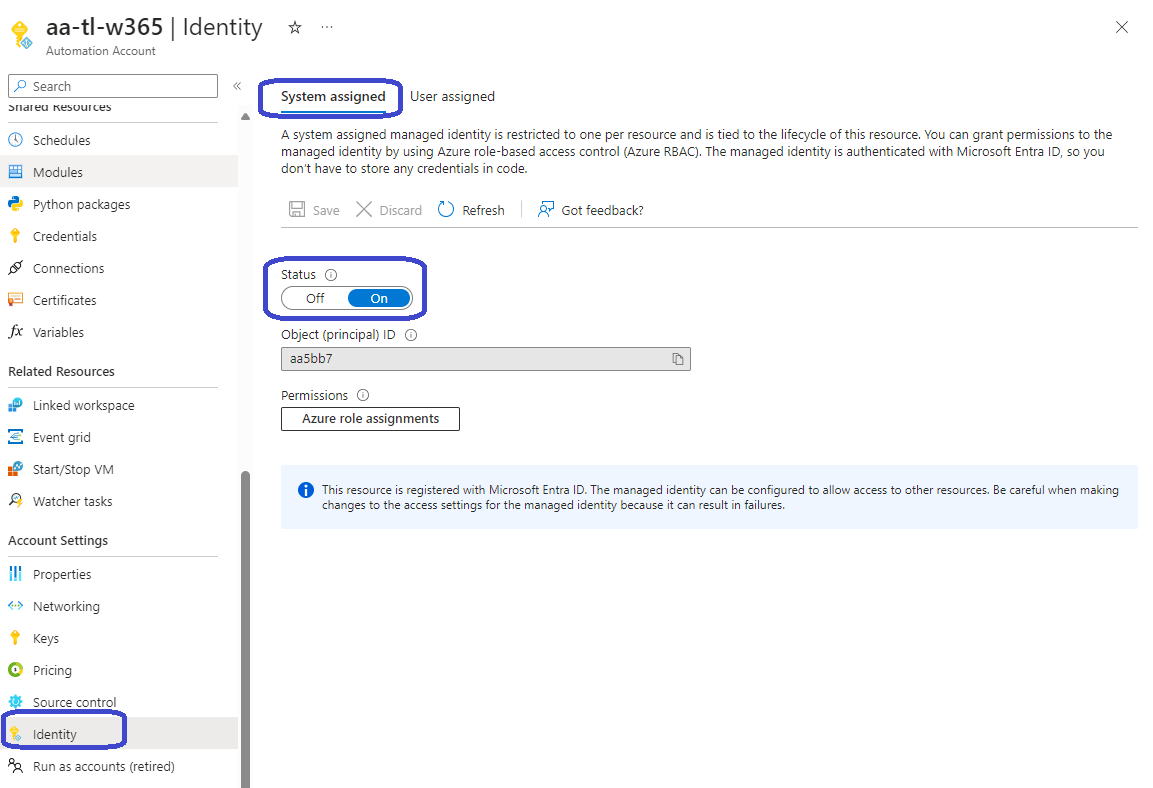
From the Automation Accounts, select the account you prepared, Identity, system assigned. The status should be set to On. Take note of the object (principal) ID. You’ll need it later 😉
2. Grant the necessary Graph rights to the system assigned managed identity
Earlier in this post we already prepared a PowerShell script that connects to Microsoft Graph and runs the necessary commands to get an overview of the Cloud PCs and reboots them. While this is great for testing purposes, you should know that this will not run from a runbook. The difference is that the account used while testing via Visual Studio Code is the account that you entered. When the script is running from the runbook, it will have to use the managed identity so now we need to assign the proper rights. I used (and tweaked) a bit of code that Dustin Schutzeichel (twitter) prepared in this awesome post (link).
All I have to do now is open a Cloud Shell and run the following code. Make sure to changed the value for $managedIdentityID.
$managedIdentityId = "your-object-principal-id"

Connect-MgGraph -Scopes CloudPC.ReadWrite.All

# Grant CloudPC.ReadWrite.All permissions
$graphResource = Get-MgServicePrincipal `
   -Filter "AppId eq '00000003-0000-0000-c000-000000000000'"
$userReadRole = $graphResource.AppRoles `
   | Where-Object {$_.Value -eq "CloudPC.ReadWrite.All"}
New-MgServicePrincipalAppRoleAssignment `
   -ServicePrincipalId $managedIdentityId `
   -PrincipalId $managedIdentityId `
   -ResourceId $graphResource.Id `
   -AppRoleId $userReadRole.Id

Disconnect-MgGraph
You should end up with something like this:
3. Import the PowerShell modules in the runbook
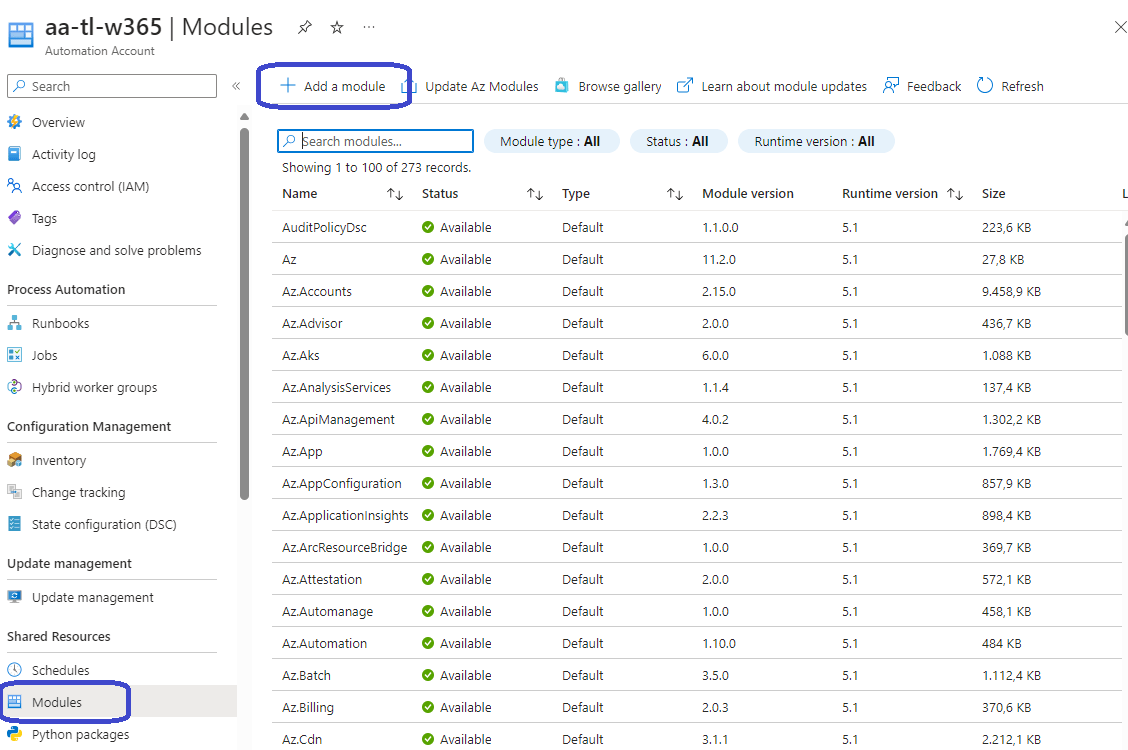
From the Automation Account, Modules. Add the required PowerShell modules from the PowerShell gallery:
- Microsoft.Graph.DeviceManagement.Administration
- Microsoft.Graph.DeviceManagement.Actions
- Microsoft.Graph.Authentication
Add the required PowerShell modules from gallery. Search for the following modules:
- Microsoft.Graph.DeviceManagement.Administration
- Microsoft.Graph.DeviceManagement.Actions
- Microsoft.Graph.Authentication
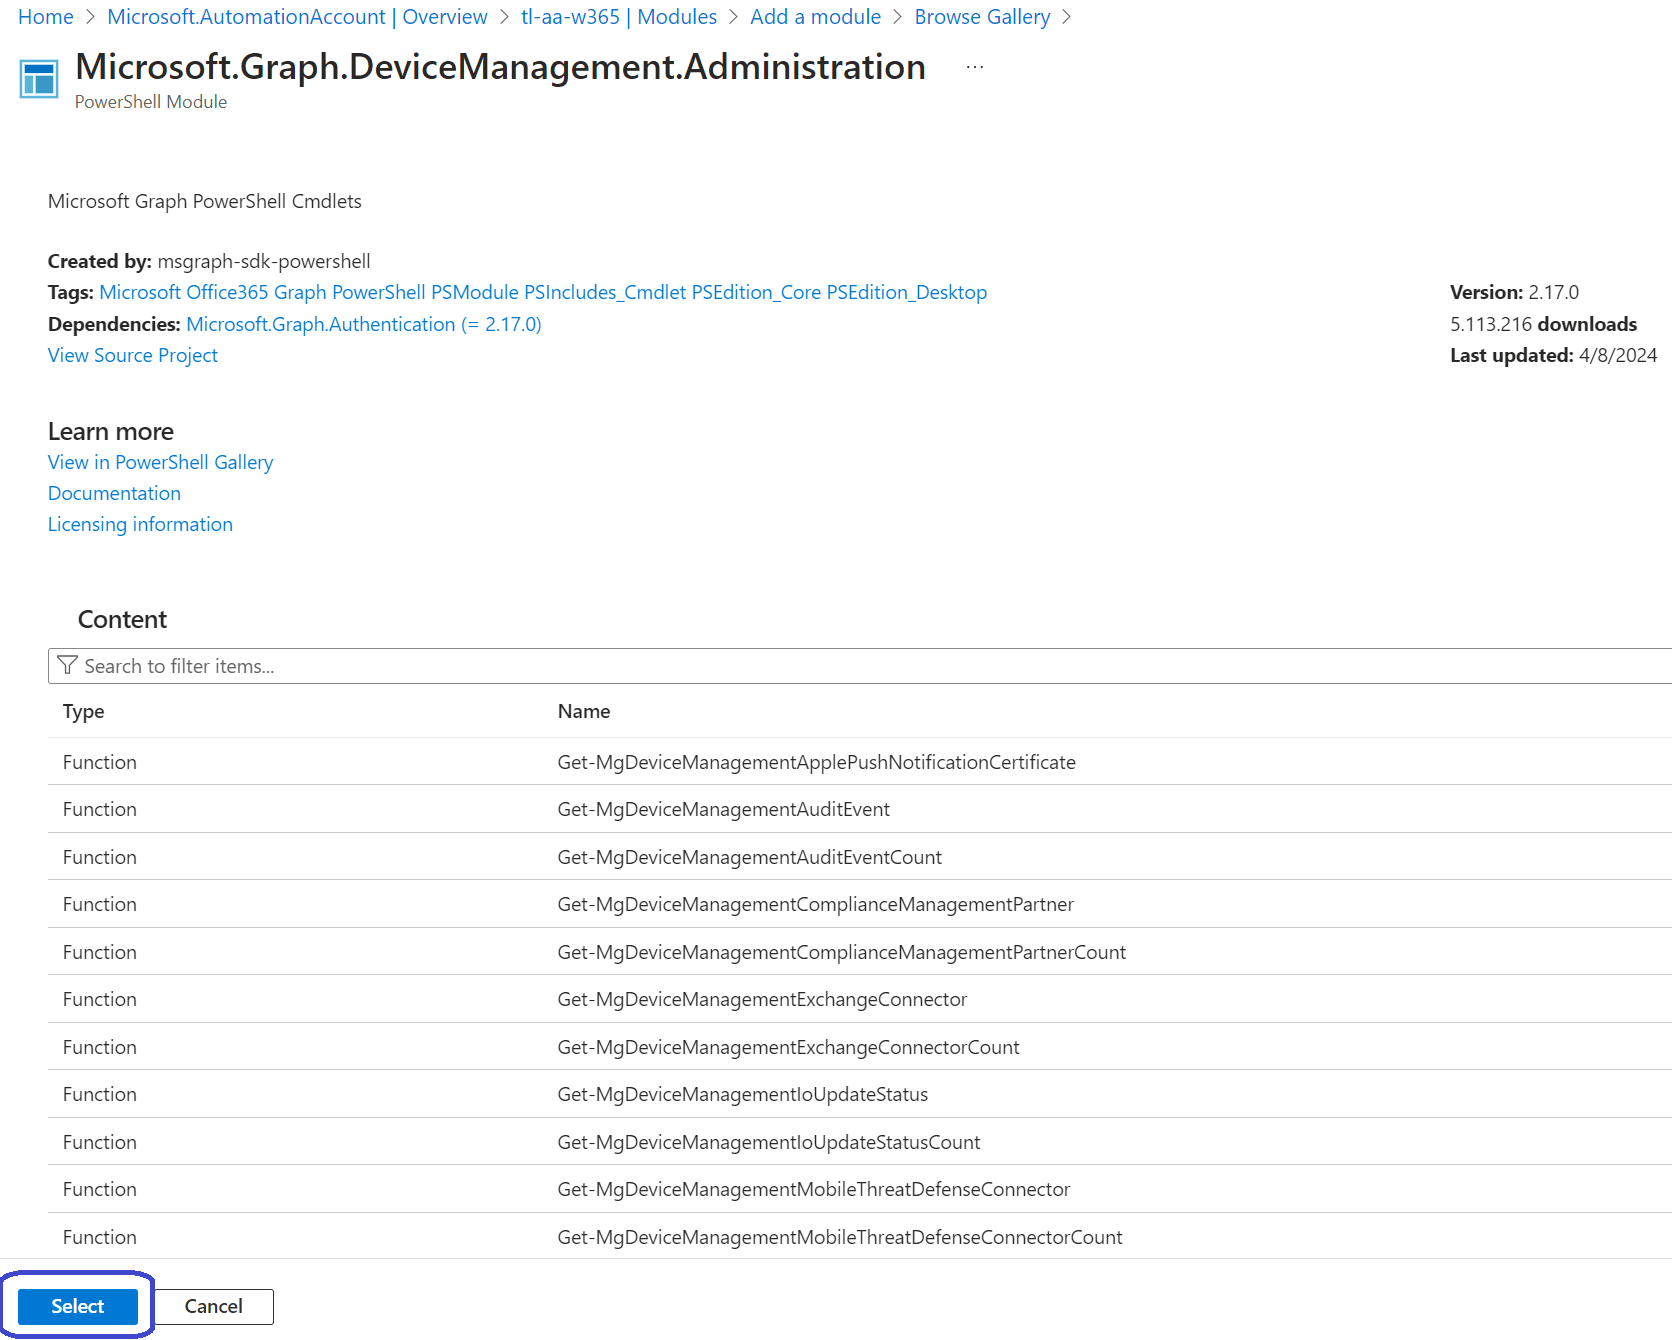
Click on the PowerShell module. A new screen will appear with more information about the module. If you’re happy and convinced that it is the right one, finish up by clicking the Select button on the bottom.
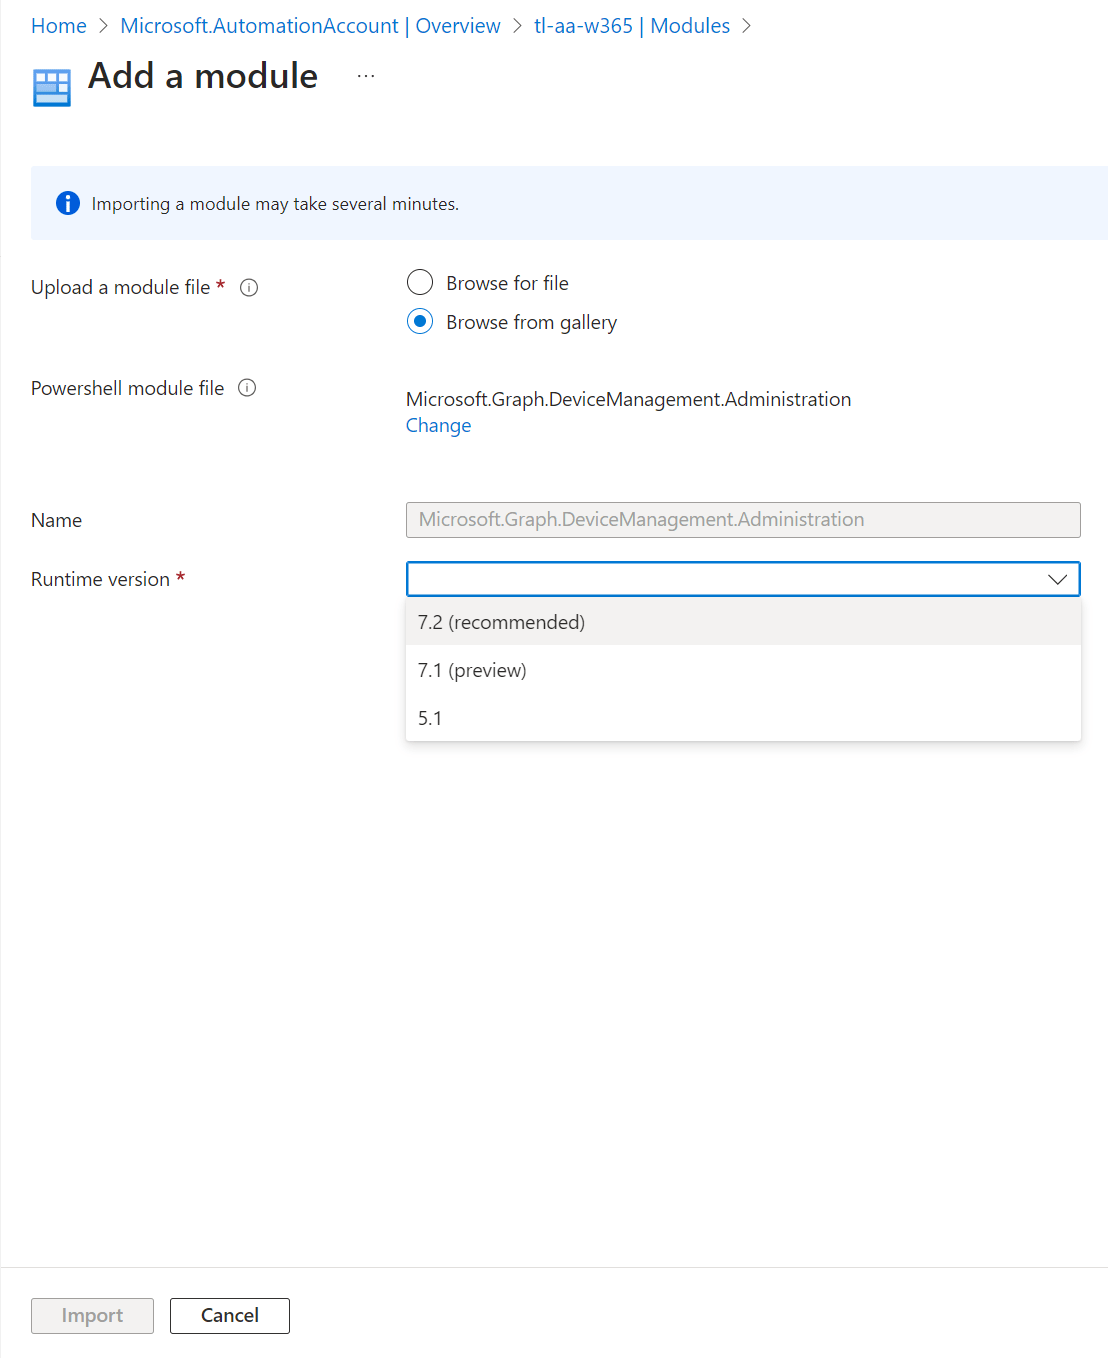
All that’s left to do is to select your Runtime version and click the Import button on the bottom of the page.
Repeat these steps for the remaining PowerShell modules. It does take some time before the module are imported. Just use the search bar to see if the import has started or to get the status:
If you find that you are having issues when running the runbook later on, make sure that these modules have the available status.
4. Create a runbook
The next task is to create a runbook. We can use this runbook to run the PowerShell script that actually reboots our Cloud PCs.
From the Automation Account, Runbooks. Select + Create a runbook.
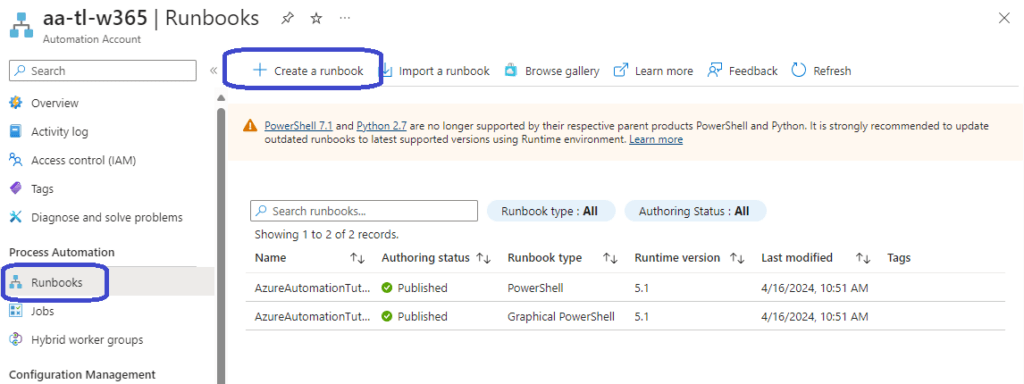
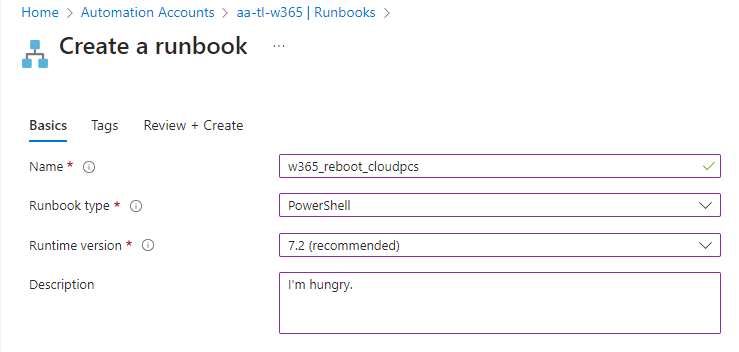
All you need to do is to provide:
- A name: I just went with w365_reboot_cloudpcs.
- A runbook type: select PowerShell.
- A description: nothing is complete without a detailed description on how your day is going.
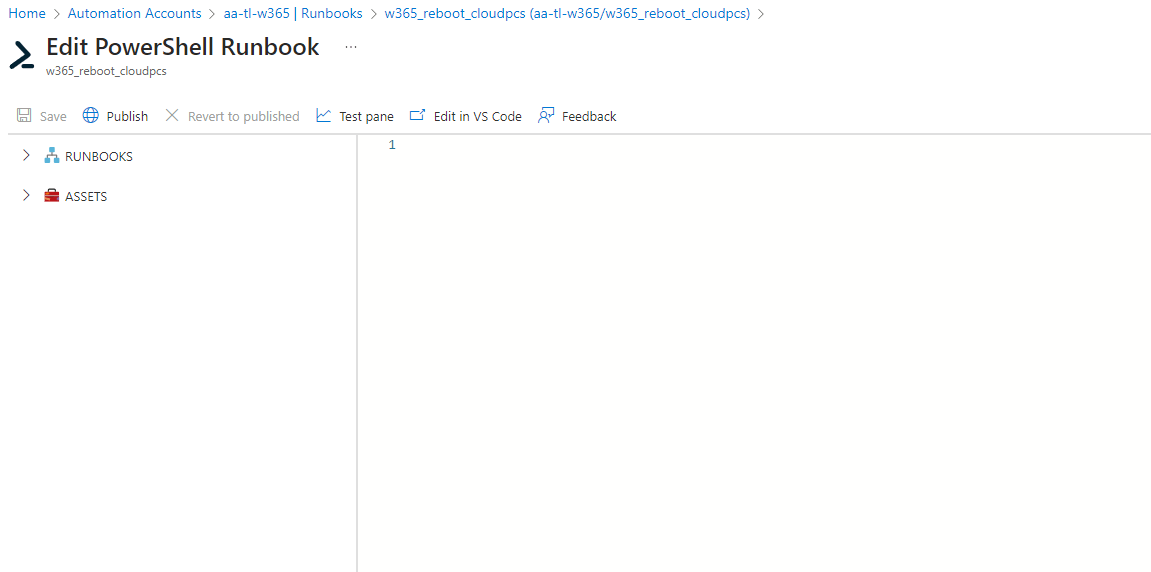
Finish up with adding tags if you want and create the runbook. This will bring you to the following screen:
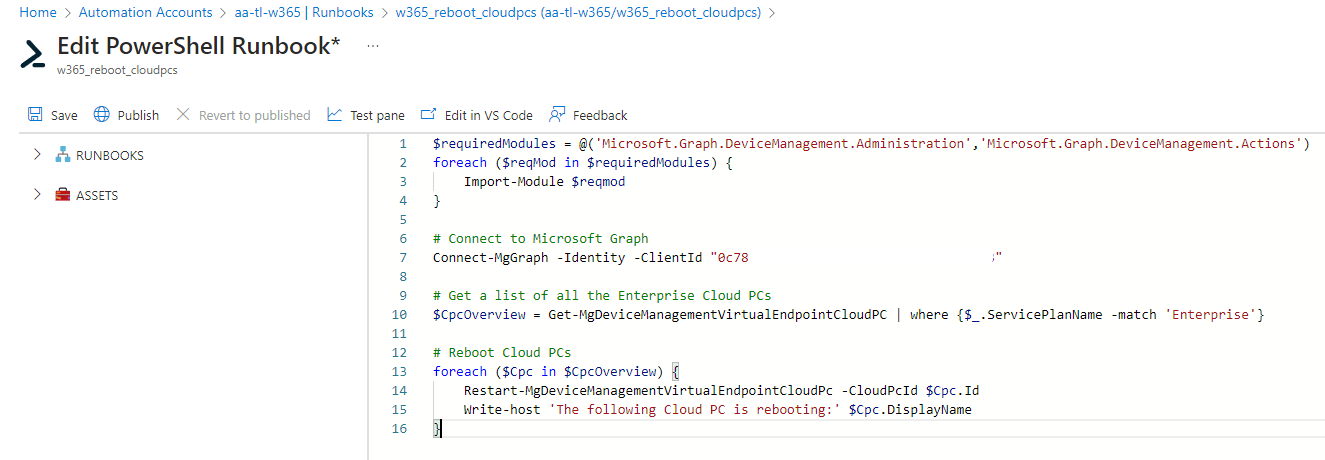
This is where we put in our PowerShell script. Here are the key things I changed to get this to work from a runbook:
- Use Connect-MgGraph -Identity (object ID) to connect to Microsoft Graph. The object ID is the ID from the system assigned managed identity.
- Make sure that the scripts loads the modules that are already imported in the Automation Account.
And before you go all PowerShell-ninja on me, yes I forgot to remove the write-host command :).
Click the Save button in the ribbon and Publish the runbook.
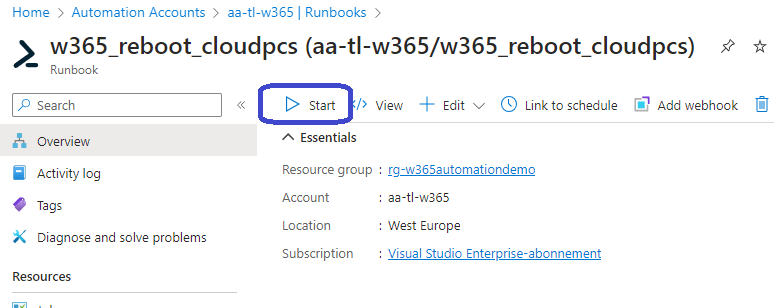
Let’s do a test run before to make sure that everything is working like it should. Click the Start button on the overview tab and give the runbook some time to do its thing.
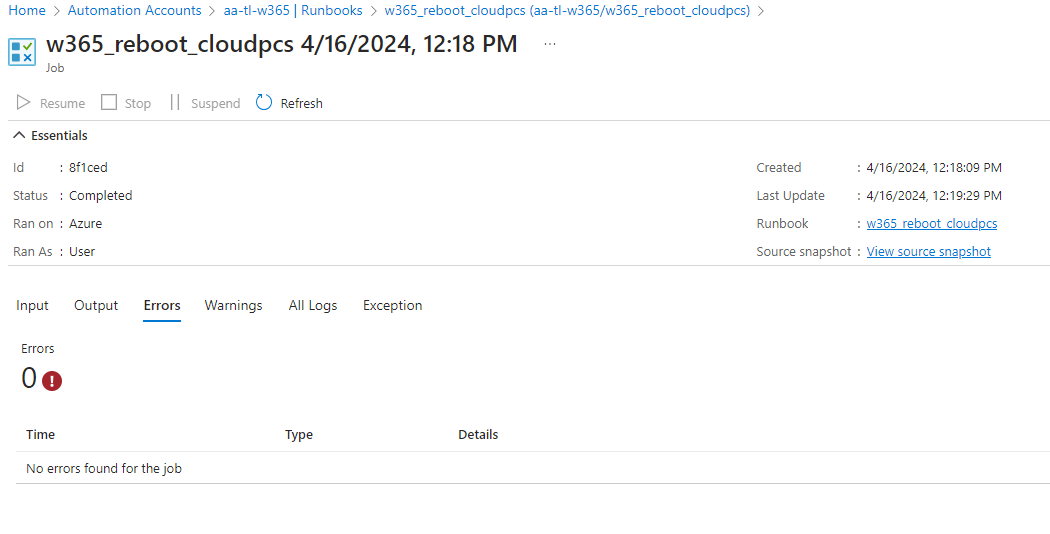
Let’s check out the result once the runbook completes. Just click the Status of the recent job, select Errors.
This is also the place to go for troubleshooting should something fail. But in this case, everything is good!
I noticed I was signed out of my Cloud PC which is a good sign. Trying to sign in again gave me this notification (which again is a good thing):
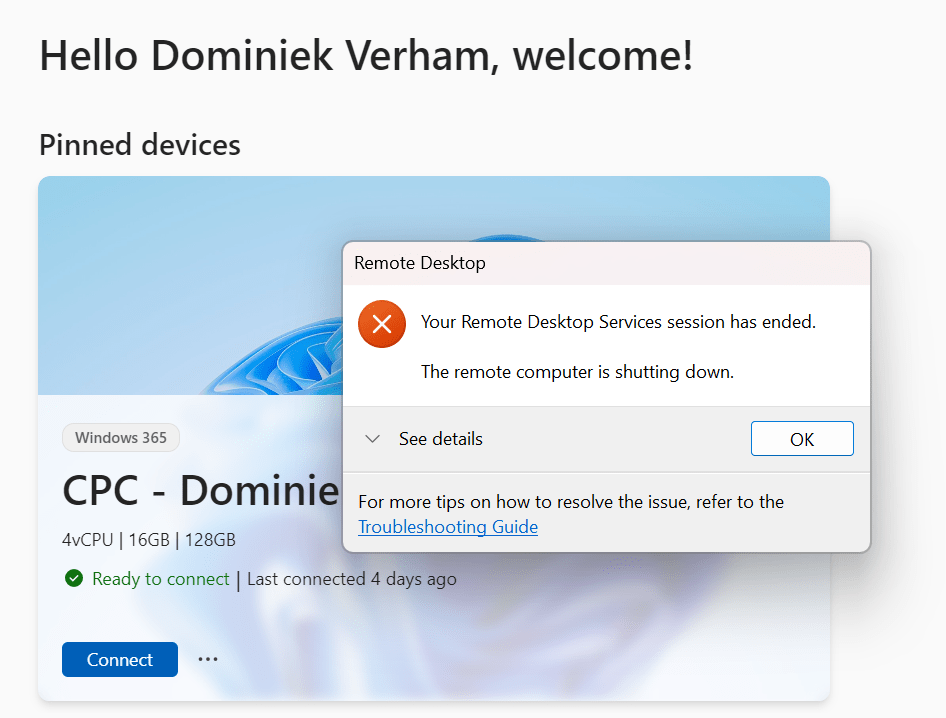
And after a short while I was able to sign in again. All that’s left to do is to create a schedule so this runbook runs automatically.
5. Create a schedule
There are two types of schedules we can use. The scheduled from the shared resources at the Automation Account level or create a schedule just for the runbook. If you want to create a shared schedule so it can be used for other runbooks as well, go to Automation Account, Schedules and add yours there.
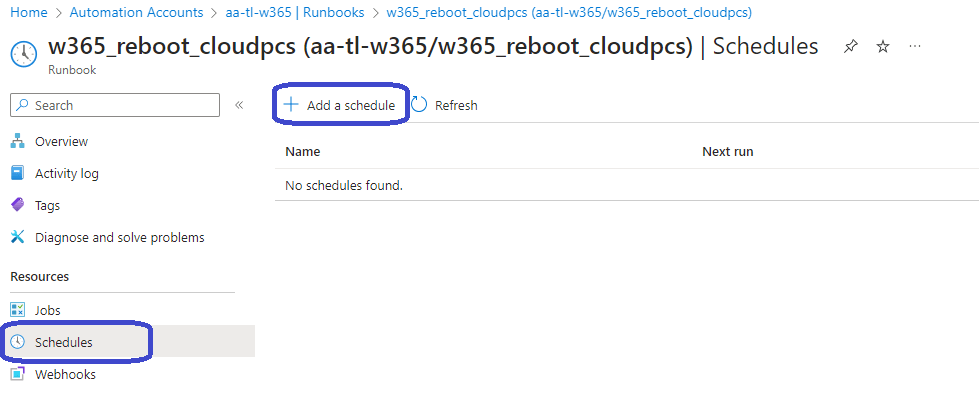
Alternatively you can add a schedule for the runbook only and here is how that’s done. From the runbook, Schedules, select+ Add a schedule.
Select Link a schedule to your runbook.

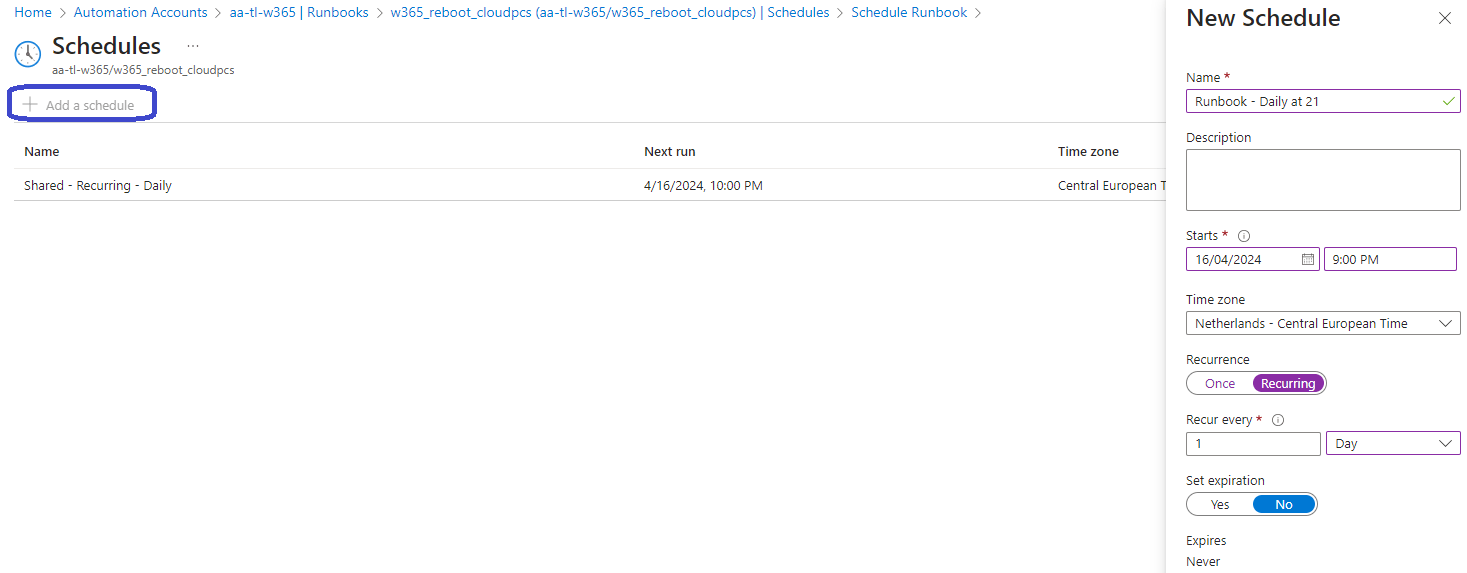
Click the + Add a schedule button in the ribbon. Fill in the required details in the window that floats in on the righthand side of your screen and
Once saved, you should end up with something like this:
Finish up with the OK button on the lower part of your screen. You have now successfully scheduled your reboot of your Cloud PCs!
Is this solution free or are costs associated with this solution?
While there are costs associated with using an Automation Account, the good news is that it is pretty cheap and the first 500 minutes per month are even free.
Check out then following URL if you want to learn more (link).
Resources
I used the following resources for this post:
Grant Graph API Permission to Managed Identity Object – Microsoft Community Hub
Microsoft Graph permissions reference – Microsoft Graph | Microsoft Learn
Using a system-assigned managed identity for an Azure Automation account | Microsoft Learn
Windows 365 role-based access | Microsoft Learn
Connect-MgGraph -Scopes – Easy365Manager
The following will help how to connect securely to Microsoft Graph from a runbook. It works differently for v1 and v2 of the PowerShell SDK. I’ve linked both for your convenience.
For Microsoft Graph PowerShell SDK v2
Using Managed Identities to Connect to Microsoft 365 & Azure (cloudprotect.ninja)
For Microsoft Graph PowerShell SDK v1

