What’s up, everyone!
Let’s take a look at Windows Autopatch. What is the Windows Autopatch service from Microsoft and how does it help admins to simplify the update process for our endpoints and Cloud PCs? Let’s take a look!
This post is part of a series about Windows 365! (Also known as Cloud PC) In this series I will explore this awesome technology. If you are curious what Windows 365 can do for you and your organization, this series might be for you!
Series – Windows 365 with Nerdio Manager
- Part 1: An Introduction To Windows 365
- Part 2: Windows 365 Business vs Enterprise
- Part 3: Configure Windows 365 Business
- Part 4: Configure Windows 365 Enterprise
- Part 5: How To Migrate From Citrix Or VMware To Windows 365
- Part 6: Use Universal Print on Windows 365
- Part 7: Monitor And Improve Performance For Windows 365 Cloud PCs
- Part 8: Use Windows Autopatch To Keep Your Cloud PCs Up-To-Date
Requirements
Windows Autopatch has the following requirements;
- Windows Autopatch is included from Enterprise E3 licenses and up.
- Windows Autopatch works with Windows 10 and 11 Enterprise versions (And Cloud PCs).
- BYOD scenarios are not supported.
- Devices must be managed via Microsoft Intune of Config Manager co-management.
- User accounts have to be in Azure AD or synchronized from a local AD DS using Azure AD Connect.
- Since Windows Autopatch is a service, check the list for required IPs and URLs.
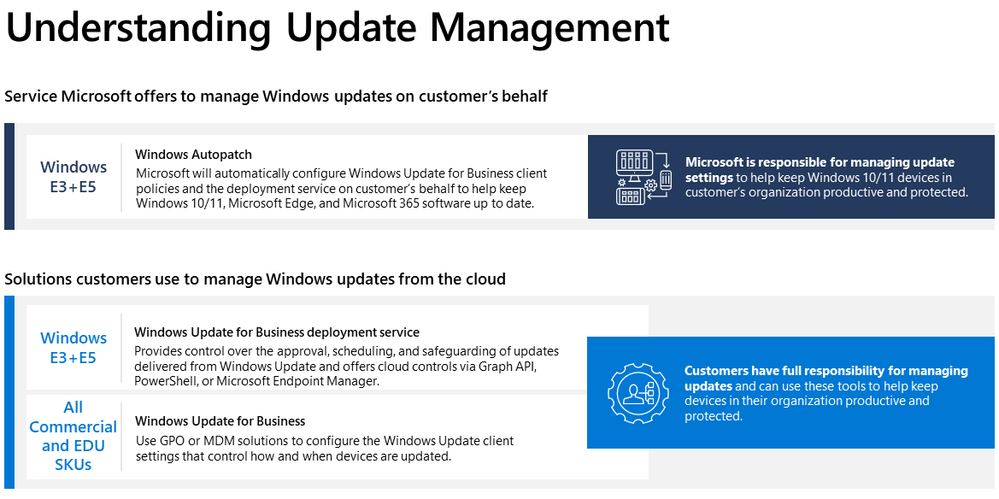
What Is Windows Autopatch?
Windows Autopatch is a service from Microsoft that went GA in July ’22. It uses the existing Windows Update for Business solution to keep your physical and virtual endpoints up-to-date, as long as they are registered to the service. There’s a big chance the service comes at no additional costs if you already use an Windows 10/11 Enterprise E3 license or higher.
The service automates the update process for Windows 10 or 11 as well as Microsoft Teams, the Office apps and Microsoft Edge.
Windows Autopatch is a service from Microsoft. It automates the deployment of updates for Windows 10 or 11, Office, Teams and Edge for enrolled devices. The service uses Windows Update for Business and configures it for you.
Tip; make sure to check the Windows in the Cloud episode about Windows 365 Enterprise patch management with Windows Autopatch.
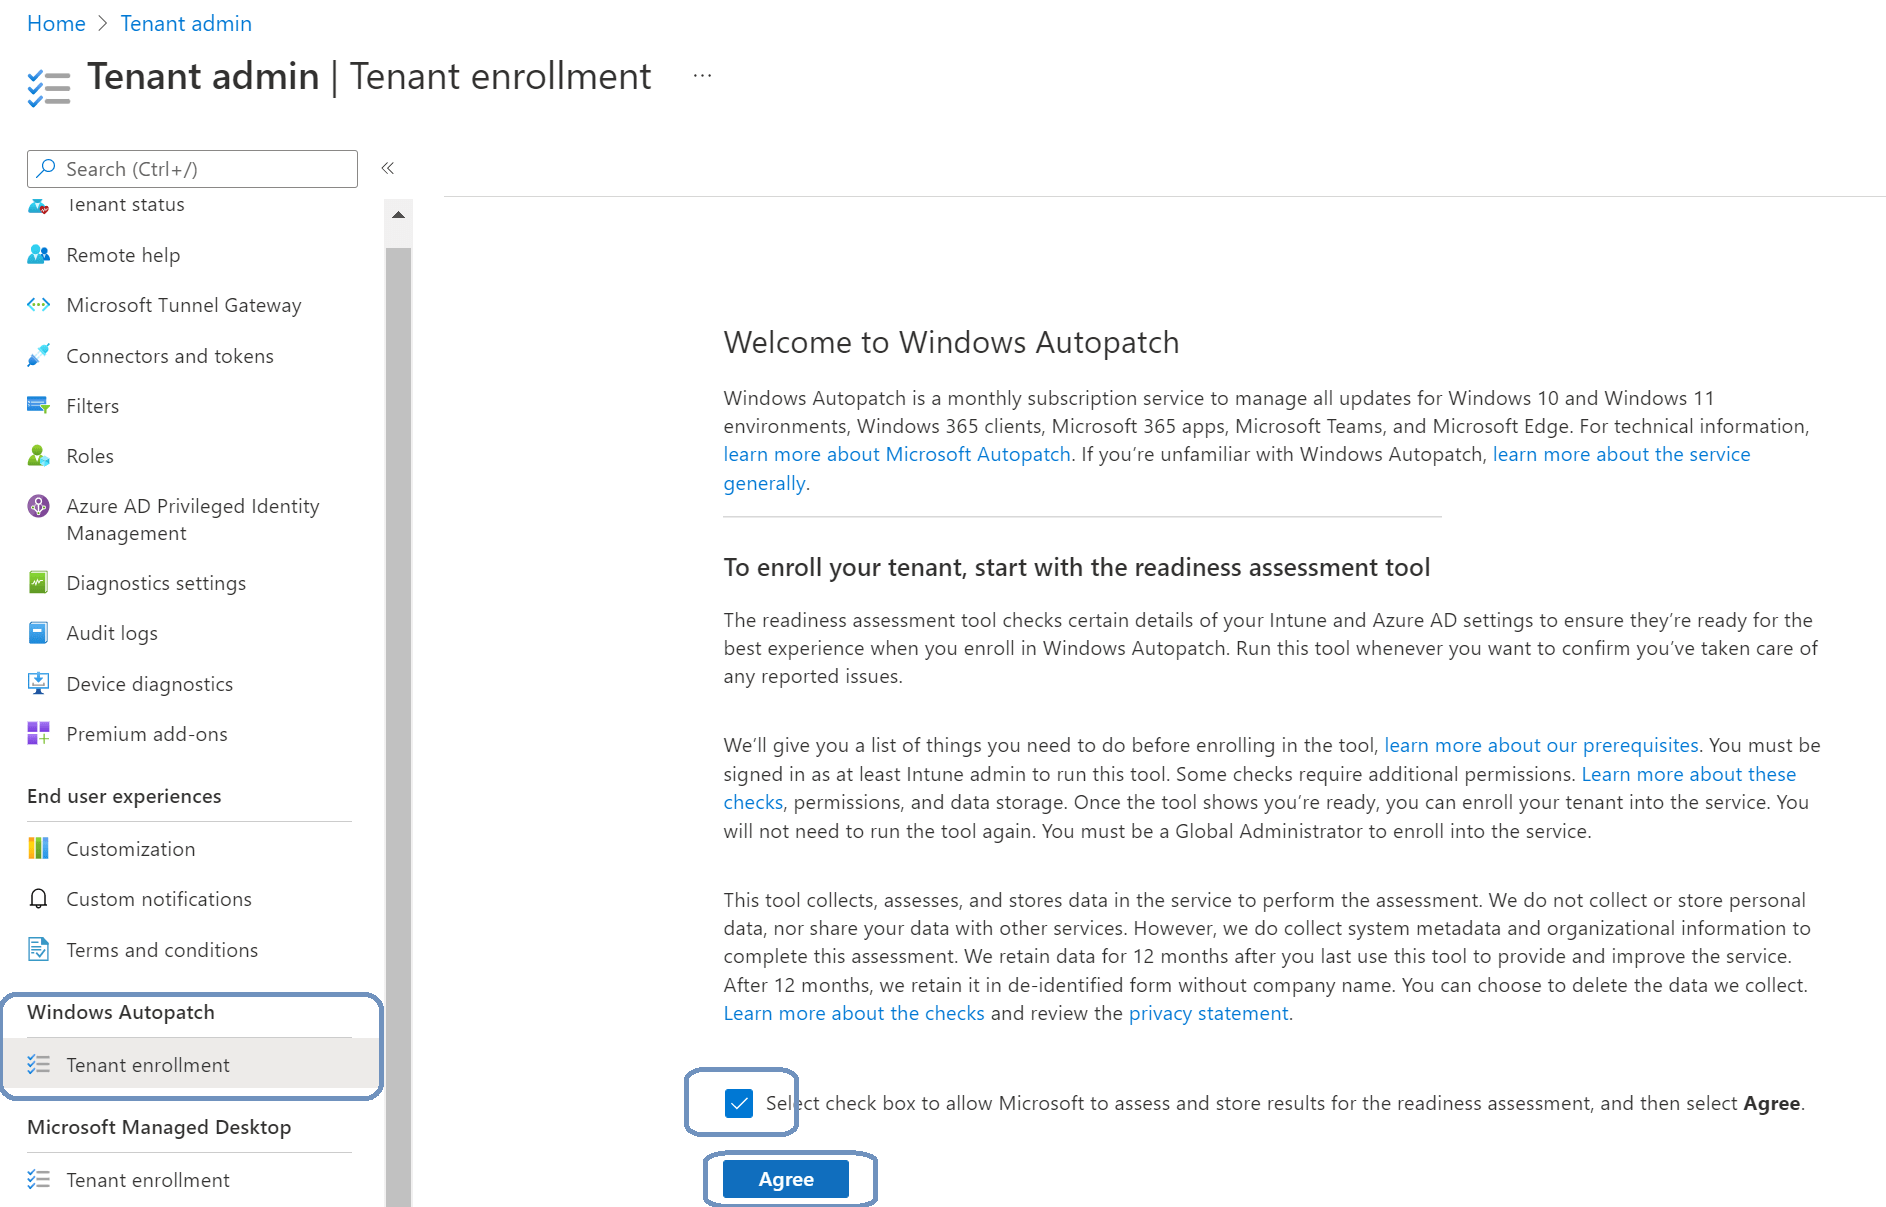
Step 1: Enroll The Tenant
The first step is to enroll the tenant into Windows Autopatch. To do so, login to Microsoft Endpoint Manager, Windows Autopatch, Tenant enrollment.
Check the box and click on Agree. This will automatically start the readiness assessment tool.
We see the readiness status once the checks complete. I got the following results for my demo environment;
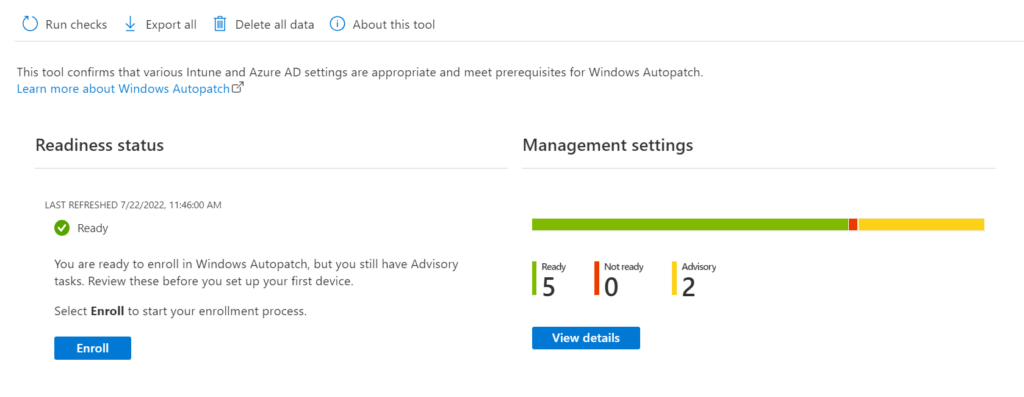
Select View details to check the advisory items.
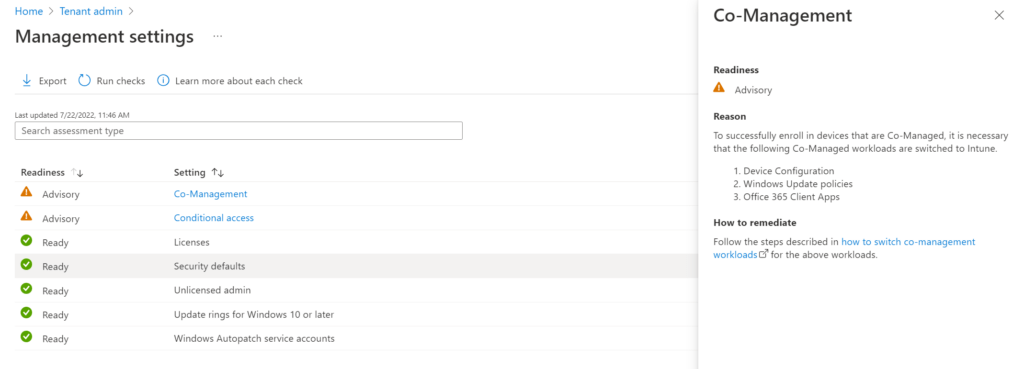
We can see the management checks that are performed. Check this Microsoft article for more information.
Let’s start with Co-Management. This check tells us which workloads should be switched to Intune if you want to use co-management. This is not relevant for my demo environment since I don’t use co-management.
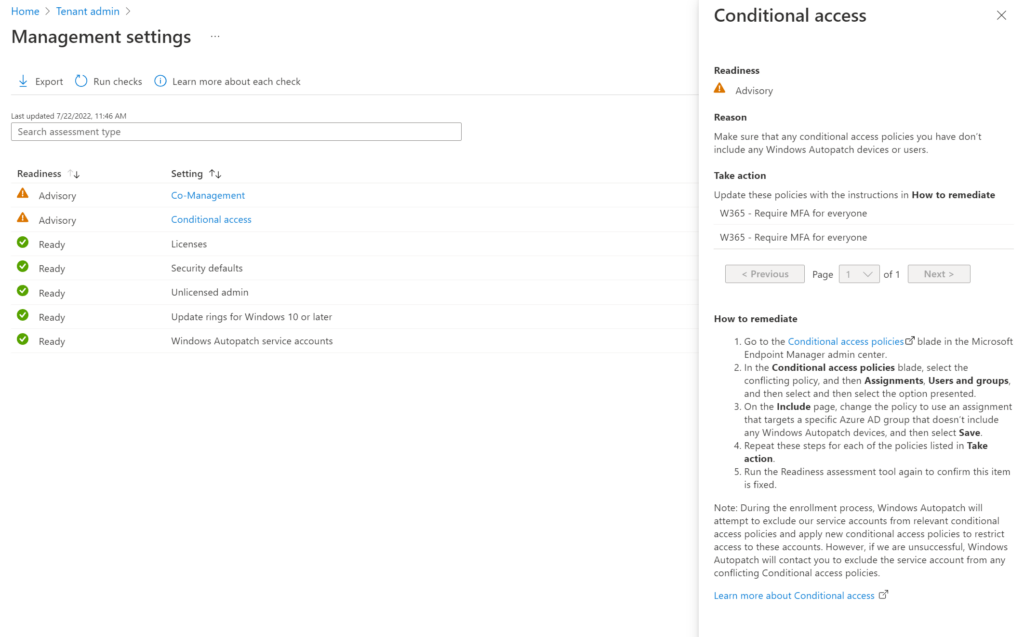
Windows Autopatch uses service accounts and these should be excluded from any conditional access rules to make sure the service works correctly. These service accounts aren’t present in the tenant yet because we haven’t started the enrollment process. Windows Autopatch will try to exclude these accounts during the enrollment process and we should be notified if this process should fail.
The following service accounts will be created;
- MsAdmin
- MsAdminUbt
- MsTest
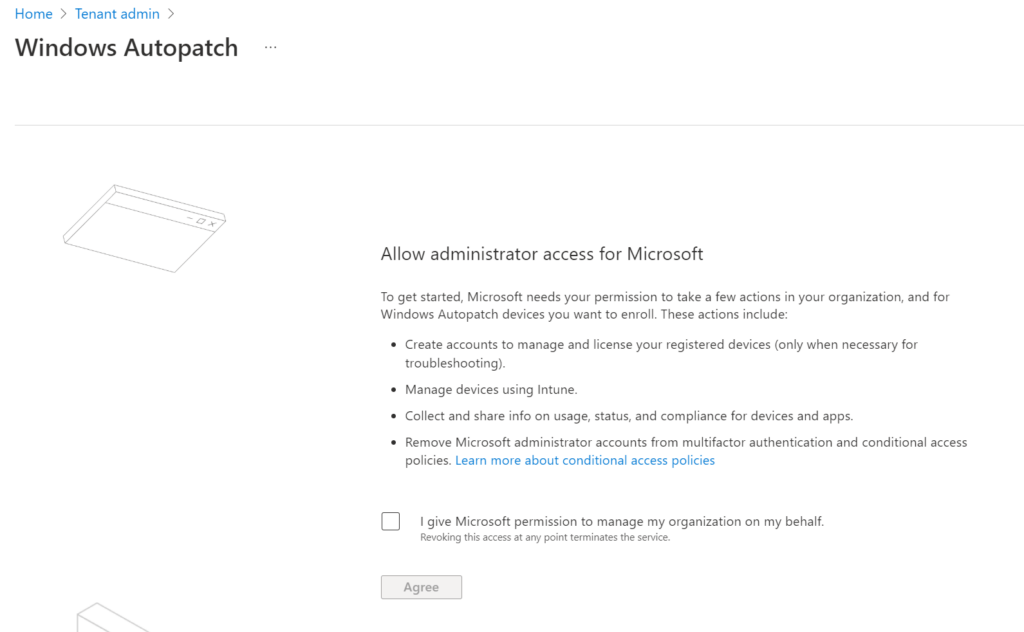
Grant the required access by checking the box and select Agree.

Fill in your contact details and continue. This will start the enrollment process and might take some time to complete.
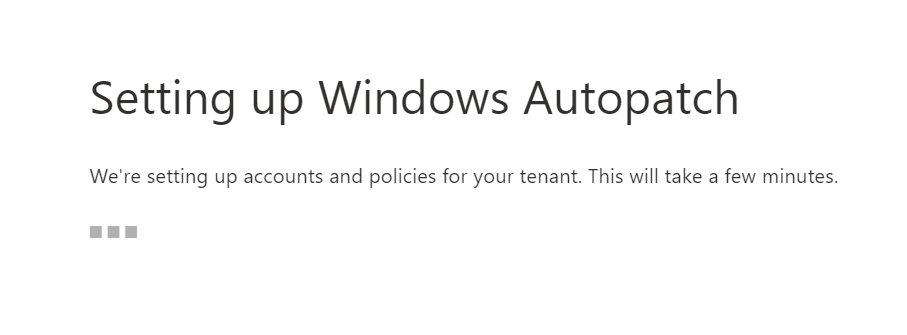
The “Windows Autopatch setup is complete” message is the first thing to appear. But keep in mind that there’s still some configuration going on and you can keep track by clicking the notification bell on the top right corner.
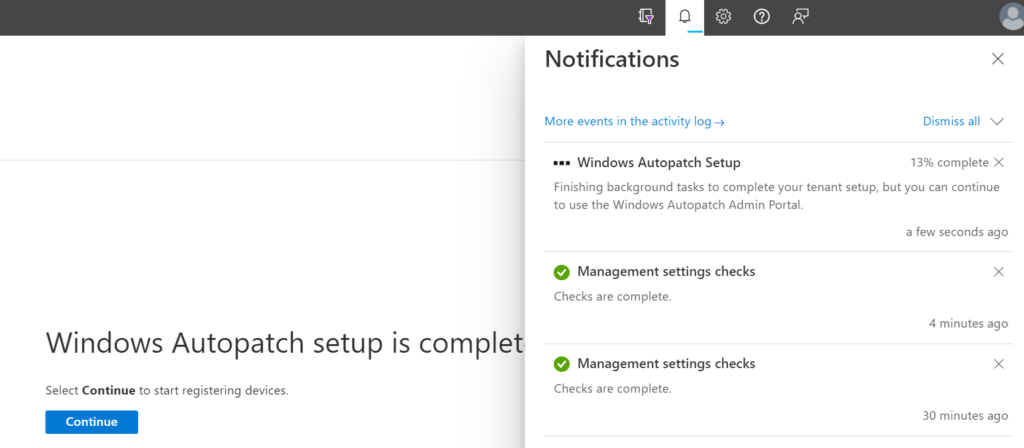
Select Continue. We’ll move on to the Devices blade in Windows Autopatch.
The tenant is enrolled for Windows Autopatch once the setup task completes.
Deploy Windows Autopatch
Windows Autopatch is a service that communicates with customers. So the first thing is to do is to verify the admins.
Go to Tenant Administration, Windows Autopatch, Admin Contacts.
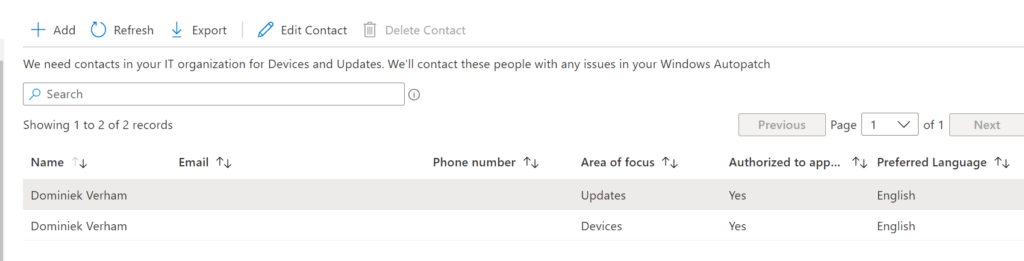
Use this blade to add, edit or remove contact details of the admins. This blade does not use a user picker solution for Azure AD.
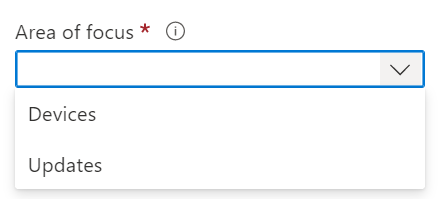
There are some options to consider. The area of focus has two values;
- Devices; used for device registration and device health.
- Updates; used for Windows quality and feature updates, Microsoft 365 Apps for Enterprise updates, Microsoft Edge updates and Microsoft Teams updates.
Since it’s a drop-down list, you can only choose one option. If the same admin is responsible for both options, just add the same admin again and select the other area of focus.
You can choose if you want to authorize the admin to approve changes that are recommended by Windows Autopatch Operations.
We need to register our devices in Windows Autopatch before Microsoft can manage them.
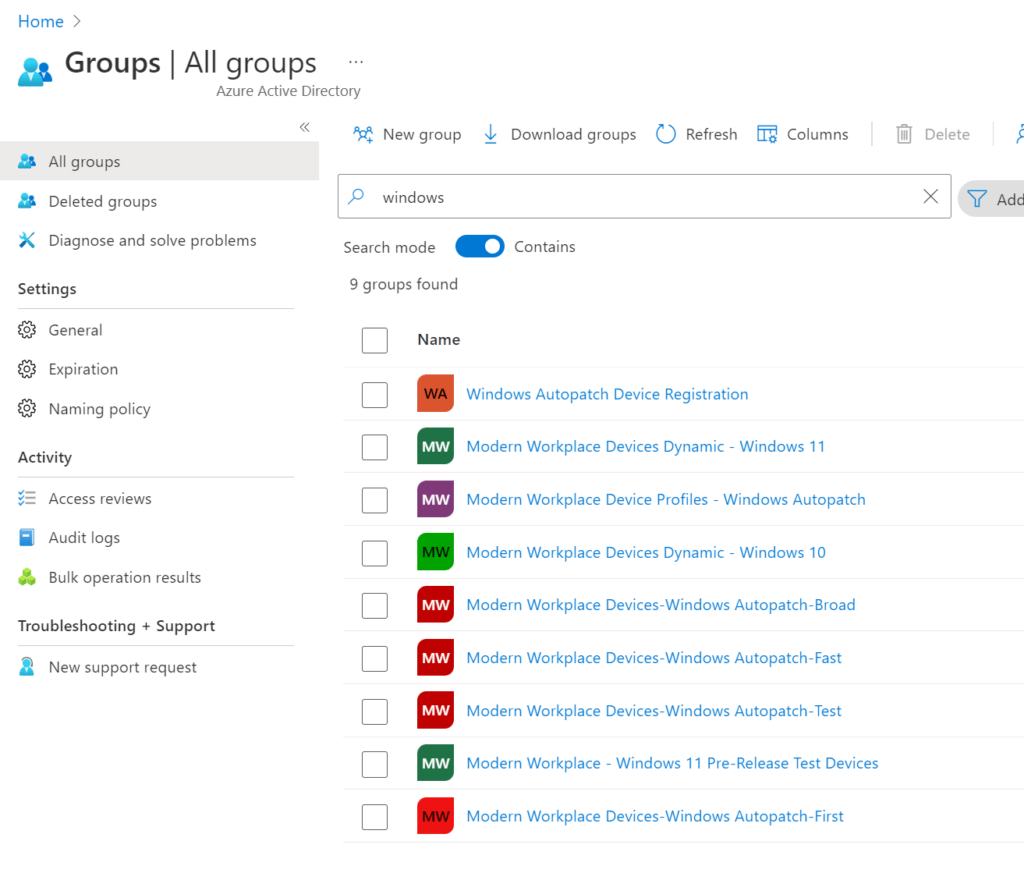
The group “Windows Autopatch Device Registration” is automatically created once the tenant is enrolled. The service checks this group on an hourly basis and registers the devices that are a member of this group.
Nested groups are supported for the following scenarios;
- The Windows Autopatch Device Registration Azure AD group only supports on level of Azure AD nested groups.
- On-premises AD groups are supported
- Config Manager collections are supported. Use a different Azure AD group for each Config Manager collection and nest these groups into the Windows Autopatch Device Registration Azure AD Group.
If you want to discover devices immediately, use the Discover Devices button in the Ready or Not ready tab.
Let’s create a dynamic device group for our Cloud PCs.

Use the following dynamic query to filter on all Cloud PCs:
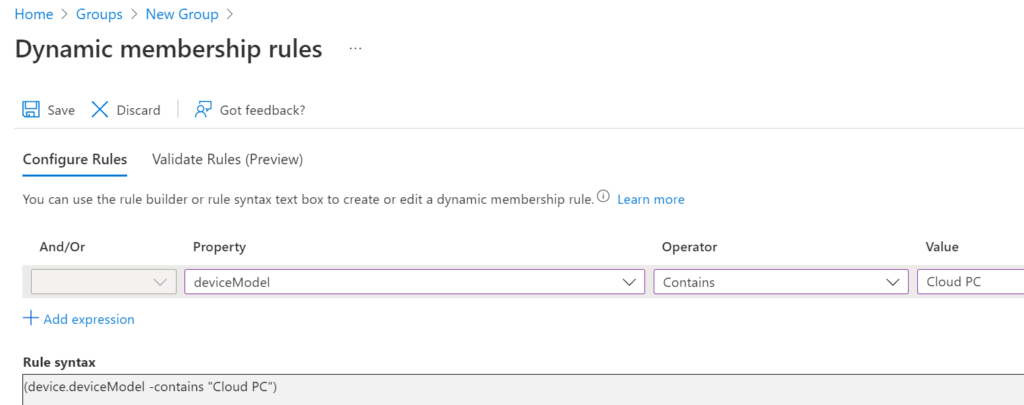
Add the Cloud PCs group to the Windows Autopatch Device Registration group.

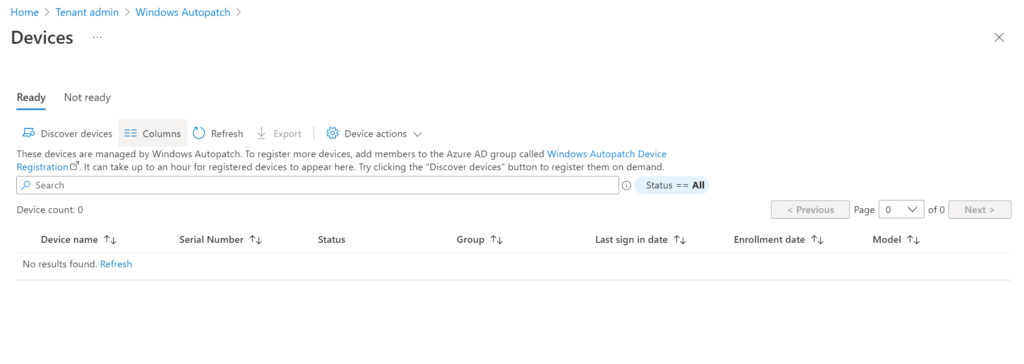
Go back to Devices, Windows Autopatch, Devices and select the Discover devices button.
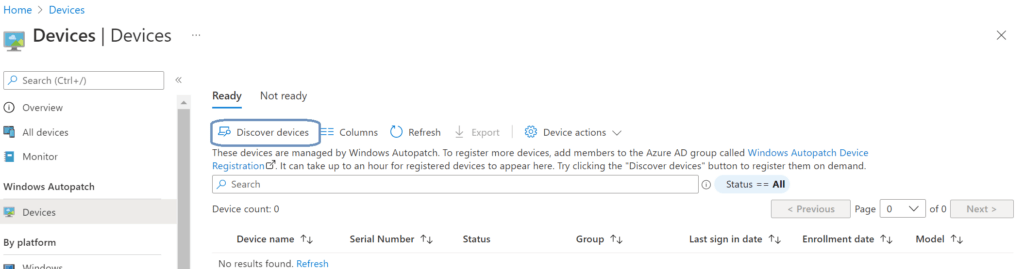
Select the OK button to start the discovery. It can take up to an hour before the devices show up. You can also speed up the process by selecting the refresh options on the page. Now I can see my two Cloud PCs!
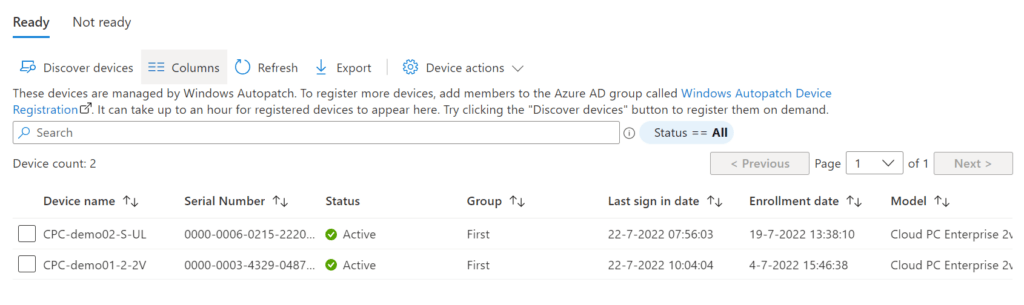
This page has two tabs;
- Ready: Shows devices that are ready to go with Windows Autopatch.
- Not ready; shows devices that failed to register with Windows Autopatch.
We can see some device information and we can see the group that they are assigned to.
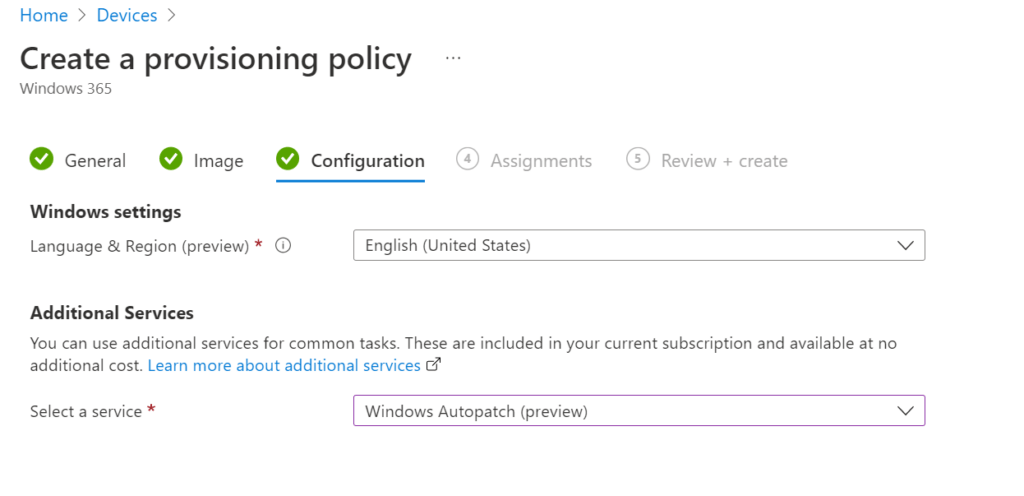
This works great for existing Cloud PCs or physical machines. There’s also an option in the provisioning policy for Windows 365. Let’s head back to Devices, Provisioning, Windows 365, Provisioning Policies. The third step, Configuration, includes the Additional Services options. We can select the Windows Autopatch service there. Newly provisioned Cloud PCs will register into Windows Autopatch automatically.
Let’s take a deeper look into how Windows Autopatch works!
Using Windows Autopatch
Windows Autopatch uses 4 update rings. Each update ring has a different purpose and is assigned a set of policies. The necessary groups are created automatically once the service is setup.
We get the following update rings;
Modern Workplace Devices – Test
This update ring is intended for IT Admins and testers. Changes are released to this update ring first.
Windows Autopatch does not automatically add devices to this ring. You have to add devices in manually. (This will be explained below in this post).
Modern Workplace Devices – First
Devices in this group are the first to receive updates and devices are used to send back data to Microsoft which is used to identify possible issues with updates. This data is referred to as signals.
This group will consist of 1% of your devices.
Modern Workplace Devices – Fast
Devices in this group are up next to receive updates. The signals from the first and fast update ring are considered as a part of the release process to the broad ring.
This group will consist of 9% of your devices.
Modern Workplace Devices – Broad
This group will contain all other registered devices and are updated last.
The Windows Autopatch service will populate the update rings for us. That could mean that some devices are put into the wrong update ring. We can manually assign a different update ring from the Devices view from Windows Autopatch.
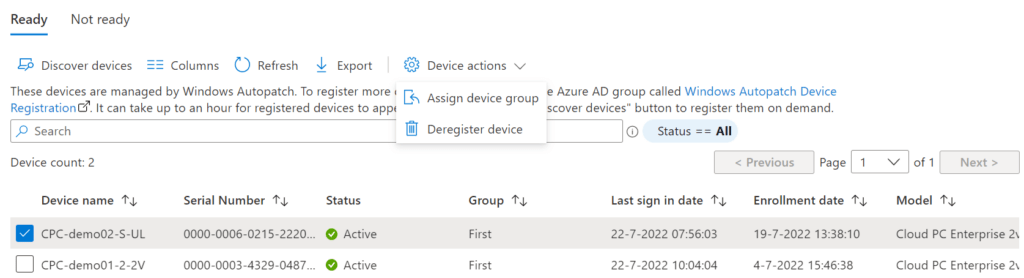
Check the box of the Cloud PC and select Device Actions, Assign device group.
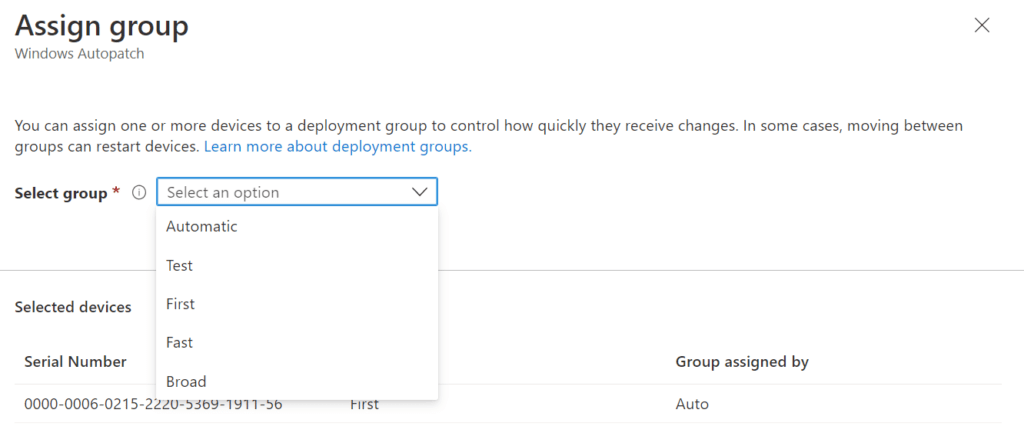
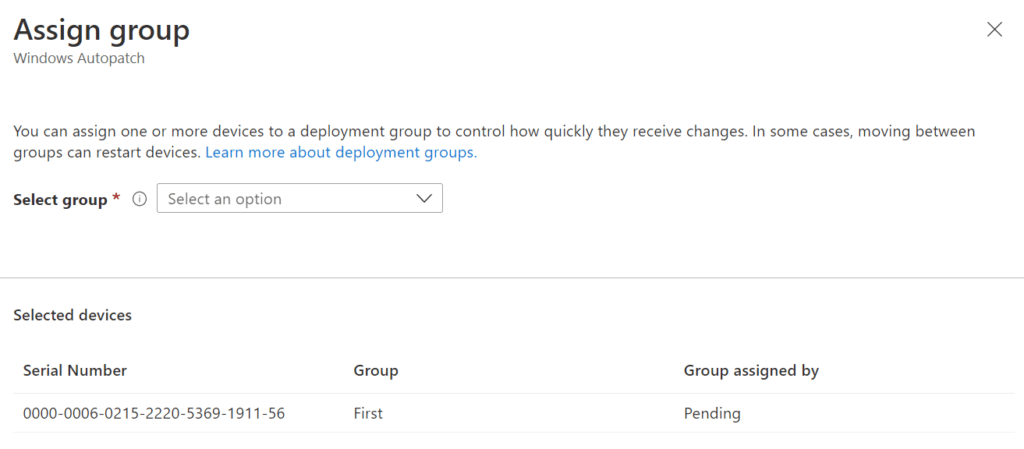
Choose the update ring you want the device to be a member of and click Save. It can take some time before the new group is assigned, so don’t worry if hitting the refresh button isn’t working immediately.
If you check the box of the same Cloud PC again and perform the same steps as mentioned above, you can see a pending status.
At this point I got curious what happened in Windows Update for Business. So let’s take a look at the Update Rings:
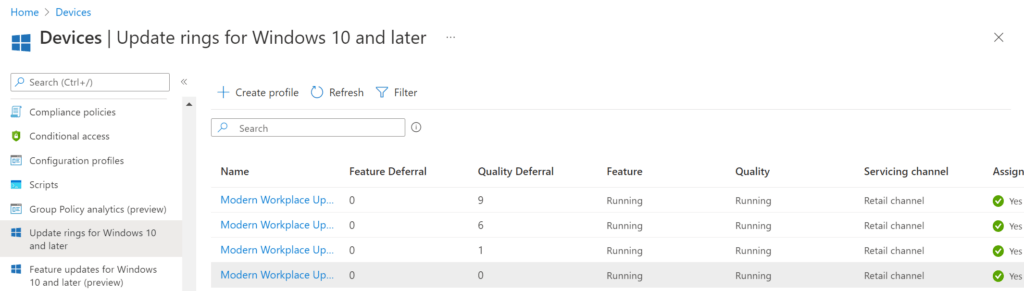
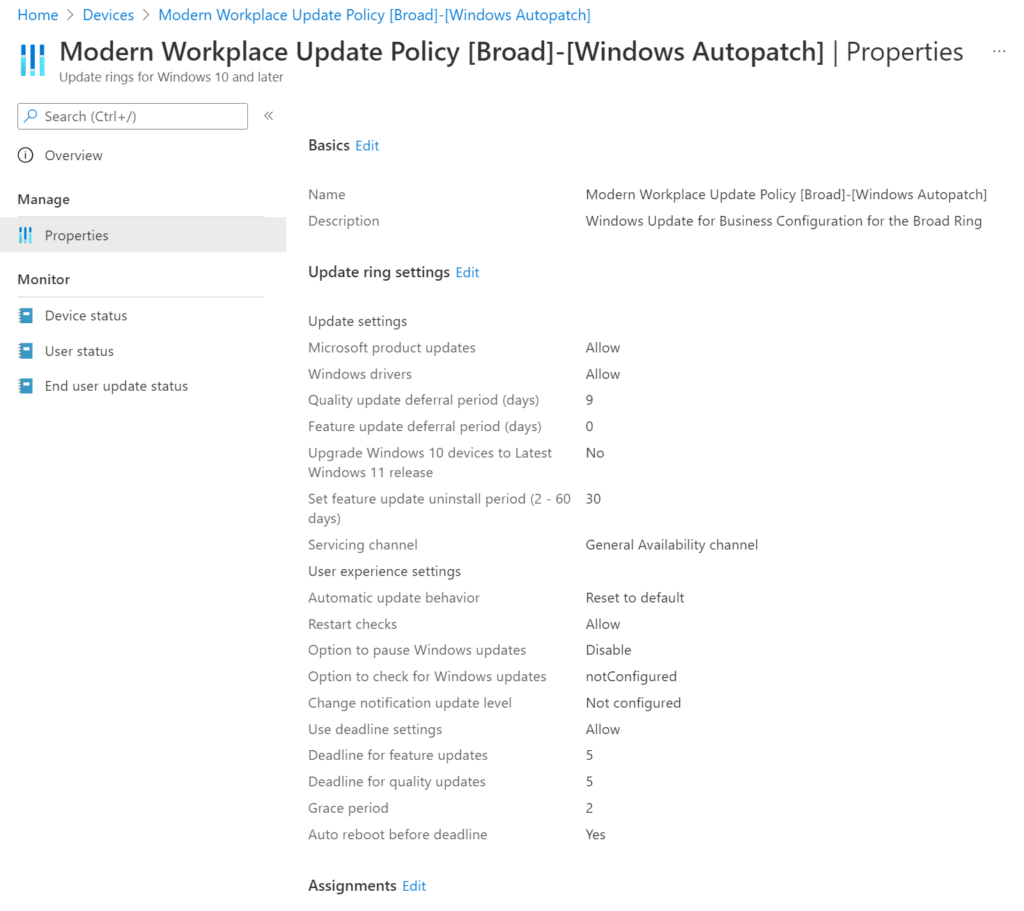
We can see the Update Rings and we can see what they look like by opening one. For example, Modern Workplace Update Policy [Broad]-[Windows Autopatch].
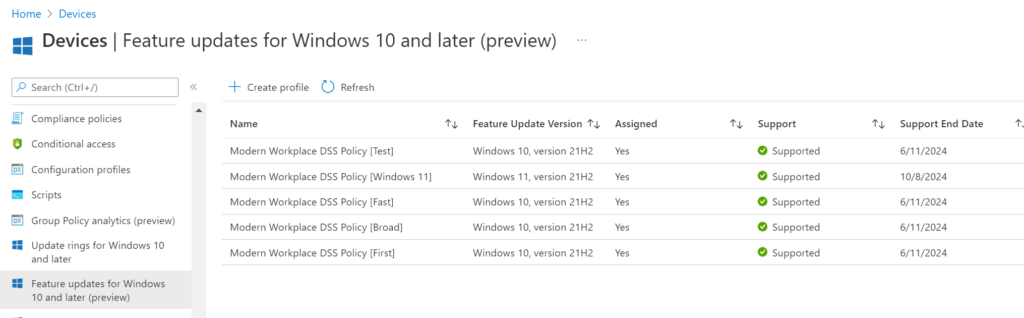
The same thing goes for the feature updates…