
What’s up everyone!
Let’s continue our journey with the Cloud PC! So at this point we have migrated from legacy products to our new modern Cloud PC’s! This would be a good time to dive into the world of performance to make sure that our users are happy with the Cloud PC. In this post we’ll take a look on the tools we have to check the performance and the ways we can improve the user experience by boosting the performance if needed. Let’s take a look!
This post is part of a series about Windows 365! (Also known as Cloud PC) In this series I will explore this awesome technology. If you are curious what Windows 365 can do for you and your organization, this series might be for you!
Series – Windows 365 with Nerdio Manager
- Part 1: An Introduction To Windows 365
- Part 2: Windows 365 Business vs Enterprise
- Part 3: Configure Windows 365 Business
- Part 4: Configure Windows 365 Enterprise
- Part 5: How To Migrate From Citrix Or VMware To Windows 365
- Part 6: Use Universal Print on Windows 365
- Part 7: Monitor And Improve Performance For Windows 365 Cloud PCs
- Part 8: Use Windows Autopatch To Keep Your Cloud PCs Up-To-Date
Requirements
In this demo I will use Windows 365 Enterprise, simply because we can take a look the features from Microsoft Endpoint Manager.
(Basic) Monitoring Options
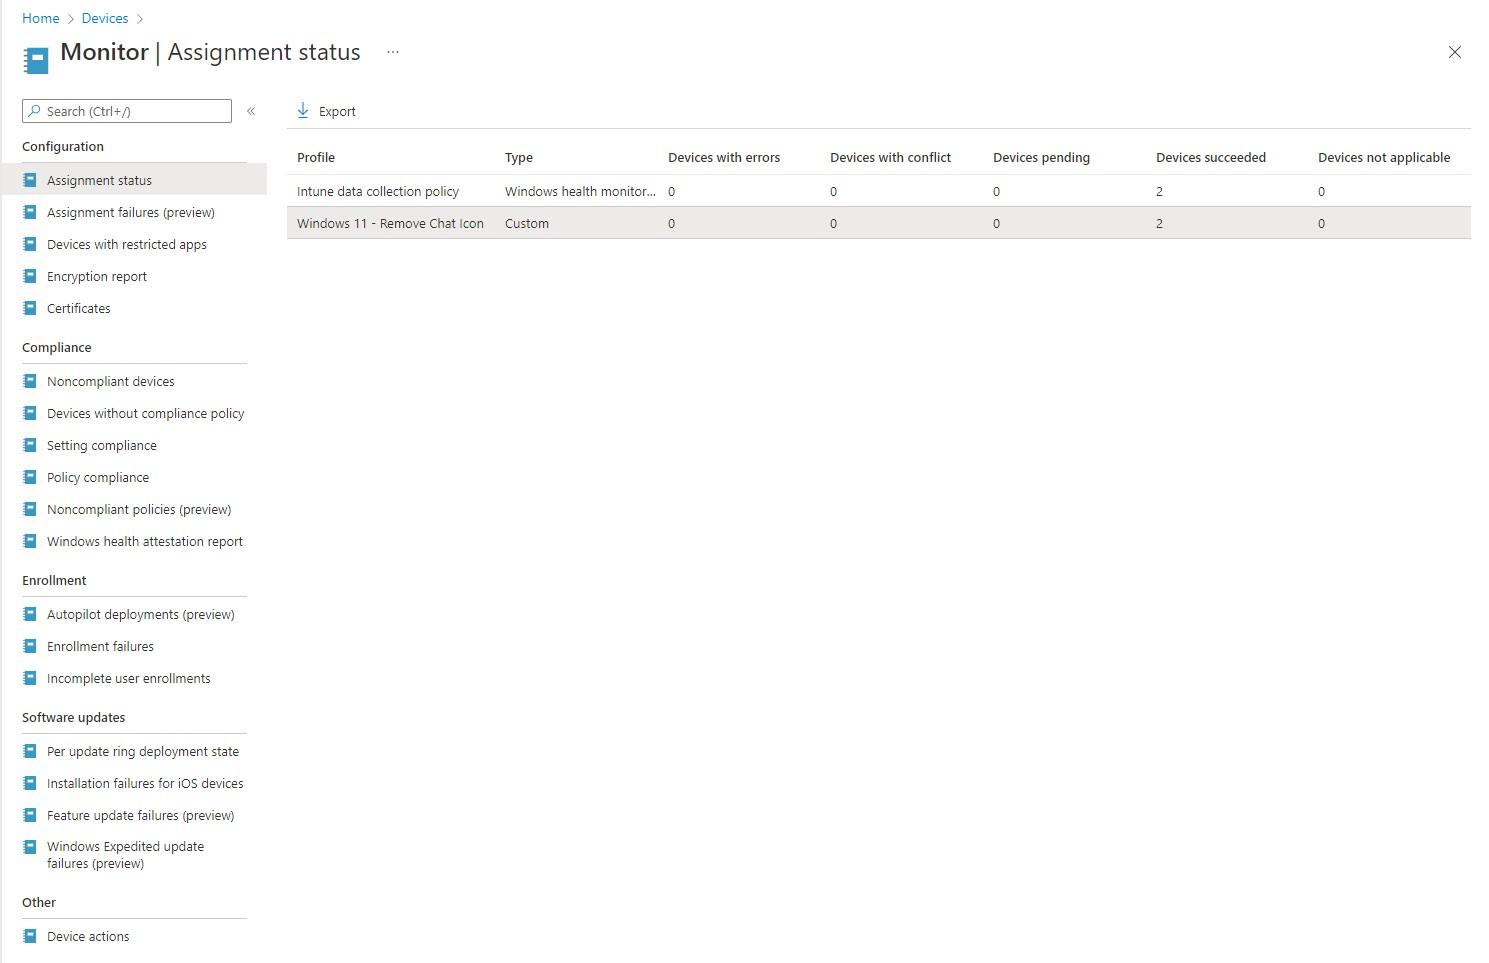
We can monitor our physical and virtual endpoints, as long as they are enrolled in Endpoint Manager, under Devices, Monitor. Here we can find a lot of information which is grouped into;
- Configuration
- Compliance
- Enrollment
- Software Updates
- Other (Device Actions)
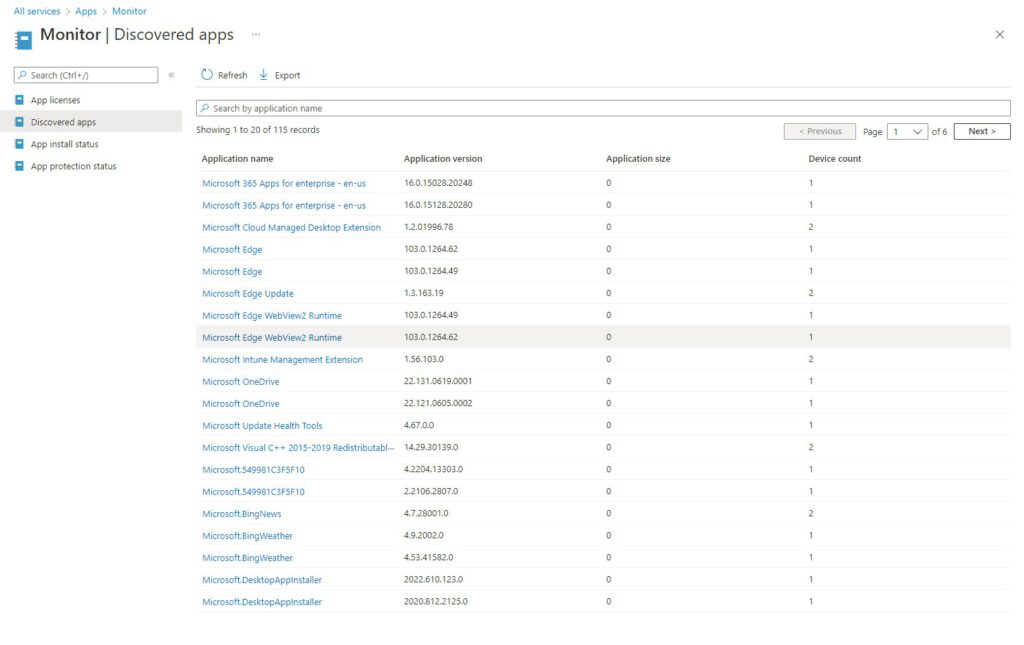
If we want to know the status of our apps, we can go to Apps, Monitor. We can find more info on;
- App Licenses
- Discovered Apps
- App Install Status
- App Protection Status
Advanced Monitoring Using Endpoint Analytics
A big help in monitoring our endpoints is Endpoint Analytics. This service is a part of the Microsoft Productivity Score and is intended to provide insights to measure how the organization is working and the quality of experience the users have.
Setup and Requirements
To make use of Endpoint Analytics, we need to make sure our devices are enrolled into Intune.
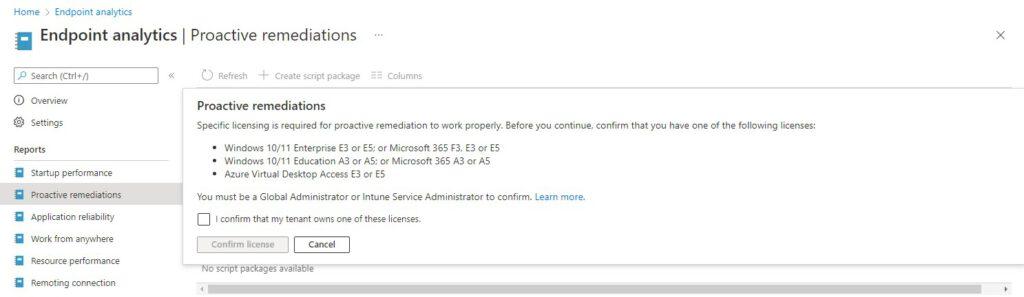
Chances are that you already have the licenses that Endpoint Analytics needs, since enrolled device need a valid license for the use of Microsoft Endpoint Manager. You do nee extra licenses if you want to use proactive remediation (more on that later);
- Windows 10/11 Enterprise E3 or E5 (included in Microsoft 365 F3, E3, or E5)
- Windows 10/11 Education A3 or A5 (included in Microsoft 365 A3 or A5)
- Windows 10/11 Virtual Desktop Access (VDA) per user
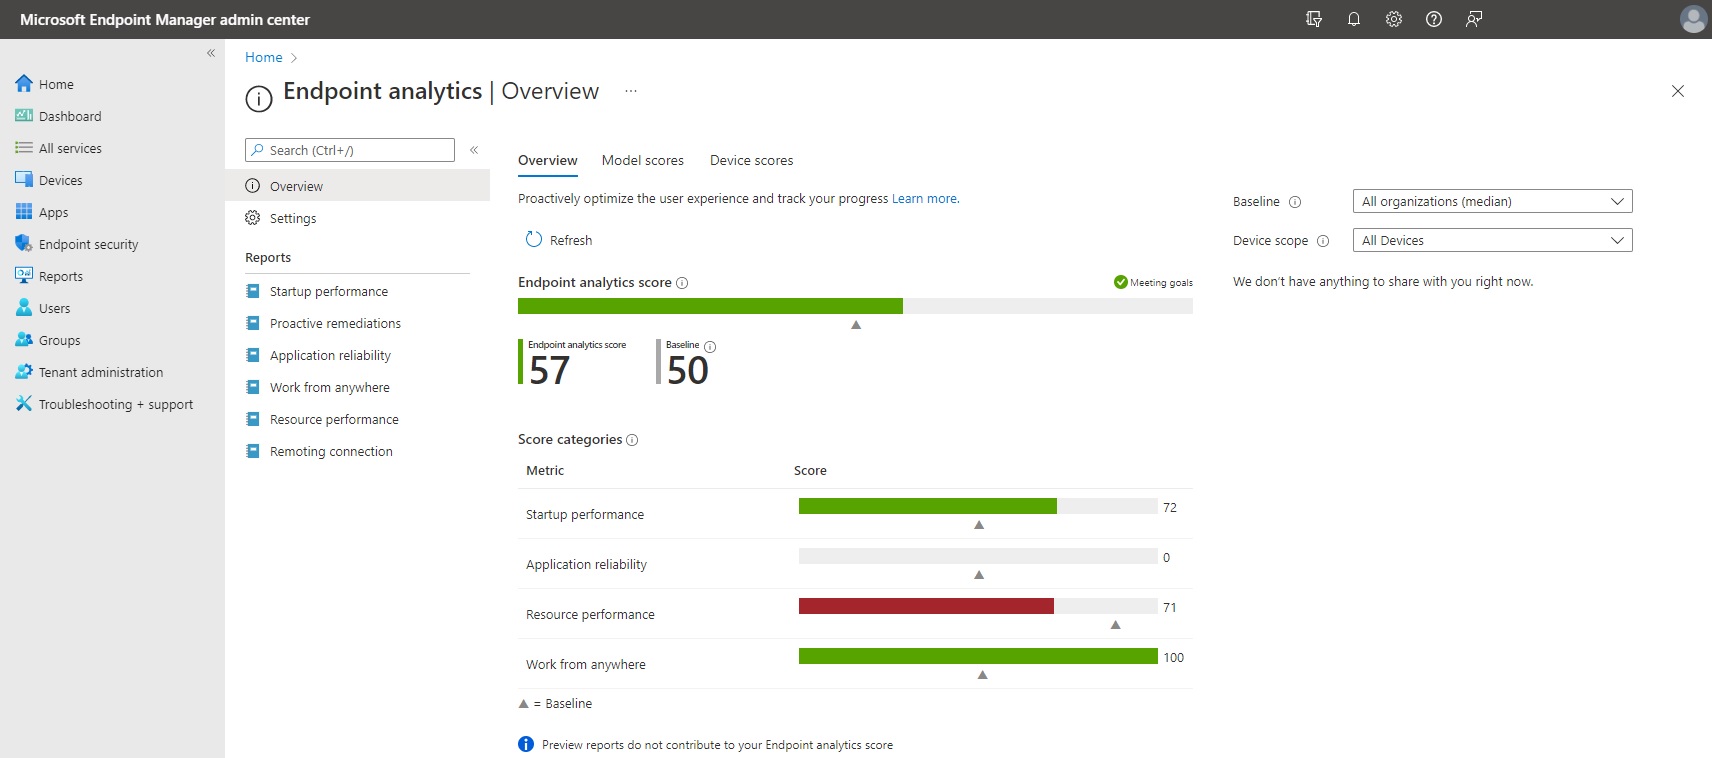
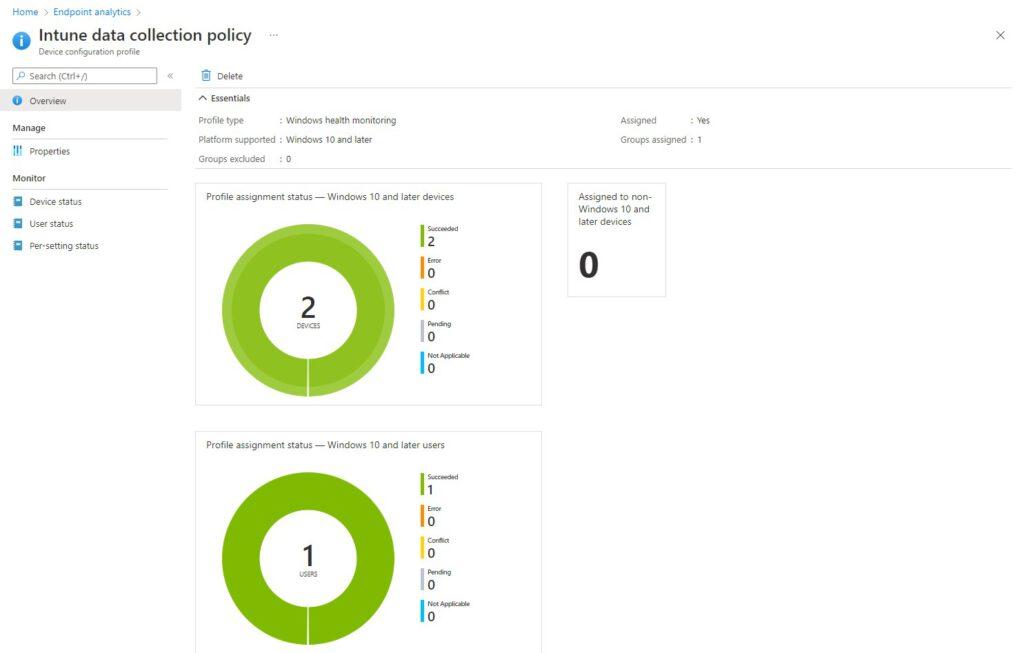
If it’s the first time that you opened this page and your tenant does not have any configuration for Endpoint Analytics yet, you will get a different page with the option to start using Endpoint Analytics. If you do so, a configuration policy will take effect to start gathering data from your endpoints. It can take up to a day before data becomes visible in Endpoint Manager. Then the dasboard will look something like this;
We can configure Endpoint Analytics from the settings page.
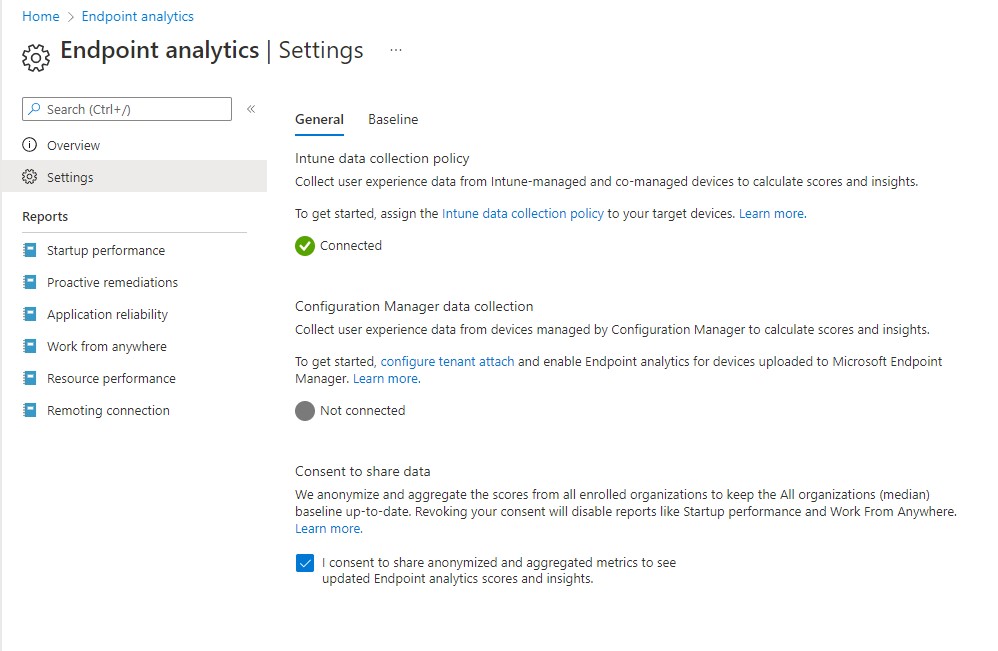
In my case I will only gather information from Intune since I don’t have SCCM setup. I you want to see the device configuration profile that gathers data from the endpoints, click on intune data collection policy.
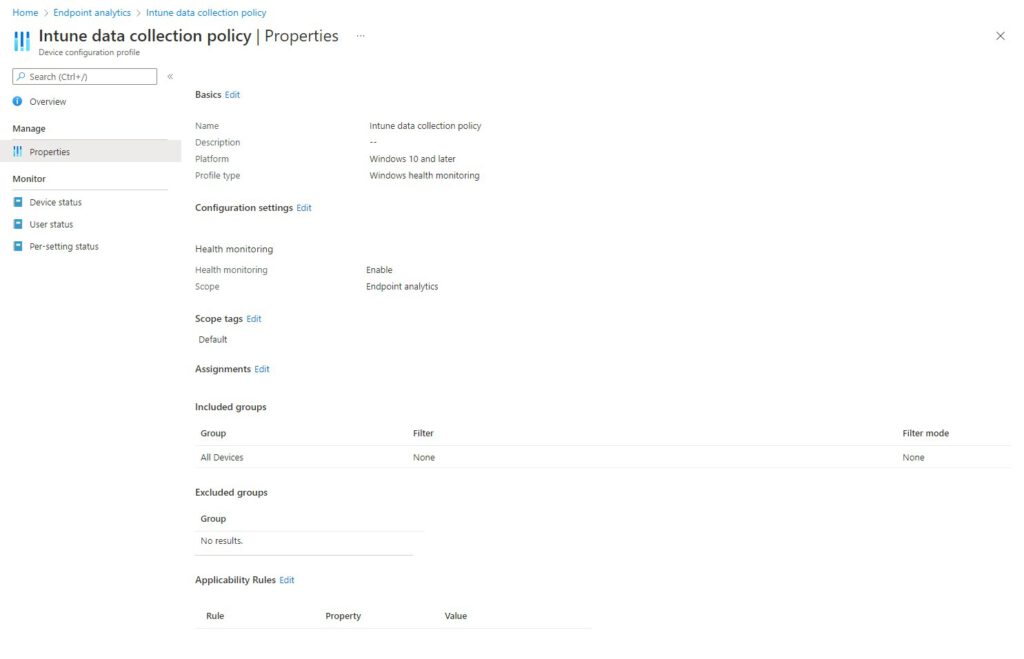
This is the content of the configuration policy;
Advanced Monitoring Options
Now that Endpoint Analytics is setup and showing data, we can review the performance data for all devices or for a single device. I will specify per setting if it’s for all devices or for a single device. Here all the settings for all devices;
- Startup Performance
- Proactive Remediations
- Application Reliability
- Work From Anywhere
- Resource Performance
- Remoting Connection
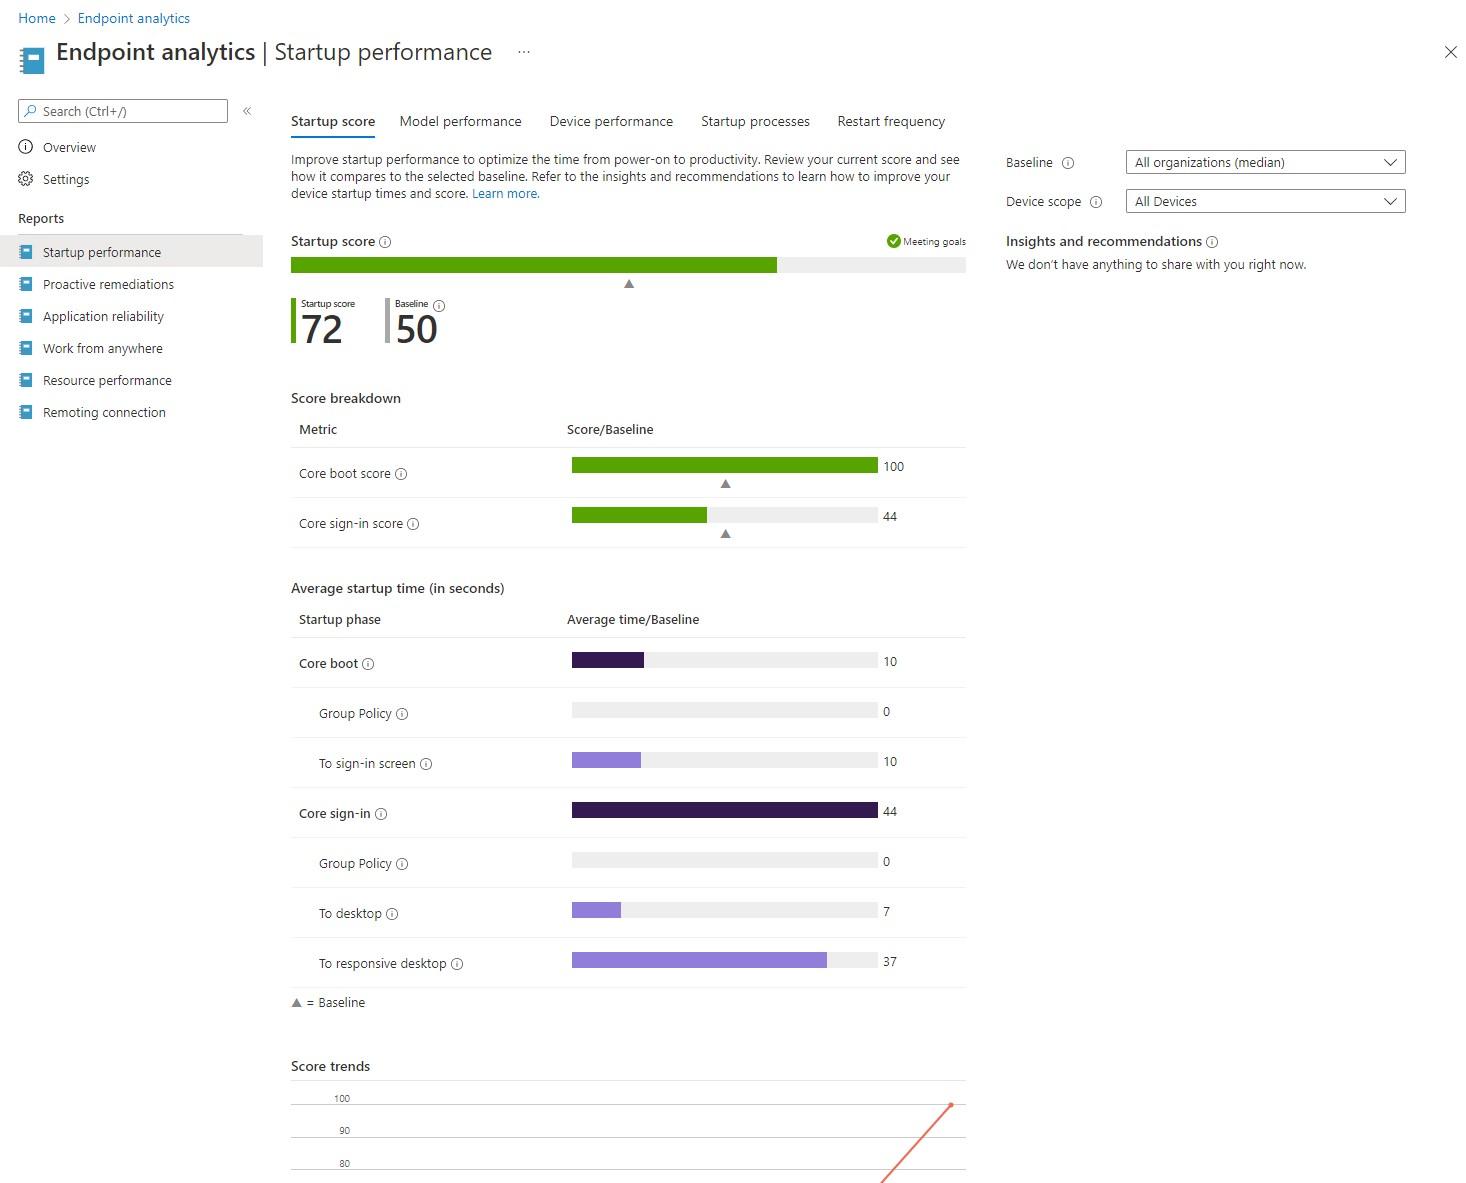
We can find all sorts of startup performance related data here. This data is divided into several categories;
- Core Boot Score: is calculated by looking at how long it takes for each device to complete the core boot score phase.Then the average score of all devices is calculated to get the core boot score for the tenant.
- Core Sign-In Score: is calculated by looking at how long it takes for each device to complete the core sign-in phase. Then the average score is calculated for all devices to get the core sign-in score for the tenant.
- Core Boot: Average time it takes to reach the sign-in prompt after a device is turned on. Excludes OS update time.
- Core Sign-In: Average time it takes to get to a responsive desktop after a user signs in. Excludes new user sign-in and first sign-in after a feature update.
The Core Boot phase consists of:
- Group Policy: Average time spent processing Group Policy during device’s core boot.
- To sign-in screen: Core boot time, minus the time spent processing Group Policy.
The Core Sign-In phase consists of:
- Group Policy: Average time spent processing Group Policy during device’s core sign-in.
- To desktop: Average time between sign-in and when the desktop renders, minus the time spent processing Group Policy.
- To responsive desktop: Average time between when the desktop renders and when CPU usage falls below 50%.
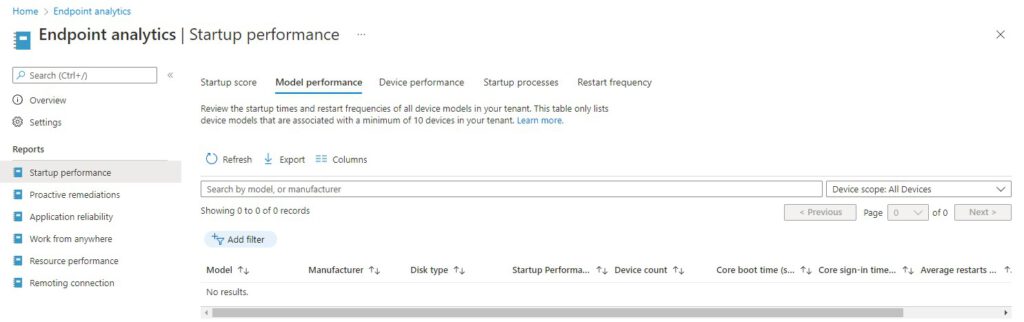
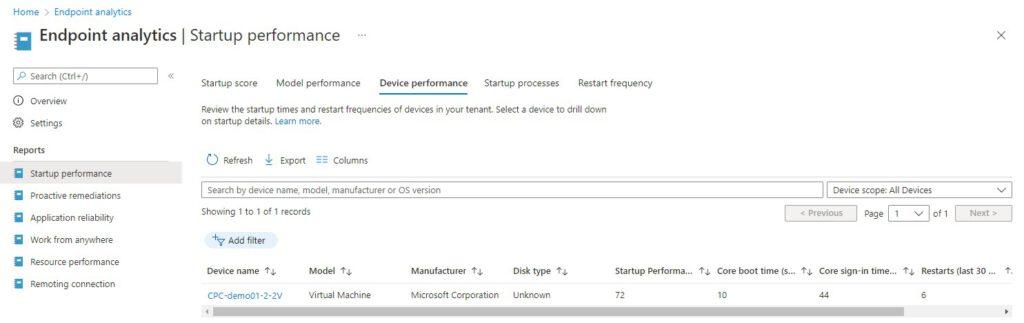
Device Performance (all devices, but it allows us to go to a single device)
We can also review the startup times and restart frequencies of our devices in the tenant.We can click on a device to get more information.
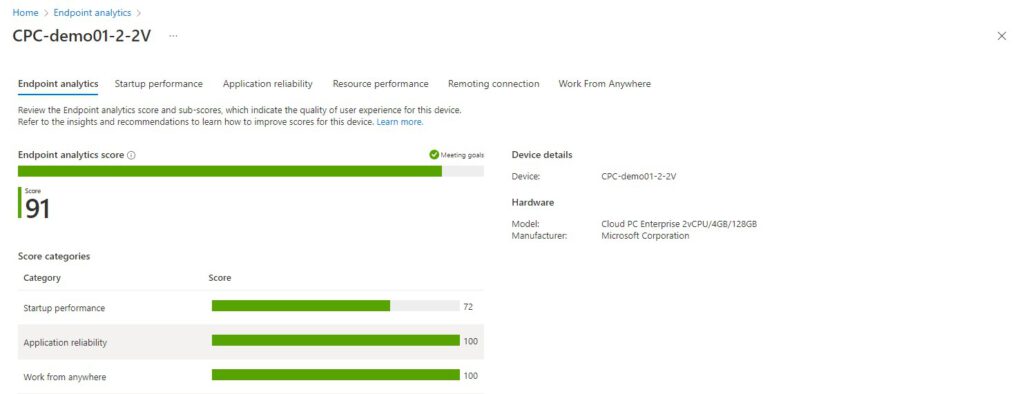
There are more options to explore on the device level. They can be accessed by clicking on the device like we just did, or go to Endpoint Manager, Windows 365, All Cloud PC’s, User Experience. We can now see more information for this Cloud PC on;
Endpoint Analytics (device level); gives an overview of the score based on startup performance, application reliability and work from anywhere.
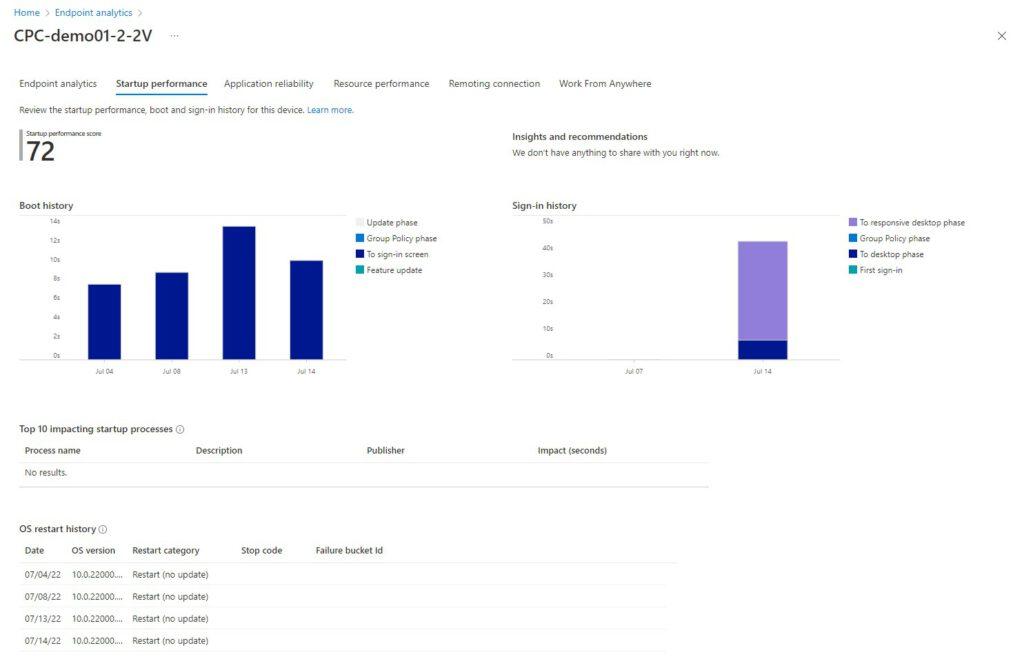
Startup Performance (device level); a report with specific information about boot history (with timings on the startup phases) and Sign-in history. This report also shows the top 10 impacting startup processes and the OS restart history.
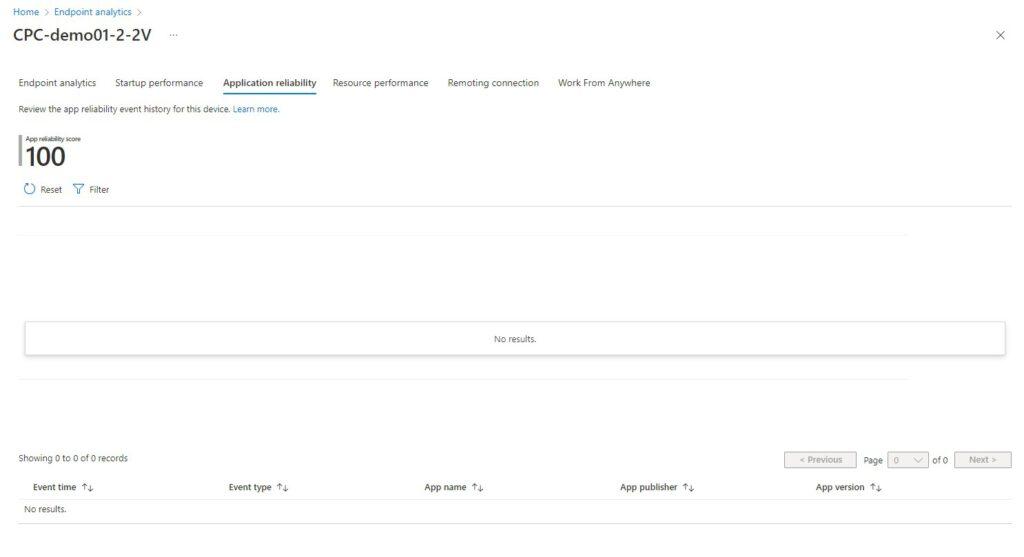
Application Reliability (device level); shows the app reliability score.
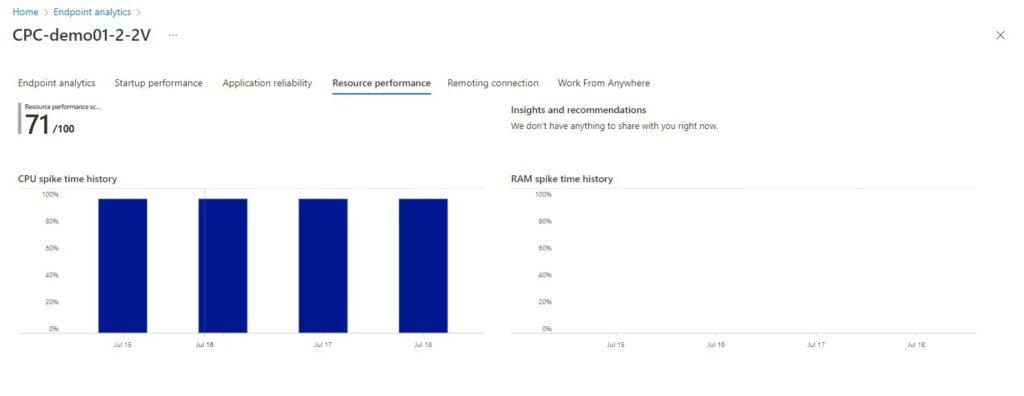
Resource Performance (device level); shows a historical view of the CPU and RAM spikes. Endpoint Analytics can detect if the Cloud PC is performing badly by the CPU and RAM spikes. In this case, Endpoint Analytics can advise to upgrade this Cloud PC. If this happens, you should see a message in the report with the text “Review this cloud PC’s resource performance score, which might indicate the need to resize.“
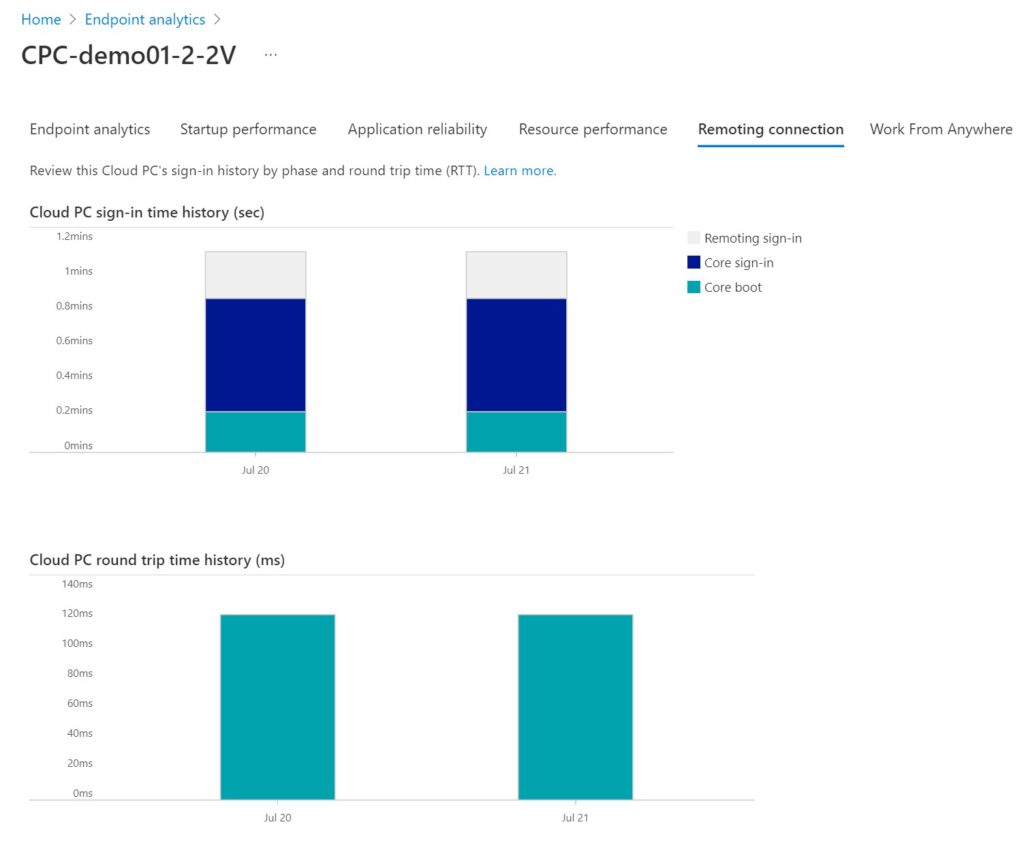
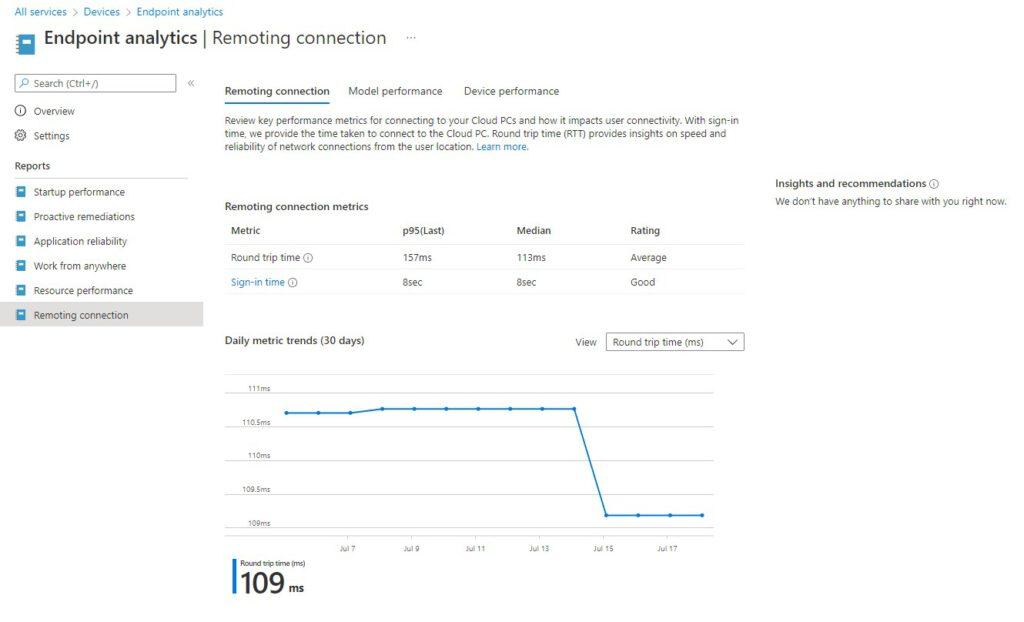
Remoting Connection and RTT
We connect to our Cloud PC over the internet and a slow internet connection can negatively impact the user experience.
We can use Microsoft Endpoint Manager to check the Round Trip Time. This metric gives us an indication on how good the connection from the local device to the Cloud PC is;
- Between 0 – 100 ms is considered as a good connection.
- Between 100 – 200 ms is considered an average connection.
- Above 200 ms is considered a poor connection.
Proactive Remediations (All devices)
As mentioned before proactive remediations need additional licenses. They are used to fix common support issues before endusers notice issues. They help to increase the user experience score.
Proactive remediation allows us to create remediation scripts and deploy them using script packages. See the link above for a demo.
Endpoint Manager reminds us that we need additional licenses if we open proactive remedition.
Application Reliability (All devices)
This application reliability report provides insights into potential issues for desktop applications on managed physical or Cloud PC’s. I don’t have many applications in my environment yet so my report is empty. But I recommend that you check out this report in production environments. Check the Microsoft link for more information.
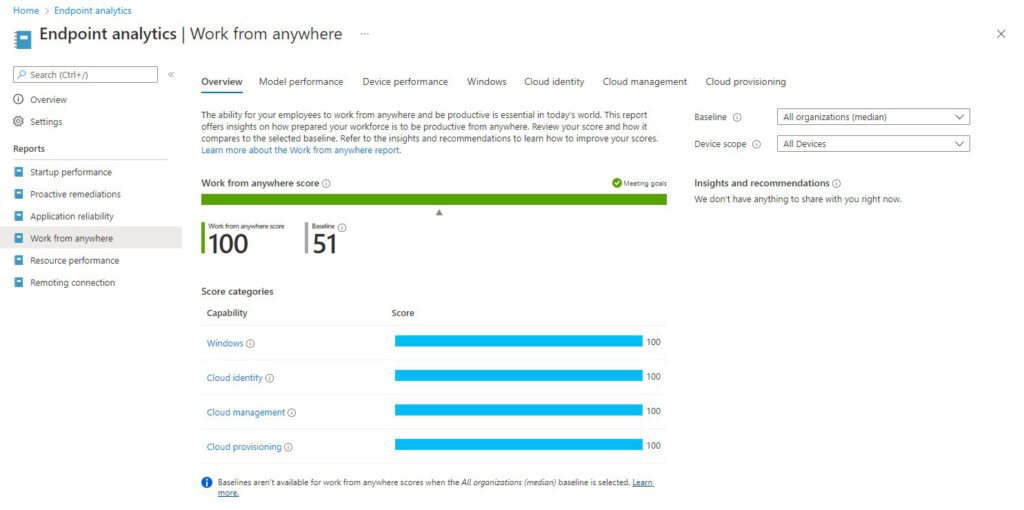
Work From Anywhere (All devices)
The Work from anywhere score represents a weighted average of the percent of deviecs that help your users to be productive from anywhere.The score works for both Intune and Config Manager enrolled devices.
The following metrics are used to calculate the work from anywhere score;
- Windows; measures the percent of devices that use a supported version of Windows.
- Cloud management; measures the percent of PCs that have attached to the Microsoft 365 cloud for additional capabilities.
- Cloud identity; measures the percent of devices enrolled in Azure AD or hybrid Azure AD.
- Cloud provisioning; measures the percentage of machines that are Windows 365 Cloud PCs or Windows Intune device that are both registered and have a deployment profile created for Autopilot.
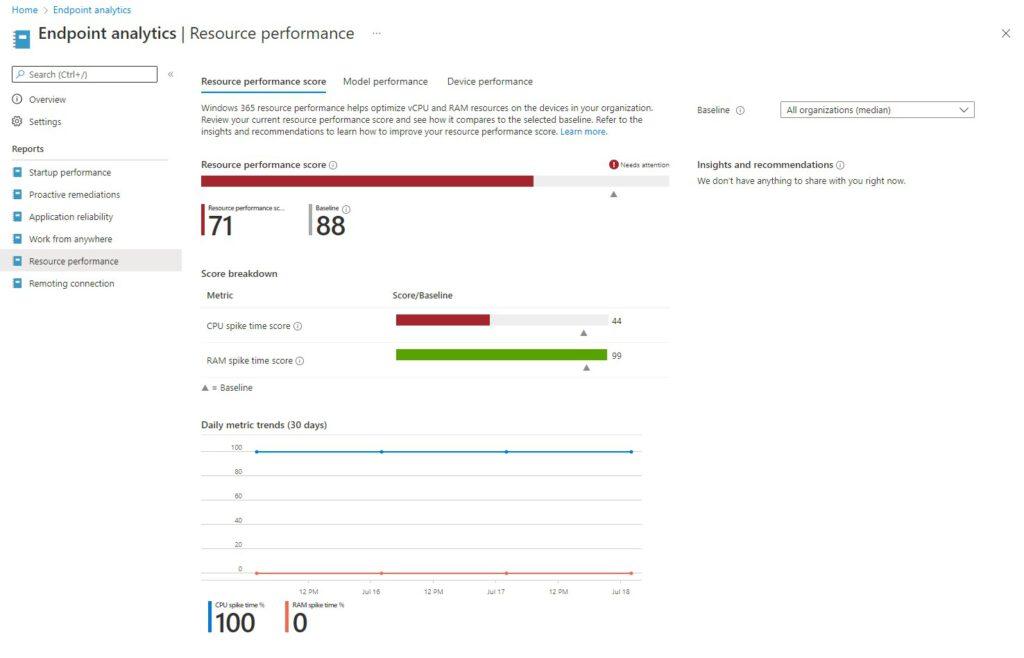
Resource Performance (All devices)
This report can be used to review the CPU and RAM spike times on the devices for your organization. I have a couple of Cloud PCs with relatively low vCPUs and RAM. In my report I can see that I should take a look at the CPU since it’s far beneath the baseline.
Remoting Connection (All devices)
This report shows the round trip time and sign-in time and shows the rating.
How To Increase Performance And User Experience
Upgrade The Virtual Hardware
Upgrading the virtual hardware is a great and easy way to increase the power of a Cloud PC. Here are the requirements to upgrade a Cloud PC;
- An admin needs the Global Admin or Intune Service Admin role
- The Cloud PC must have a status of Provisioned
- Resizing is not supported for a cloud PC provisioned through Group-Based licensing
- Cloud PCs that are Azure AD joined
Let’s see how the upgrade procedure works.
In Endpoint Manager, go to Devices, Windows 365, All Cloud PCs and click on the Cloud PC you want to upgrade.
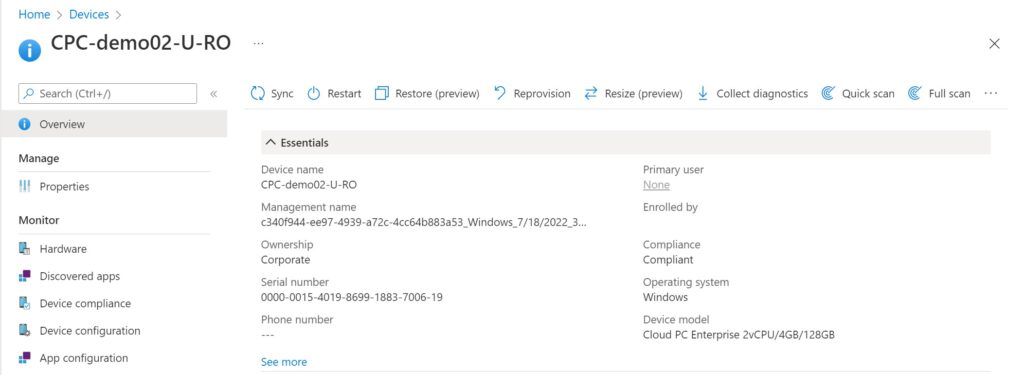
Click on Restore (Preview) in the ribbon. We can see the 10 restore points for this Cloud PC.
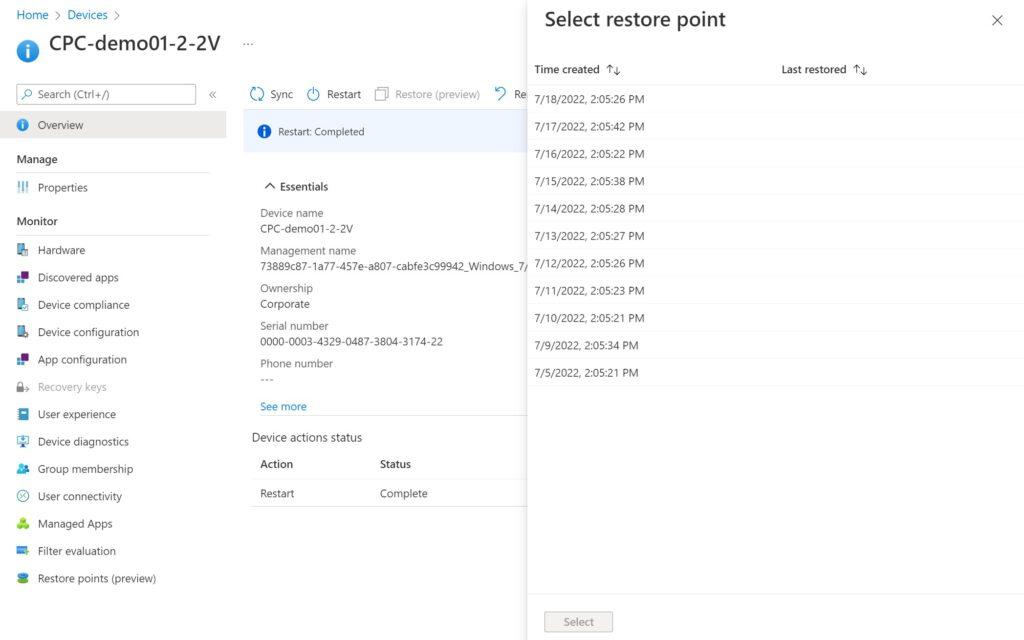
You can only choose models for which you have licenses available in your tenant. Currently we have a 2 vCPU/4GB/128GB Cloud PC. Let’s upgrade to a model with 8 GB of RAM. Click on Resize (Preview) in the ribbon, select the correct model and click on the Resize button.
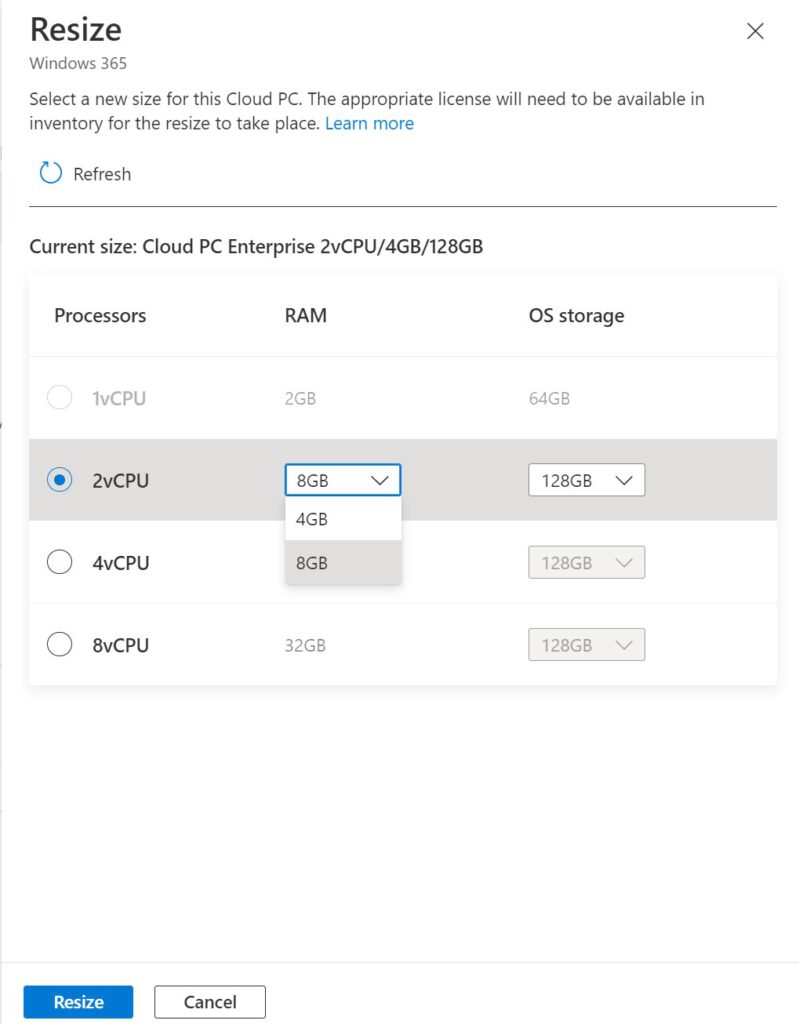
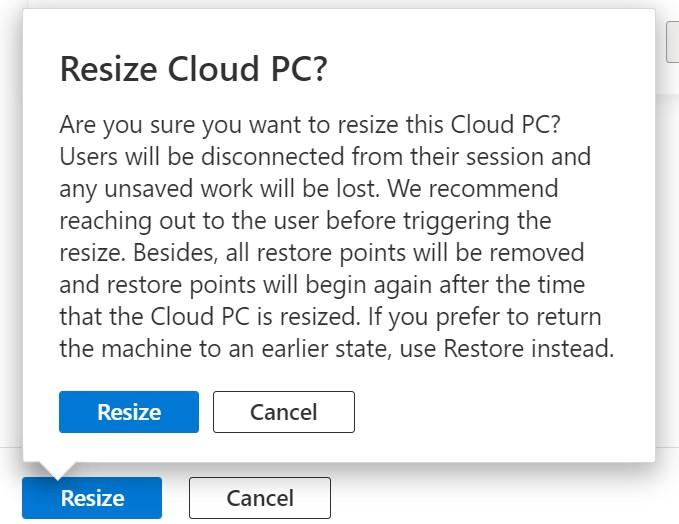
We get a notification that lets us know what the impact is of upgrading the hardware. We can also see that restore points will be removed.
If you get a very generic error at this stage, you probably want to have a look at the way the license is assigned to the user. Most likely you used group-based licensing and that scenario is not supported.
If you implemented modern profile management, most of the important user data is synchronized with the Cloud. In that case you could consider to remove the user from the group that assign the license, remove the Cloud PC from the grace period (be aware this is a destructive way to remove the Cloud PC) and then assign the correct license.
If everything checks out you get the following message:
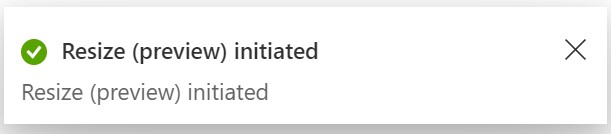
The status will change to Resizing in the meantime.

The upgrade is completed after the Cloud PC reboots successfully. The
Network Connectivity
The network connectivity for Windows 365 is the same as for Azure Virtual Desktop. By default RDP uses TCP based reverse connect transport to connect to the Cloud PC. The main advantages here is that it has the highest compatibility with various network connections. We can enable RDP Shortpath which uses UDP based transport which is designed for direct connectivity. Because it uses UDP instead of TCP we can get a smoother connection since it doesn’t have the overhead of a TCP session.
Should RDP Shortpath fail for some reason, we automatically fall back to TCP reverse connect transport.
Just add the following registry entry to enable RDP Shortpath:
REG ADD "HKLM\SYSTEM\CurrentControlSet\Control\Terminal Server\WinStations" /v ICEControl /t REG_DWORD /d 2 /fUse this registry entry to disable RDP Shortpath:
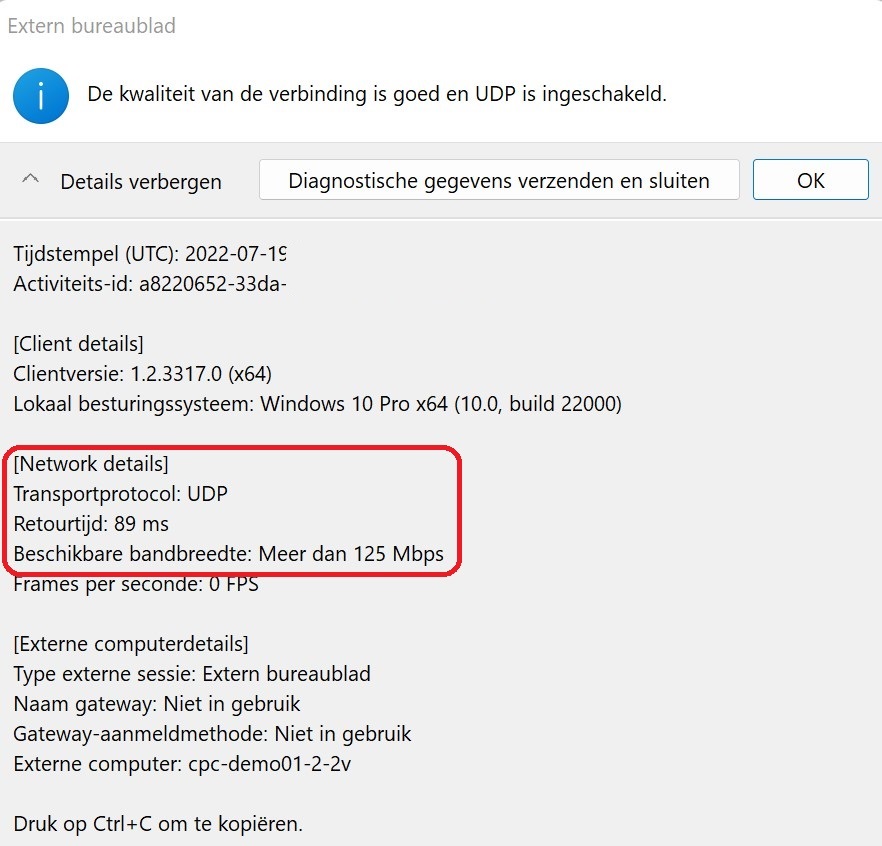
REG DELETE "HKLM\SYSTEM\CurrentControlSet\Control\Terminal Server\WinStations" /v ICEControl /fYou can verify if RDP Shortpath is used by logging into your Cloud PC. Click on the connection icon and check if UDP is used. In this case, it works!
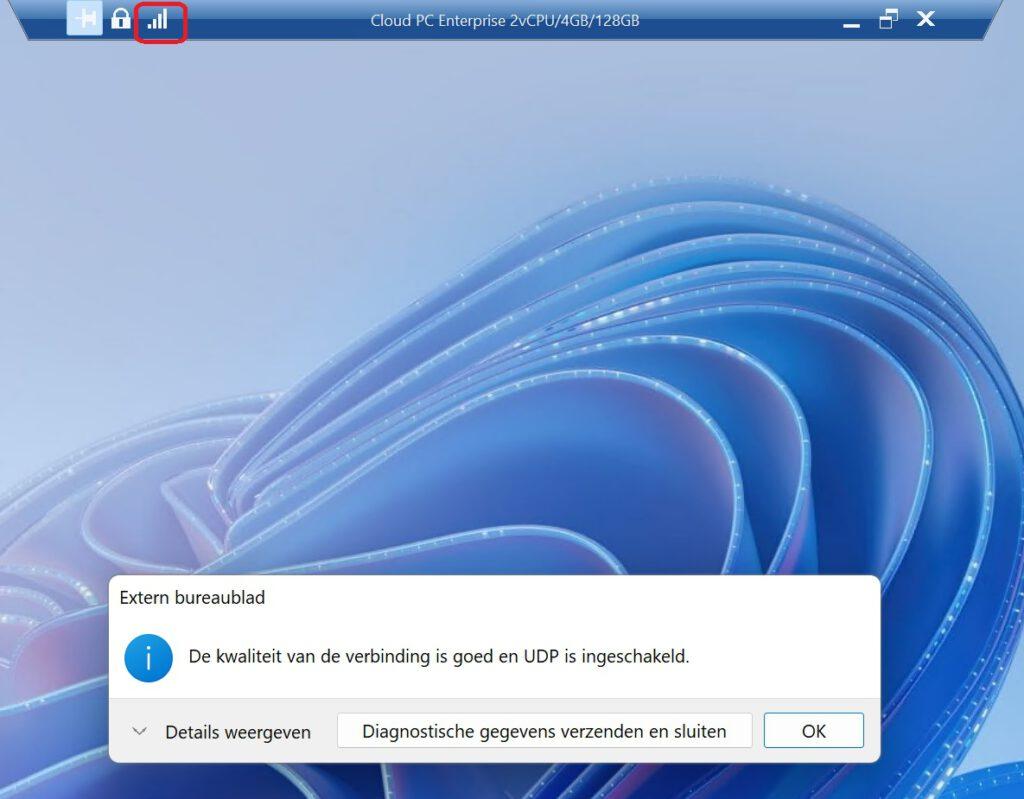
You can check the details for more information, like the available bandwidth and round trip time.
Using Microsoft Teams On A Cloud PC
Running Microsoft Teams on a Cloud PC gives us a different experience than running Microsoft Teams on a physical machine. We can implement some optimizations to improve the user experience and performance for Windows and macOS endpoints. Let’s take a look!
The first thing that comes to mind is the image that we’re using on the Cloud PC. Remember that we can use gallery images and custom (or golden) images. Gallery images are prepared by Microsoft and they are already optimized for Microsoft Teams. If you want to use a custom image, remember to prepare your image by;
- Adding a registry value in this registry. key; HKEY_LOCAL_MACHINE\SOFTWARE\Microsoft\Teams. Add a DWORD value named IsWVDEnvironment with a value of 1.
- Install the latest Visual Studio C++ runtime. This is required for the Teams WebRTC protocol redirection to work.
- Install the WebRTC Ridirector (websocket) plugin.
- Review the requirements and limitations.
- Prepare the network for Microsoft Teams.
- Confirm that the required components are installed (as mentioned above)
- Make sure your Cloud PC is sized correctly.
- Make sure your local machine meets the hardware requirements.
- Make sure you are aware about the known issues and limitations.
That concludes this demo on performance management for Windows 365.