
What’s up, everyone!
I’ve written a post on how to create a custom image for Azure Virtual Desktop in the past but I never went into any detail on how to create your own shiny custom image for Windows 365. So let’s do a two-part post on how to create a custom image for Windows 365.
The first post will show how to create a custom image and how to configure it in Intune so your Cloud PC’s can use the custom image.
The second post will go more into details on the different options you have to optimize your custom image.
Enjoy!
Requirements
To follow along you’ll need a Microsoft tenant with Windows 365 licenses, Microsoft 365 (in my case E3) licenses and a valid Azure subscription.
A custom image is only supported for Windows 365 Enterprise and Frontline.
Windows 11 only supports Gen2 virtual machines.
Use the Windows 365 Language installer to make sure you have the correct languages installed on your image.
Determine the requirements of the custom image
The process to create a custom image for Windows 365 looks a lot like creating a custom image for AVD but there are a couple of differences. The first thing we need to determine is what we need from our custom image. I would suggest to write your requirements down, for instance;
- Which operating system do you need?
- What apps do you need to install or uninstall?
- Are there any registry changes you need?
- Other optimizations you need, like VDOT?
Step 1: Create a custom image from an Azure VM
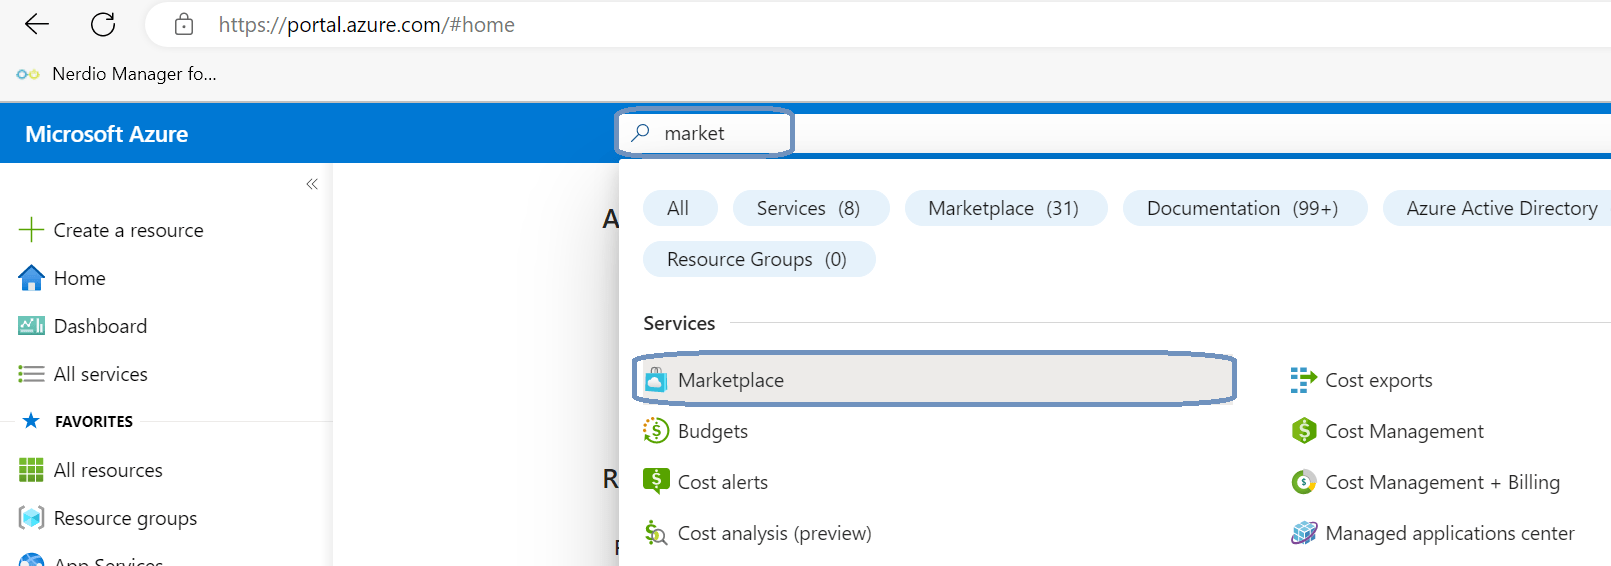
There are a couple of ways to get this done. You can either go to virtual machines from the Azure portal and create a new one or go to the Marketplace and start there. For this demo, let’s use the Marketplace. Let’s start by going to the Azure portal (https://portal.azure.com) and search for Marketplace.
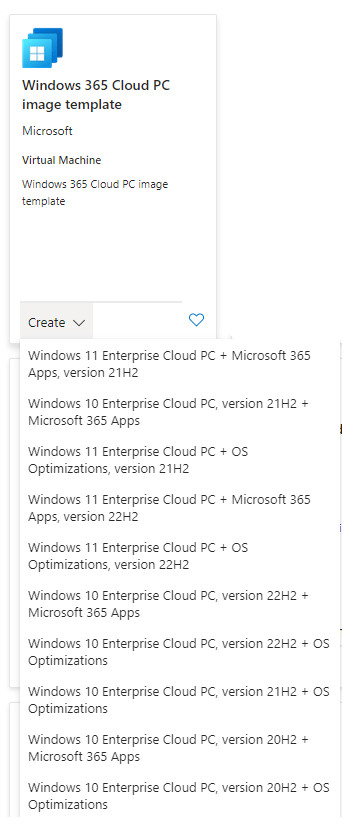
Just search for something like Cloud PC and you’ll find the Windows 365 Cloud PC image template.

There’s already a list of Windows 10 and 11 templates available. Just a short recap:
- + Microsoft 365 Apps: this template has the Microsoft 365 Apps already installed and it’s optimized for Teams.
- + OS optimizations: optimized for Team. It does not have the Microsoft 365 Apps installed.
- Only Enterprise editions are allowed.
- Multi-session is only for AVD, it’s not supported for Windows 365.
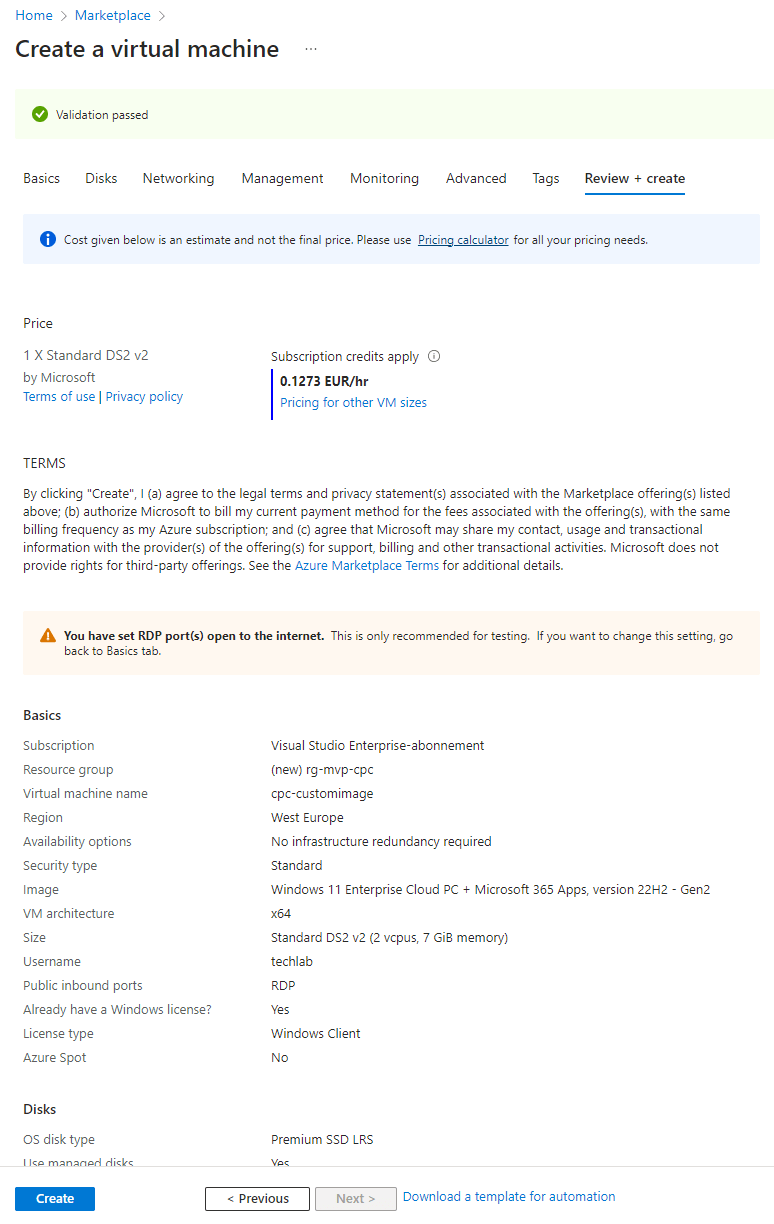
I’ll go with the latest and greatest and once I select the image I want I’m brought to the Create a virtual machine blade.

I won’t go into every detail on this page but I’ll highlight the most important ones:
- Give the VM a name
- Choose the correct Azure region
- You can actually change the image type if you want to. There’s a see all images link which will allow you to change the image.
- Choose the Size for your VM. For this demo the default is good.
- Provide local admin credentials.
- Inbound RDP: for demo or testing purposes this might be good enough. But I recommend another solution for production purposes, like a Basion host.
Creating the new VM might take a bit of time. Once the VM is available, I’d recommend you create a snapshot so you have a clean version you can revert to if needed.
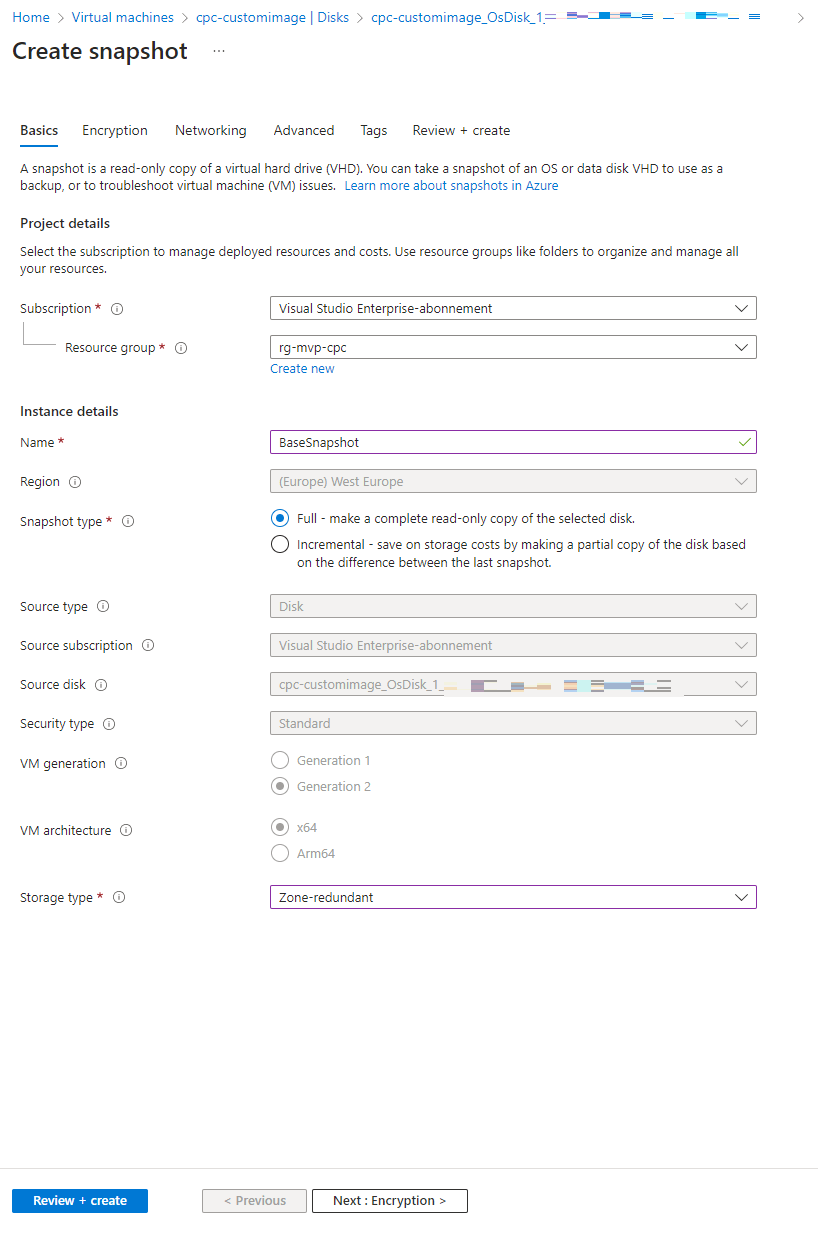
Step 2: Create the base snapshot
Let’s create our base snapshot. Go the the virtual machine you created earlier and select Disks. Click on your disk on the righthand side. Click the + Create snapshot button in the ribbon.

Give the snapshot a name and check continue. The default values look good for this demo so I’ll continue and create the snapshot.
Step 3: Customize the image
Now it’s time to customize the image to our liking. For instance;
- Optimize the operating system using the Windows Virtual Desktop Optimization Tool
- install Microsoft updates
- install apps
- your own required optimizations or settings
- finish up with running sysprep
Let’s keep things smooth and simple and install some basic apps like 7Zip and Notepad++.
Finish up by running Sysprep:
sysprep /generalize /shutdown /oobe
* In my case sysprep wasn’t able to run because of the Notepad++ installation. I will get into more detail on the next upcoming post. For now the solution was to remove Notepad++ from the image.
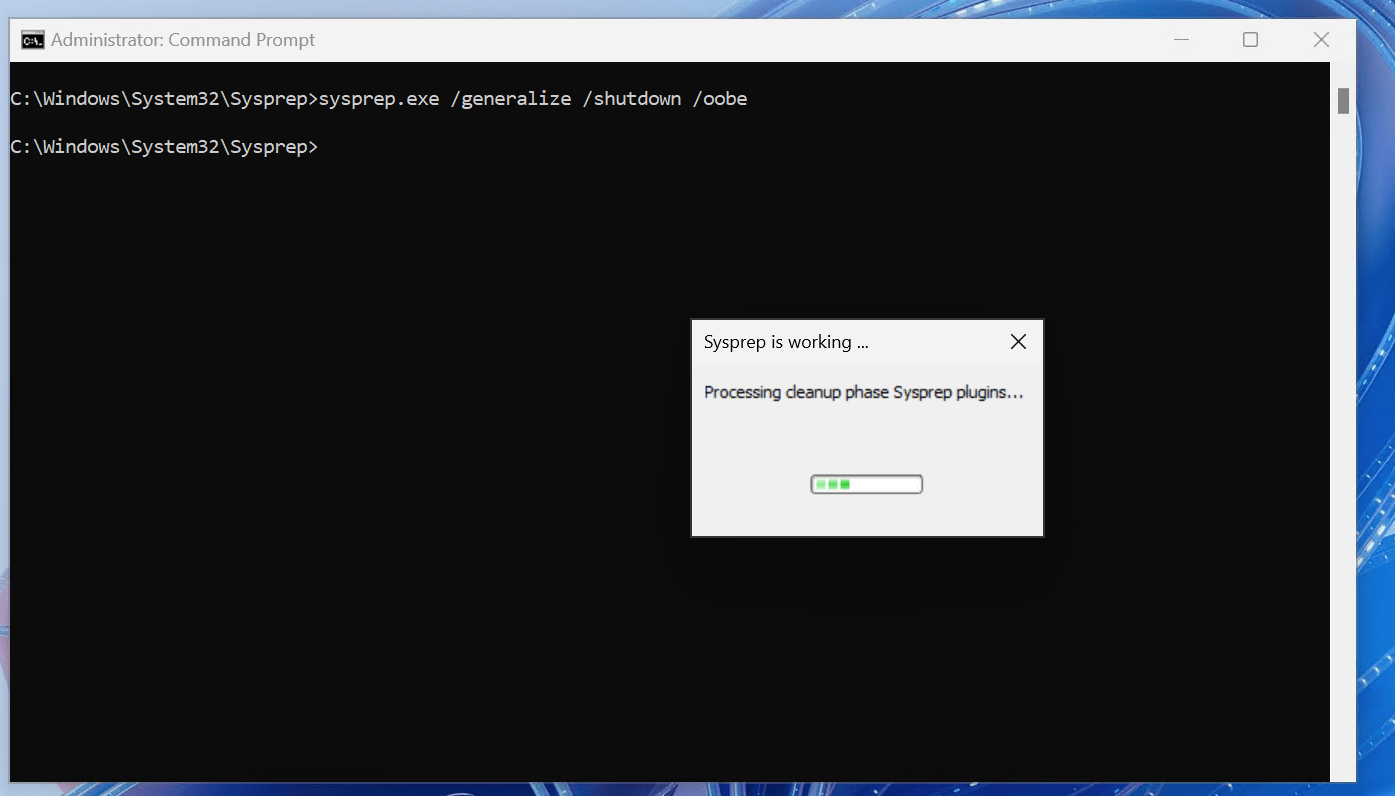
The process is complete once the VM shuts down.
Step 4: Capture the image
Open the virtual machine from the Azure portal. From the overview, select the Capture button in the ribbon.

Probably the most important choice we have is where do we want to store the image? We got two choices:
- Azure compute gallery
- Managed image
Storing an image in a Azure compute gallery has many benefits. You can replicate the image to different regions and have multiple copies for instance while a managed image does not. For this demo, I’ll use the managed image option.

You can add some tags if you want and create the image if you are happy with the settings.
Step 5: Configure the custom image in Intune
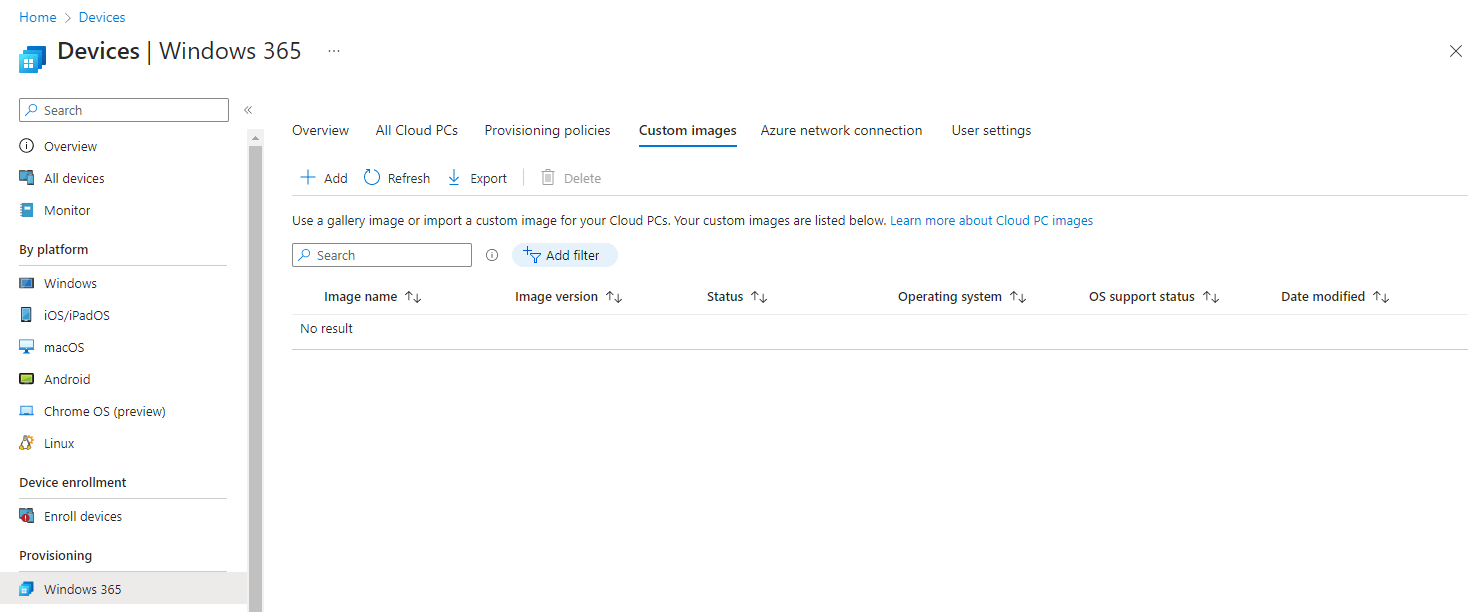
First we will need to add the newly created image to the custom image node in Windows 365 and then we can use it in our provisioning policies. Sign in to the Microsoft Intune admin center, Devices, Windows 365, Custom Images.
Provide a name and version for the image. Select the subscription and add the newly created image. Adding might take a bit of time.
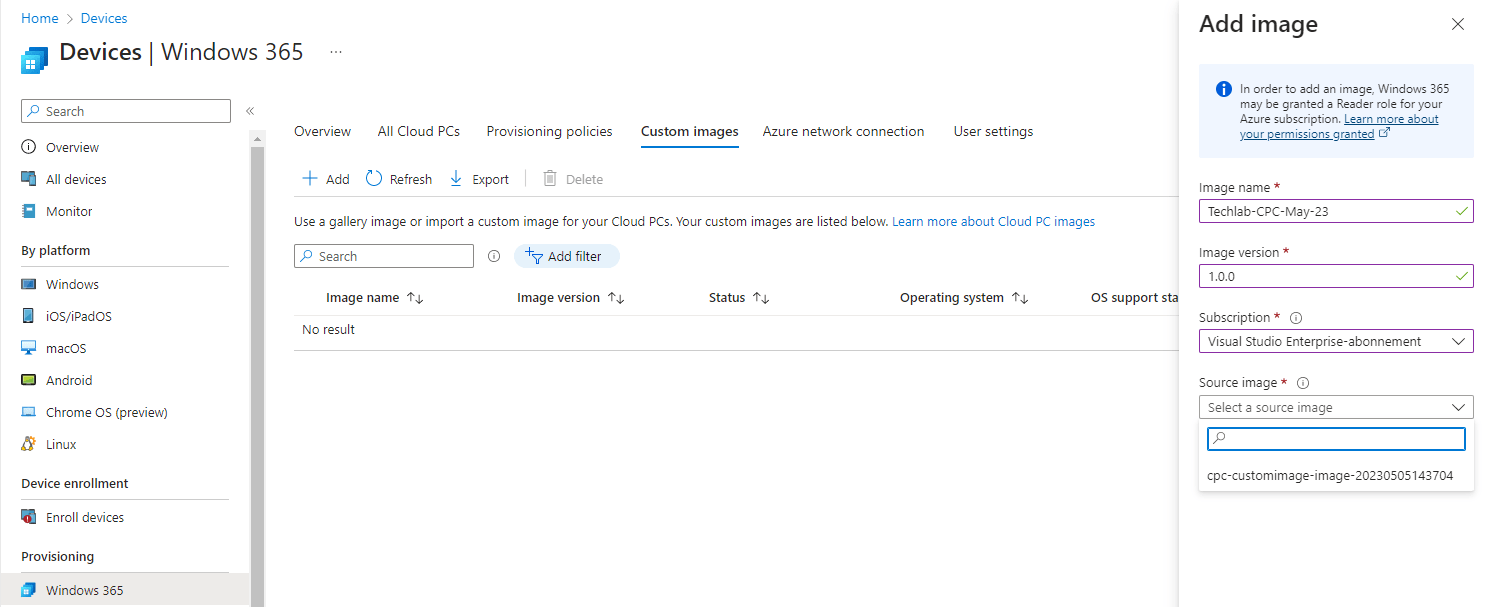
Once the image is added successfully we can use it in our provisioning policies. We can simply create a new provisioning policy and select the newly added custom image or we can edit existing provioning policies. But remember that existing Cloud PC’s will need to be reprovisioned before they will use the custom image.
Resources
I used the following resources for my post:
Create custom images languages
Virtual Desktop Optimization Tool