What’s up, everyone!
Chances are that you are already familiar with Nerdio’s Cost Estimator which is a great tool to plan for an AVD deployment and get an indication of the costs and savings. It’s builtin to Nerdio Manager for MSP and we can access it on the Nerdio website.
But the legends at Nerdio didn’t stop there! Nerdio announced the availability of Nerdio Advisor which contains the AVD modeler. It’s available in Nerdio Manager for Enterprise. Think of the AVD modeler as a way to design a deployment using a questionnaire of sorts and get an accurate indication of the cost. Let’s take a look at this awesome feature!
Prerequisites
You’ll need to following to make use of Nerdio’s AVD modeler:
- A valid Azure subscription
- The appropriate Azure roles
- Nerdio Manager for Enterprise v. 4.7.0 or higher
The AVD modeler
Login to Nerdio Manager for Enterprise (NME from now on) and navigate to Advisor, AVD Modeler.
The modeler screen is made up of two parts, like most of Nerdio’s interface;
- Models; We can create our models here.
- AVD Modeler tasks; An overview of the tasks that have been created.

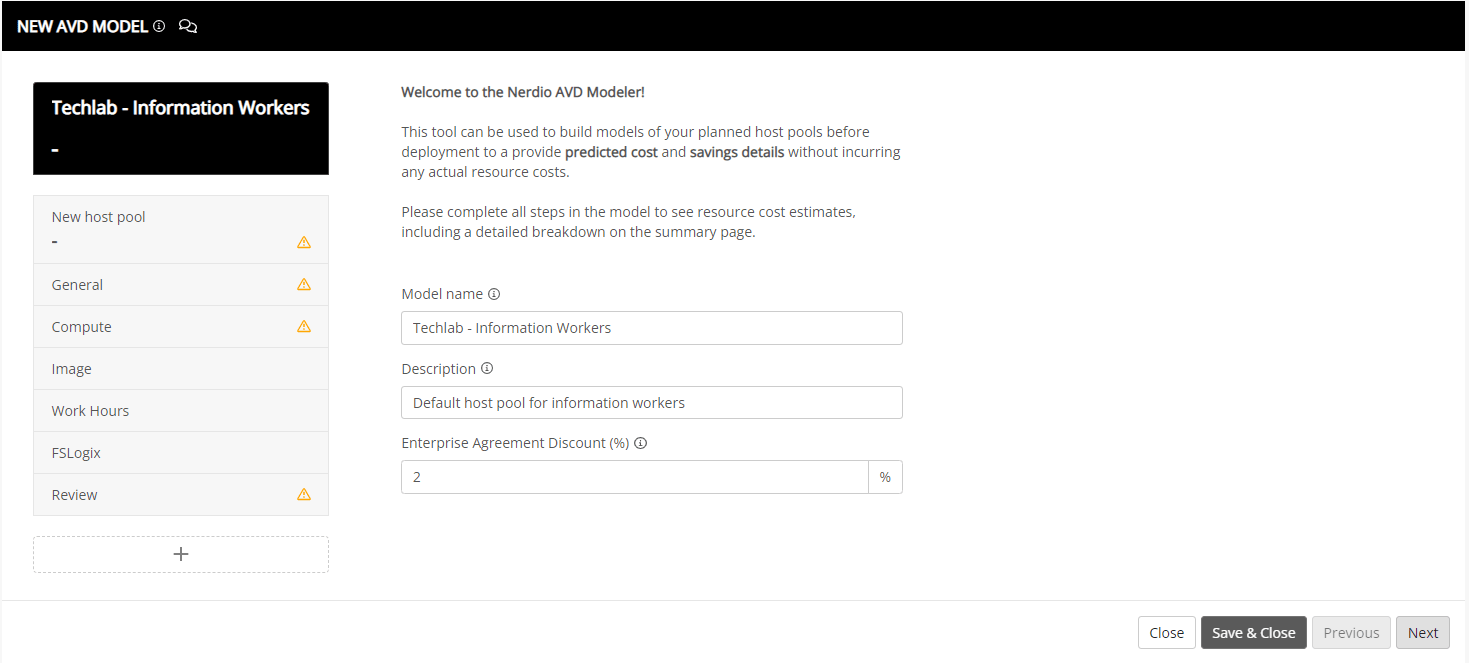
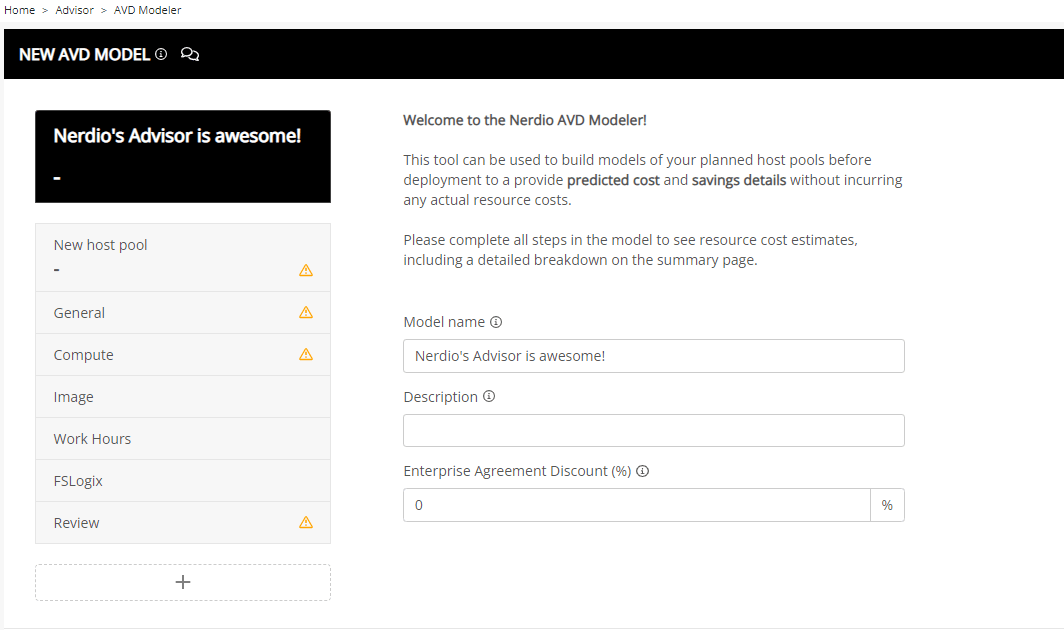
Click the Add button to create a new model. Immediately we can see the different steps for each host pool that the modeler will take us through;
- General: General information about the host pool.
- Compute: Determine the user workloads and VM Sizing etc.
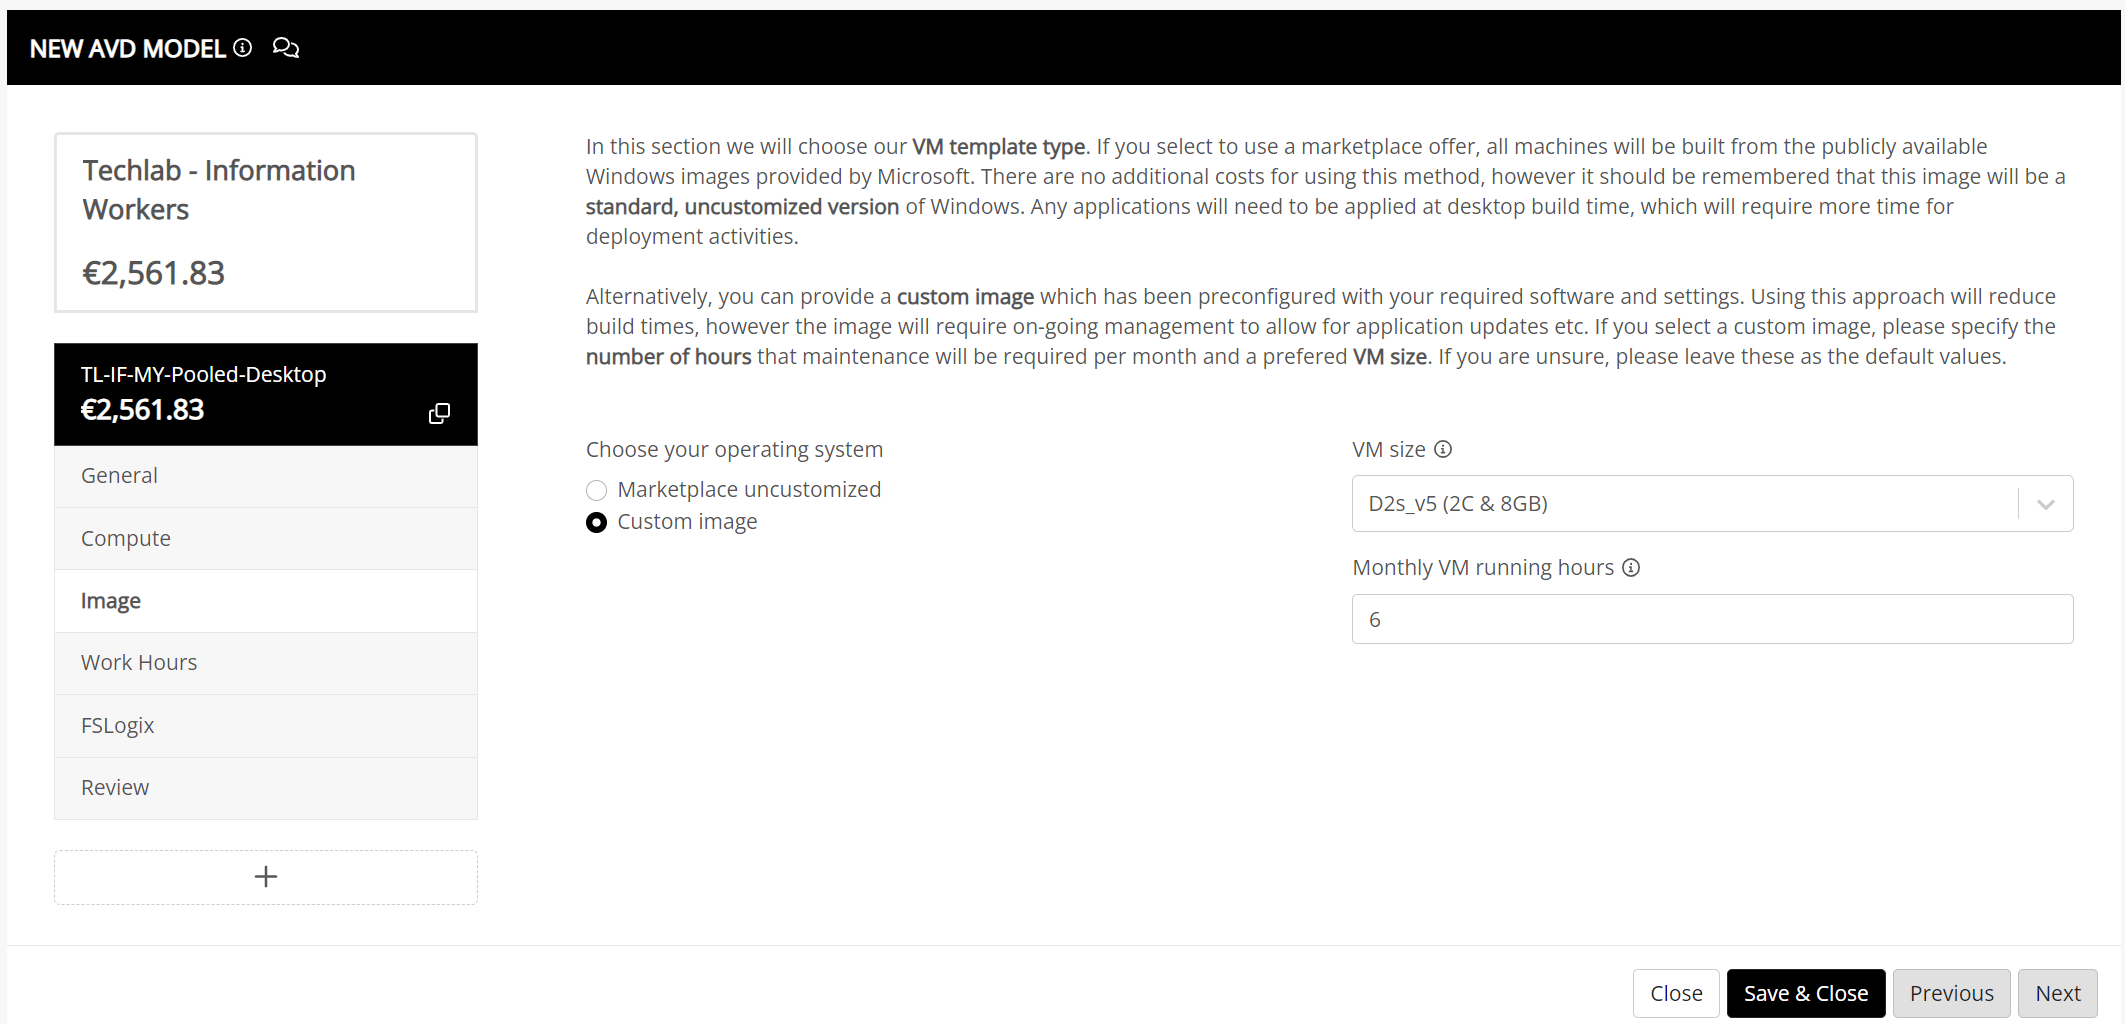
- Image: Choose a marketplace image or a custom image.
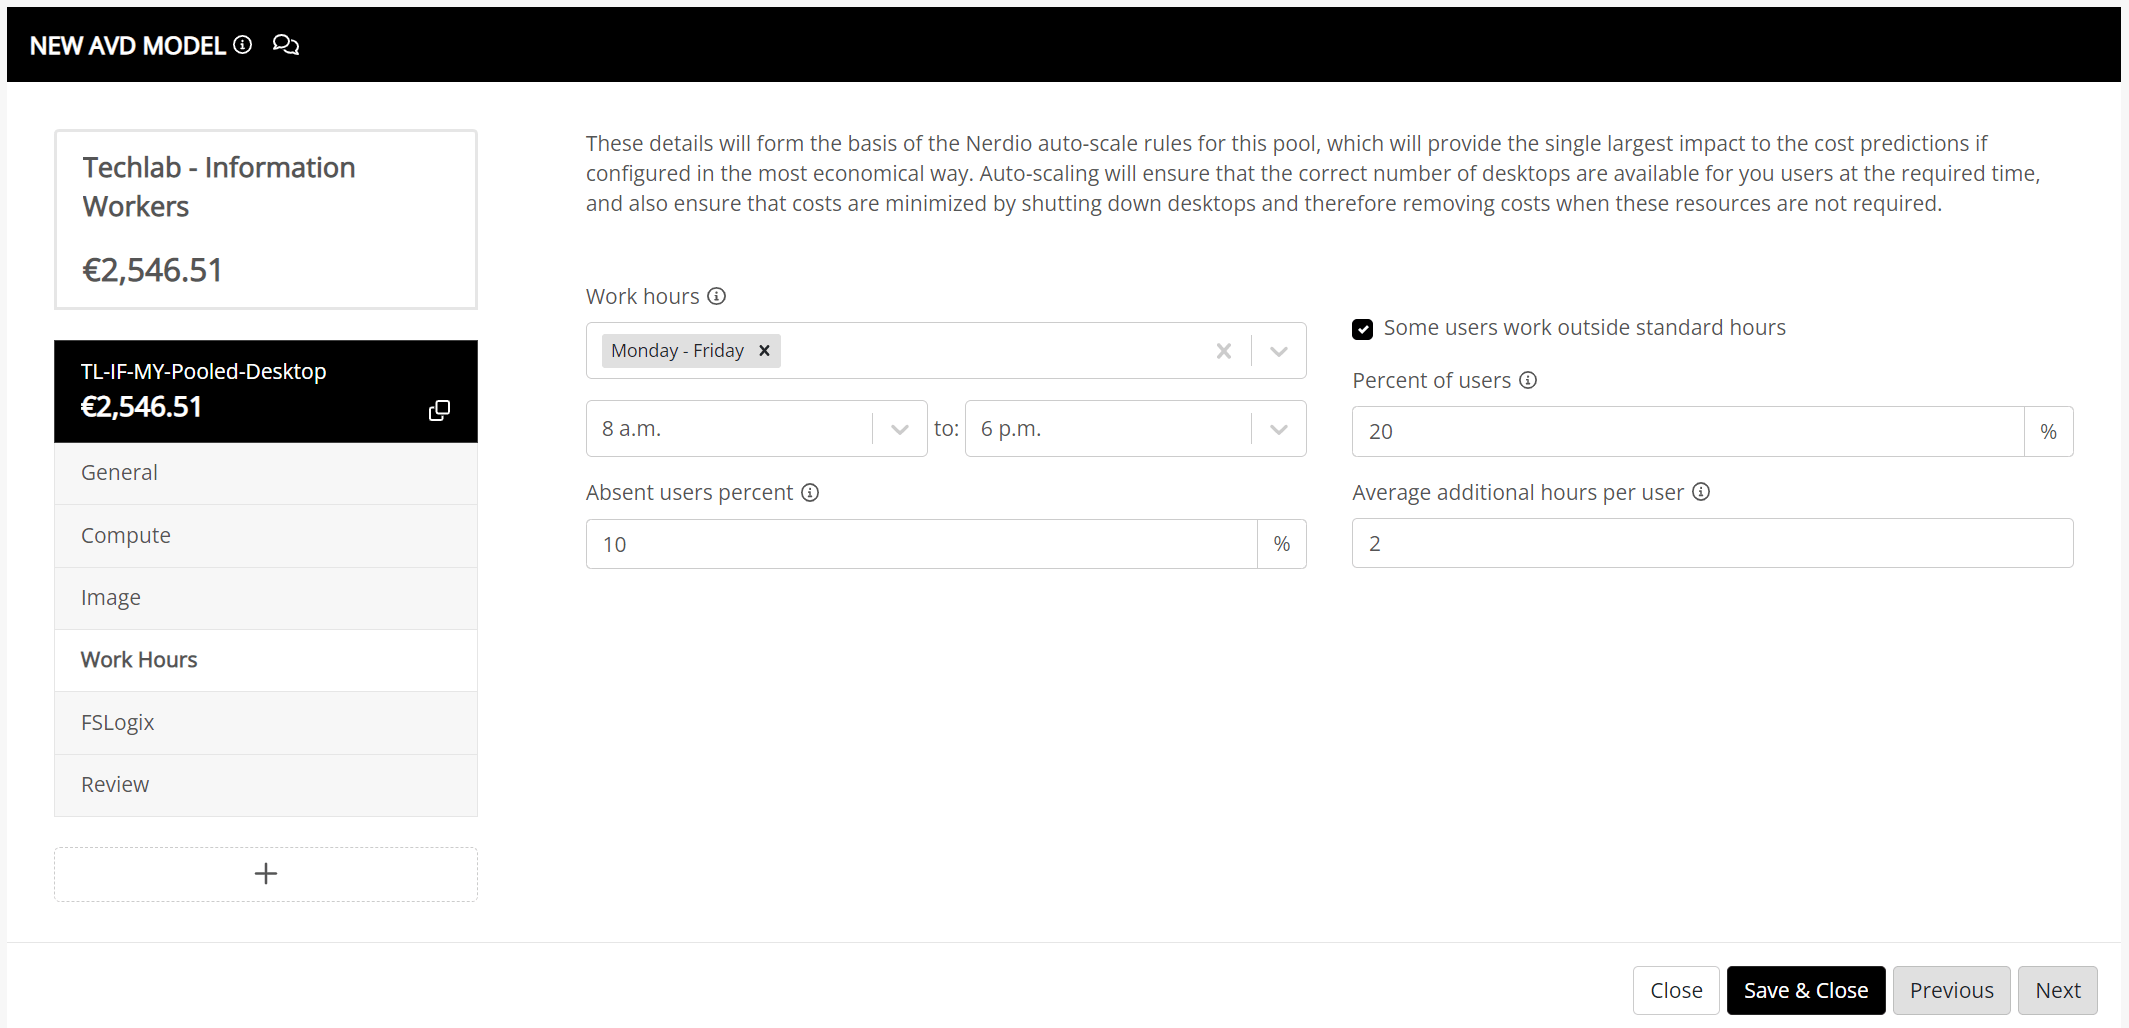
- Work Hours: Determine the work hours.
- FSLogix: Determine the storage of the FSLogix profiles and the expected size per profile.
- Review: An overview to admire your awesome work.
Just enter a model name and give it a good description. If you are eligible for an Enterprise Agreement Discount, you enter the percentage here. Click Next to continue.
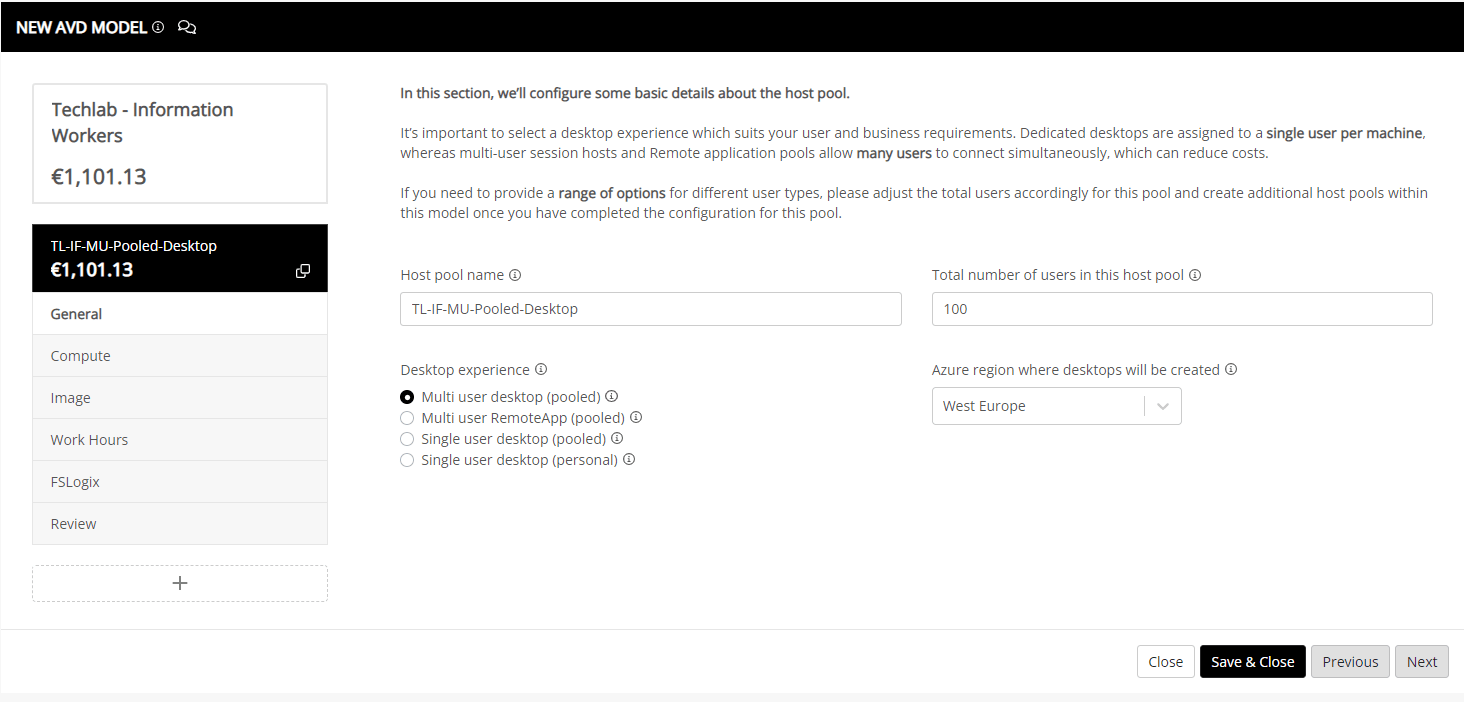
Provide a name for your host pool and enter the number of users in this host pool. Choose the desired desktop experience and the Azure region. In my case I went with a pretty default scenario, a multi-user full desktop (pooled) host pool with 100 users. Immediately I can see a cost estimate. The desktops will live in the west europe region. Click next to continue.
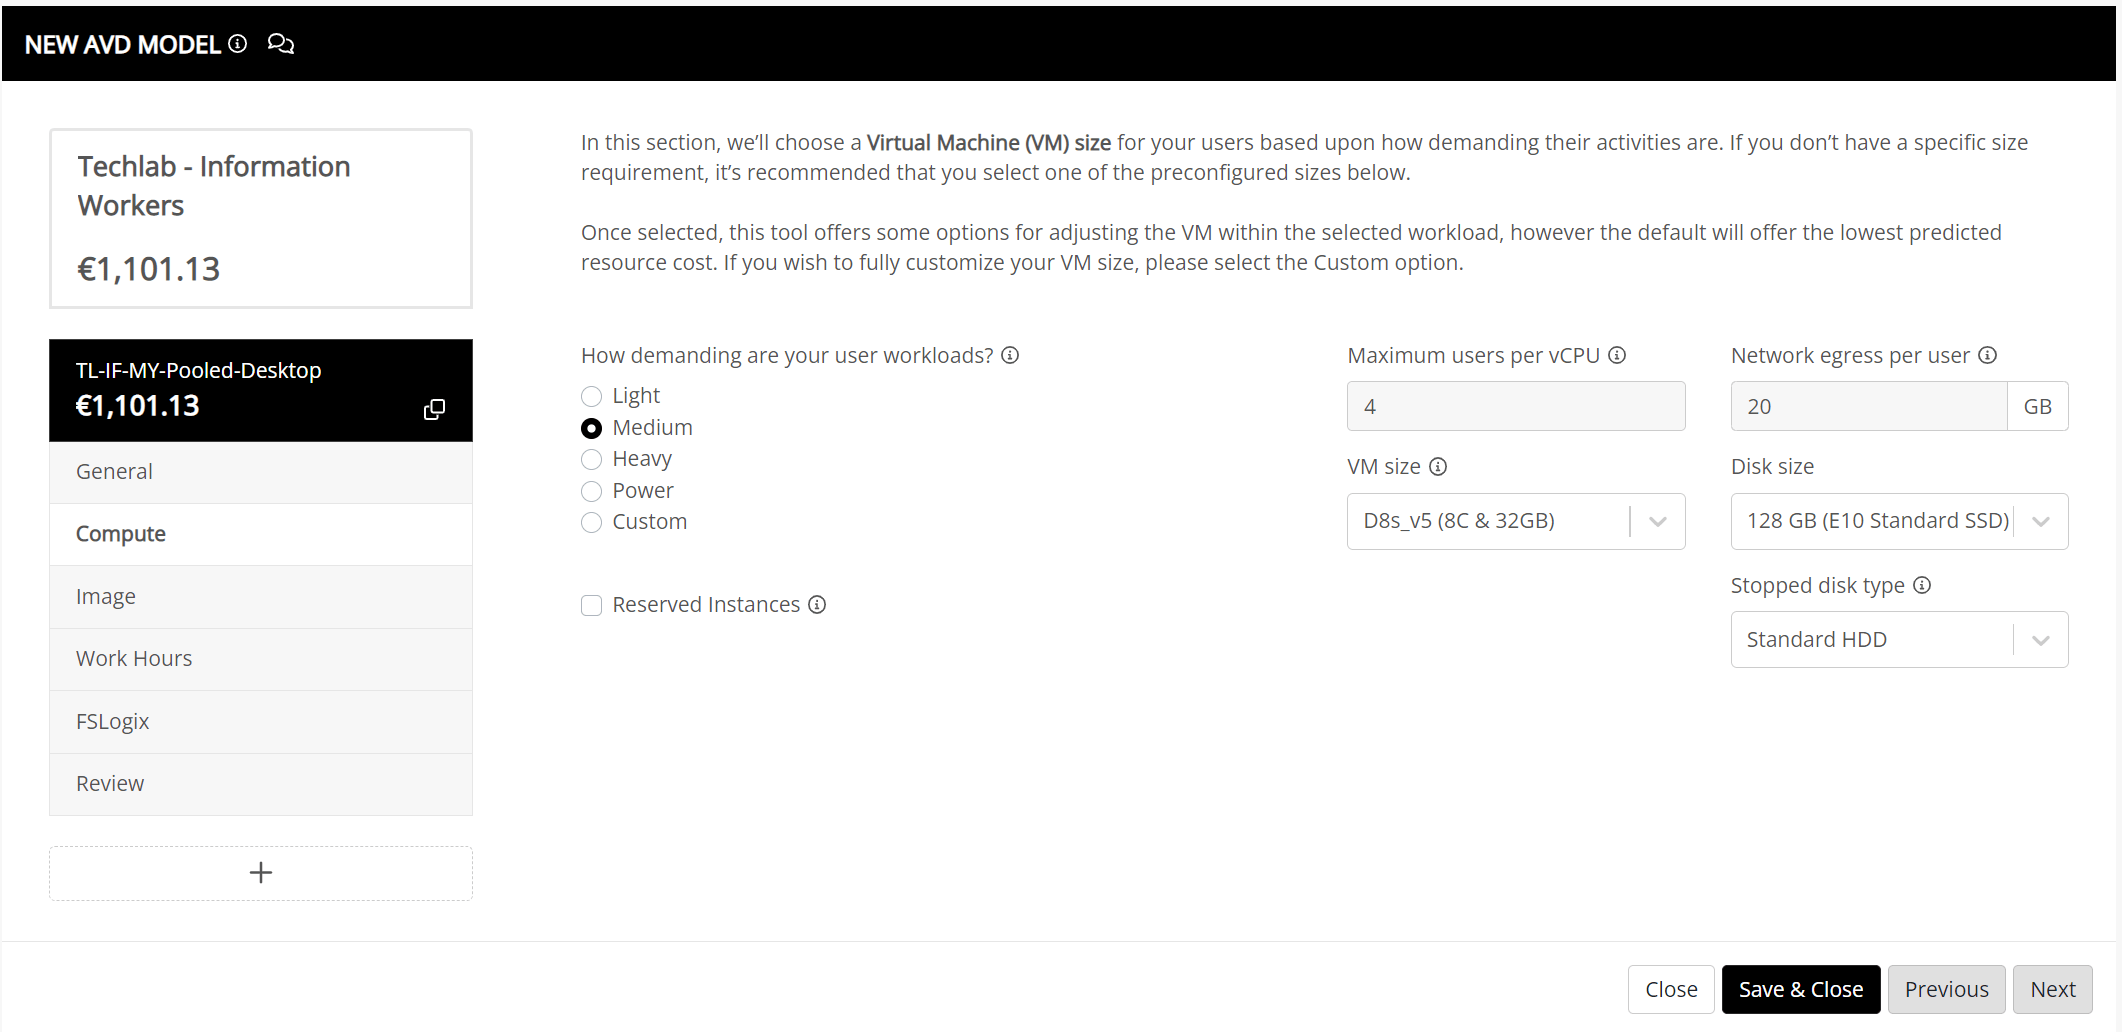
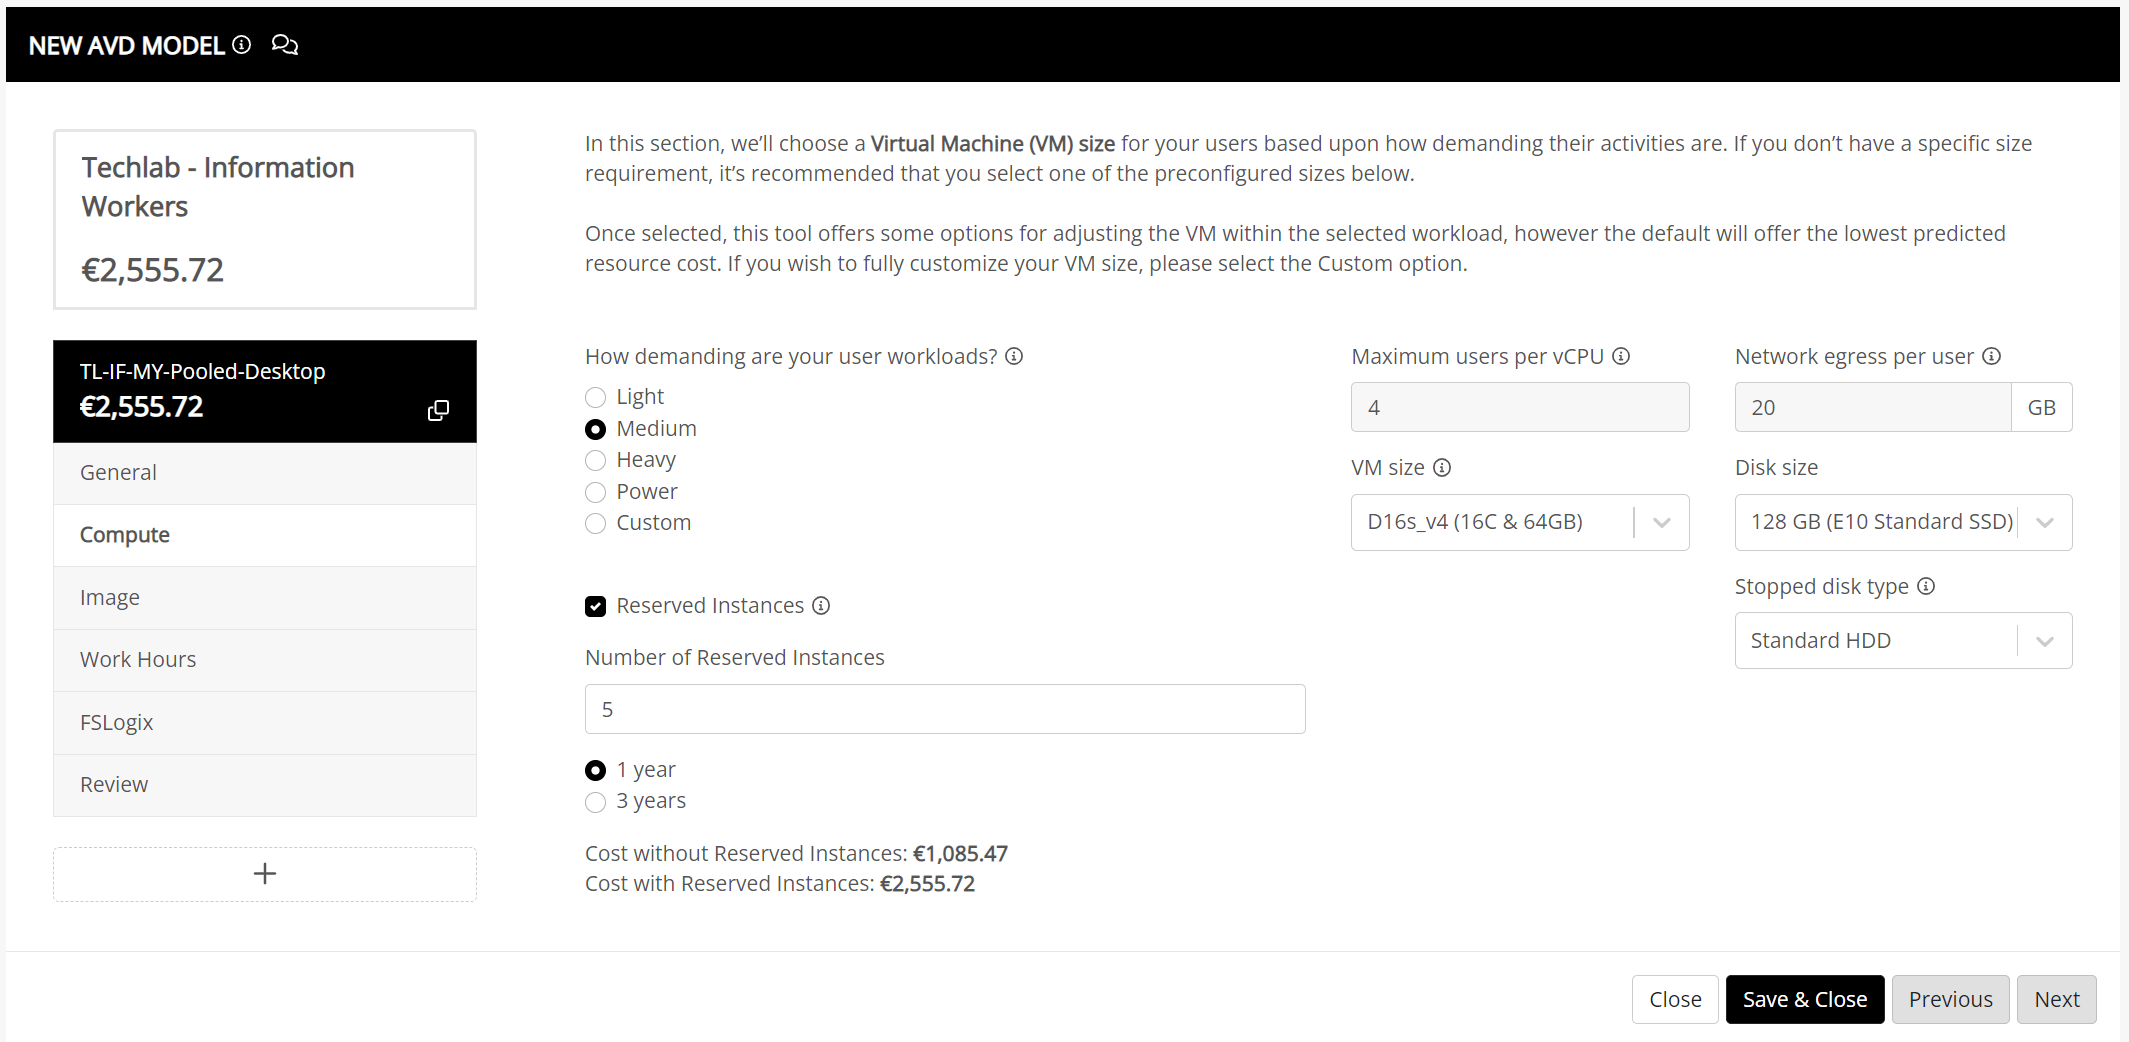
The next step is all about Compute. Nerdio already preconfigured a couple of things based on official Microsoft documents. So we can basically start with the defaults or tailor the experience to our liking.
First we can choose the type of workload for our host pool. We can choose between the following;
- Light: 6 users per vCPU & 10 GB network egress per user.
- Medium: 4 users per vCPU & 20 GB network egress per user.
- Heavy: 2 users per vCPU & 30 GB network egress per user.
- Power: 1 user per vCPU & 40 GB network egress per user. The VM size will change to D16s_v4 (16C & 64 GB).
- Custom: The ability to define the workload yourself.
Let’s continue to the image settings. You can choose between a default Marketplace image (marketplace uncustomized) or a custom image. Since you’re going to need a VM to create your custom image, you can choose the VM size and specify the running hours.
Nerdio Manager is awesome at autoscaling your environment. So let’s take a look at when our users are most active. You can tune these hours on the Work Hours tab.
Determine the workdays and the peak hours. You can also enter a percentage of users who are generally absent.
You can also check the box to enter a percentage of users that work outside of business hours.
A great way to tune your environment!
User profiles are generally stored in FSLogix profile containers. These are stored on Azure Files (or NetApp files) and they consume storage space which has a cost. So next up we can determine the size of the user profiles and select our storage solution.
The size (75 GB) is just an example.
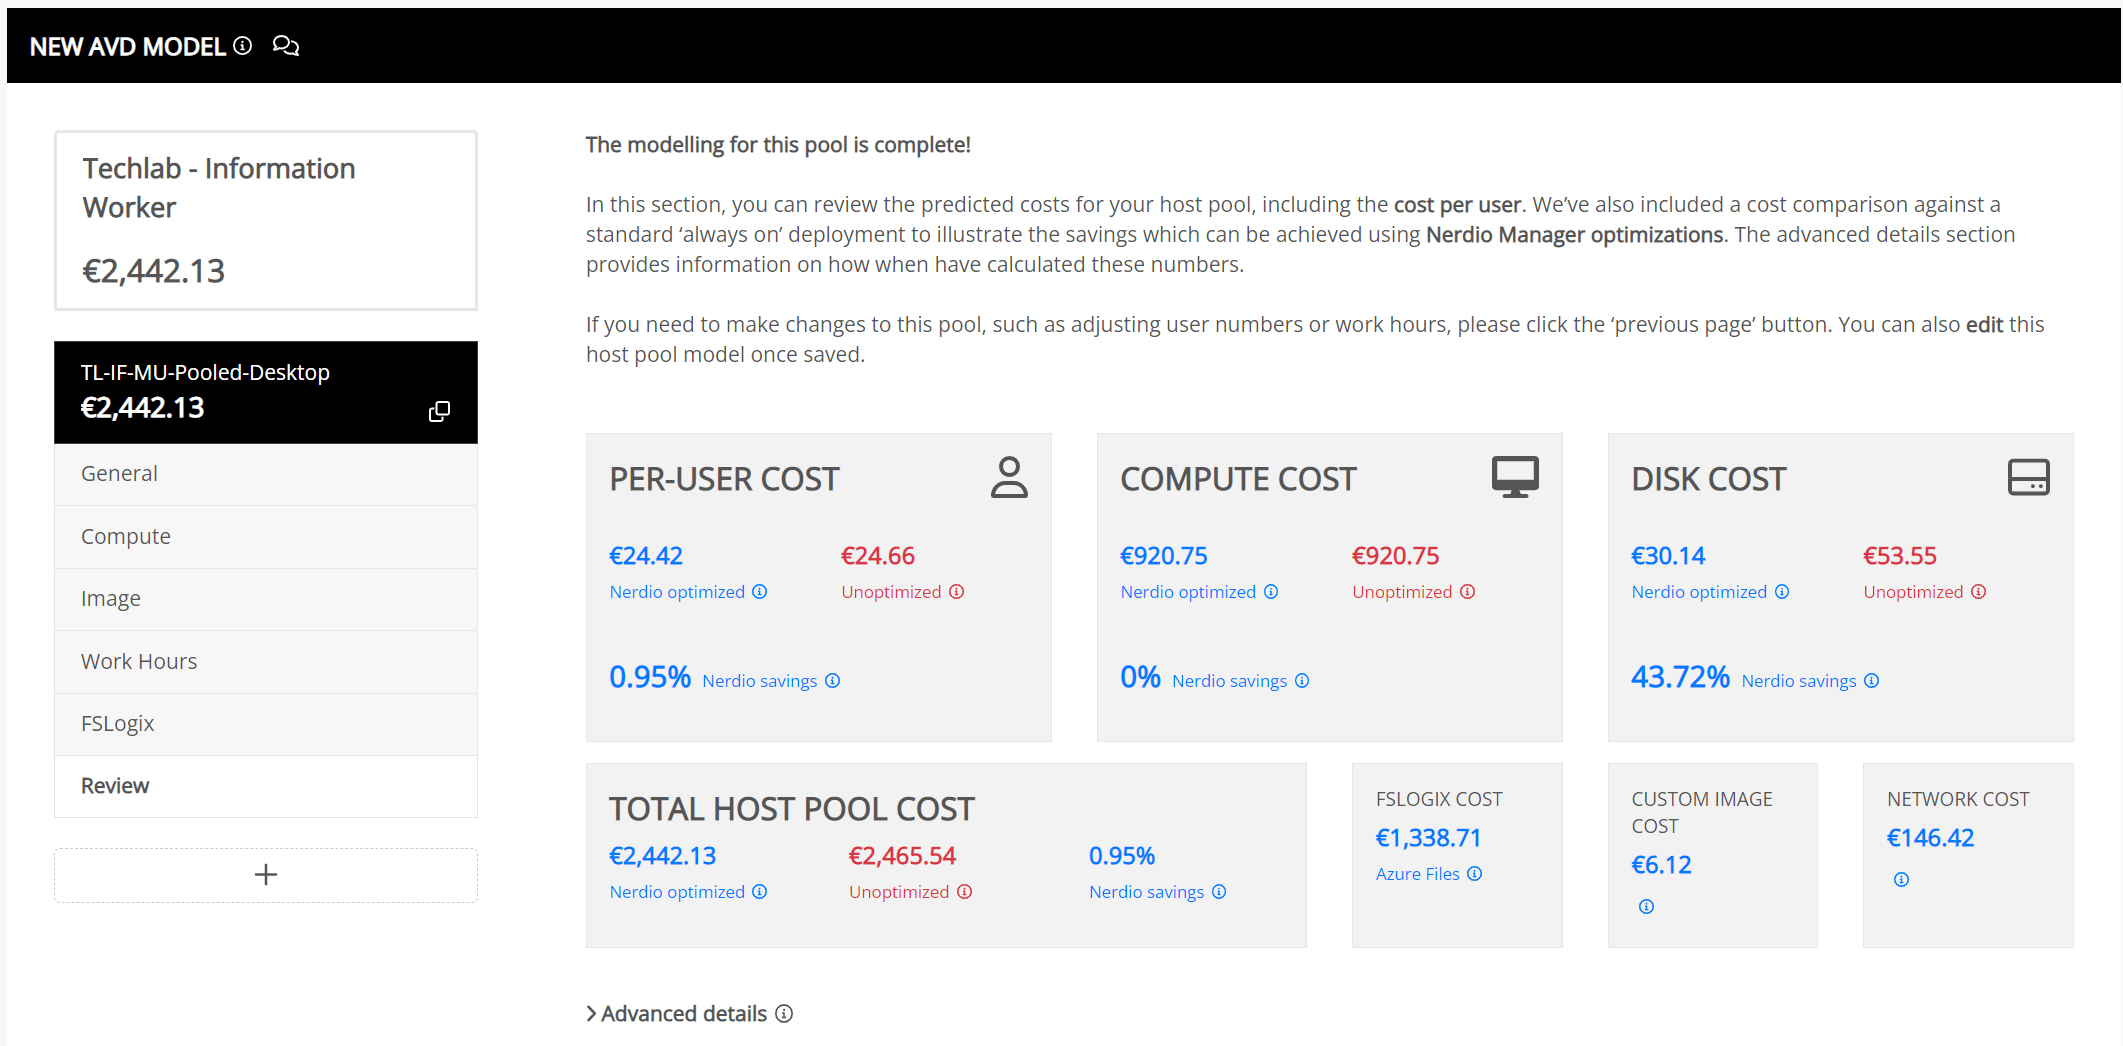
You can continue to the review screen once you entered all the details of this host pool. You’ll see a high level overview of the costs;
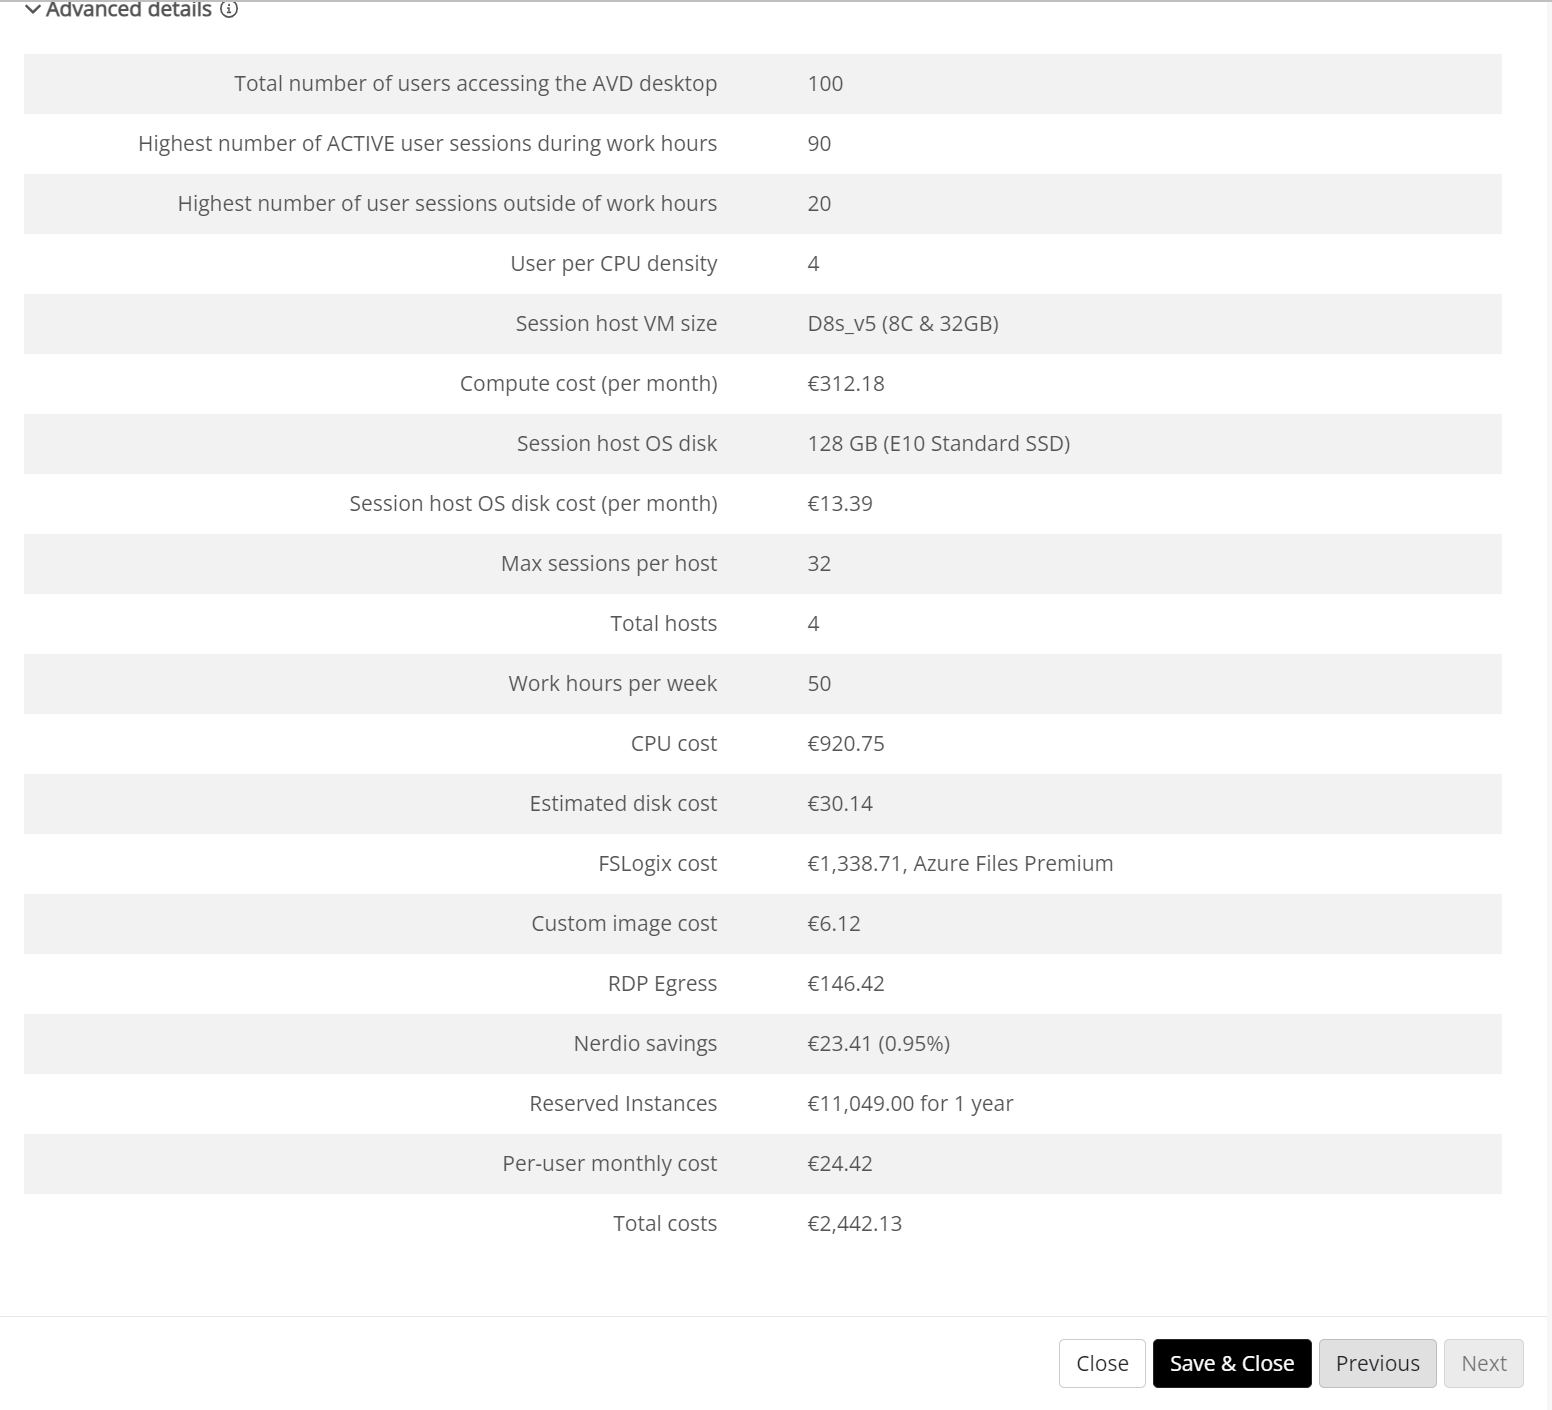
You can get more details if you expand the Advanced details part:
You can also add more host pools to this model if you want to. Just click on the + button to add a second one. I just added a second one for consultants without any RI’s.
I think this a great way to compare different deployments to each other. We can see that Nerdio is able to save on costs even when you are using reserved instances and is saving a lot more on costs when you are not using reserved instances.
Make sure to save your AVD model so you can review and edit it later on.
Happy modeling!

