What’s up, everyone!
Here’s an updated guide on how to implement Azure MFA on an existing RDS infrastructure. This version has some great improvements as it also shows how to implement Azure MFA in a redundant way.
Preparation
I found it helpfull to create a cheatsheet with the servernames, IP addresses and the RADIUS shared secret(s). This will save you a lot of type work during the configuration phase.
Prerequisites
Microsoft provides us with some prerequisites. At the time of writing, the prerequisites are;
- Remote Desktop Services (RDS) infrastructure
- Azure AD MFA License (Azure AD P1 right)
- Windows Server software
- Network Policy and Access Services (NPS) role
- Azure Active Directory synced with on-premises Active Directory
- Azure Active Directory GUID
There are some things to look out for. For instance, make sure your users have the correct license so they have the Azure AD MFA right. When in doubt, consult one the many what-did-i-just-buy sites.
Authenticator options
Take in account that the RD Gateway does not provide an option to enter a verification code. This tells us there are only two ways to complete the multifactor logon;
- Use the Microsoft Authenticator with push notifications
- Use phone verification
NPS Extension
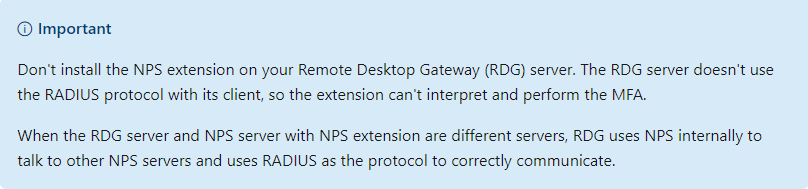
There’s a nice gotcha with the NPS extension as well. The Microsoft document tells us we shouldn’t install the extension on the gateway server because that server does not use the RADIUS protocol with it’s clients. Therefore we need to install the NPS role on a different server. Here’s the info;
The enviroment
Every server in the environment uses Windows Server 2019 as the operating system. The environment consists of the following servers;
- 2x RD Gateway / Web servers
- 2x RD Connection Broker servers
- 2x NPS servers with the Azure MFA NPS Extension
- An SQL database used by the Connection Broker for high-availibility
- Enough RD Session Host servers to create a collection
- 1x File server to store FSLogix containers
- 1x Management server for the RDS Licensing role
Step 1: Configure the RD Gateway Servers
Configure the Remote Desktop Gateway Manager
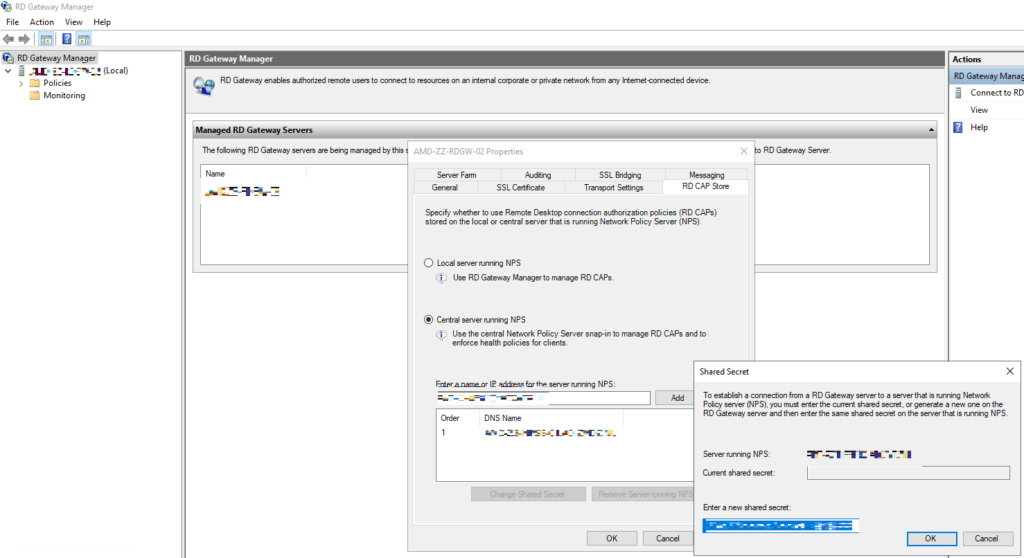
Logon to the first RD Gateway server. Open up Servermanager and open the Remote Desktop Gateway Manager console. Right-click on the servername and select Properties. Select the RD CAP Store tab. Change the setting to Central server running NPS. Add the NPS servers to the console. We will be prompted for a DNS name or IP address along with the shared secret.
Once the NPS servers are added, we should see them in the RD Gateway Manager console.
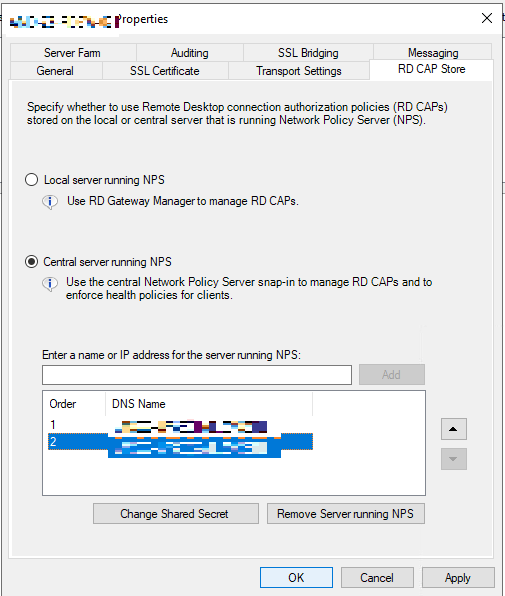
Click the OK button and close the Remote Desktop Gateway Manager console. Since we have two RD Gateway servers, repeat this step on the second RD Gateway server.
Configure the NPS role on the Remote Desktop Gateway server
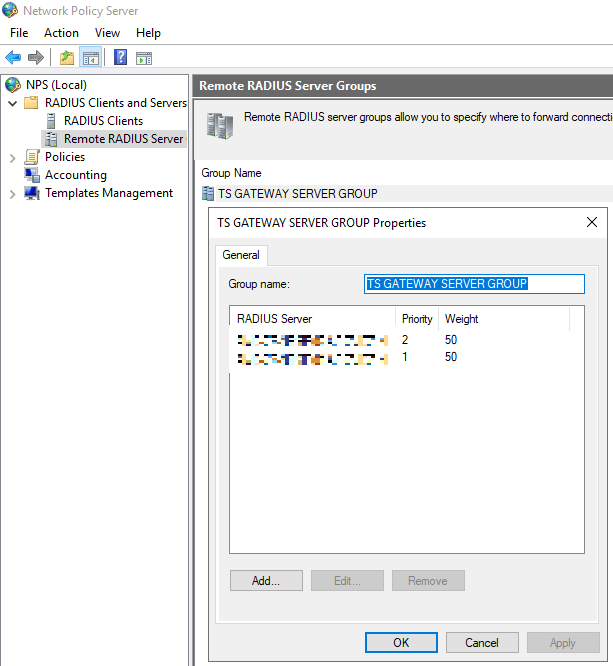
Open Servermanager and open the Network and Policy server console. Open the Remote Radius Server Groups node. It should contain the TS GATEWAY SERVER GROUP. This group was created and provisioned with servers when we set the Central Server running NPS setting in the RD Gateway Manager console. It should look like this:
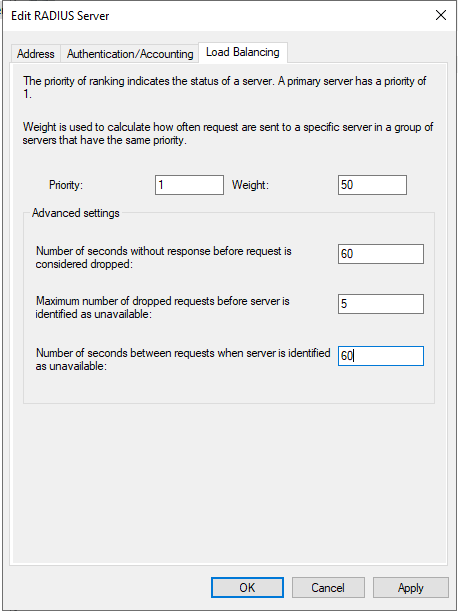
Doubleclick each server and configure the Load Balancing options. There is no need to change the other settings. The shared secret was entered during the previous step.
To allow users enough time to respond to multifactor requests, change the values on the load balancing tab to:
- Number of seconds without response before request is considered dropped: 60
- Maximum number of dropped requests before server identified as unavailable: 5
- Number of seconds between requests when server is identified as unavailable: 60
NPS by default sets different priorities to servers when added via de Remote Desktop Gateway Manager console. It is possible to set the same priority to the servers. Requests will then be distributed by using the weight indicator.
This is a screenshot of the first server:
This is a screenshot of the second server:

Then we add the NPS servers as RADIUS client to the NPS server. Click on the RADIUS Clients node.
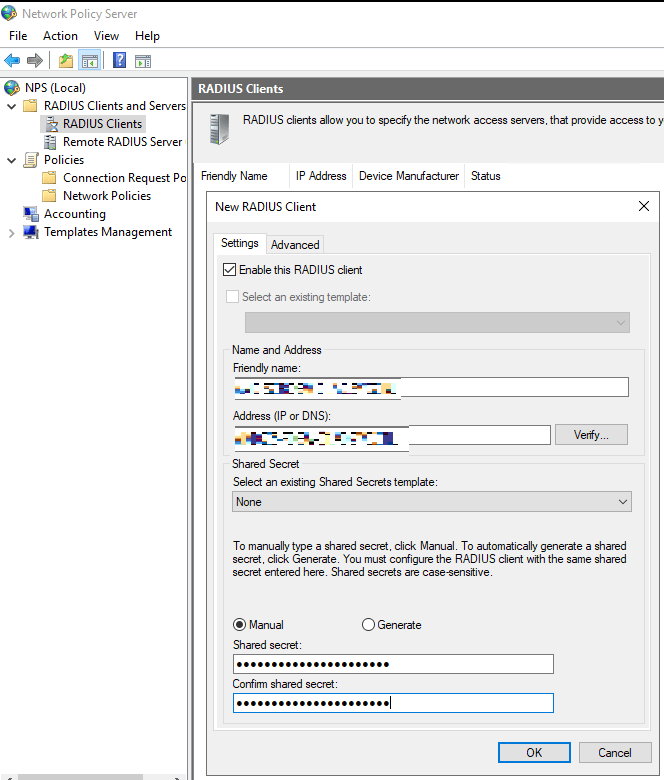
Right-click and select New. Enter a friendly name, the DNS name and the shared secret.
Once the clients are added, we should see the following:

Next up is to configure the Connection Request Policies. Click on the Connection Request Policies node.
Our goal is to add policies to allow the gateway servers to communicate with the NPS servers and allow the NPS servers to communicate with the gateway servers. The easiest way is to duplicate the TS GATEWAY AUTHORIZATION POLICY twice.
Move both copied policies to the top and edit the first policy.
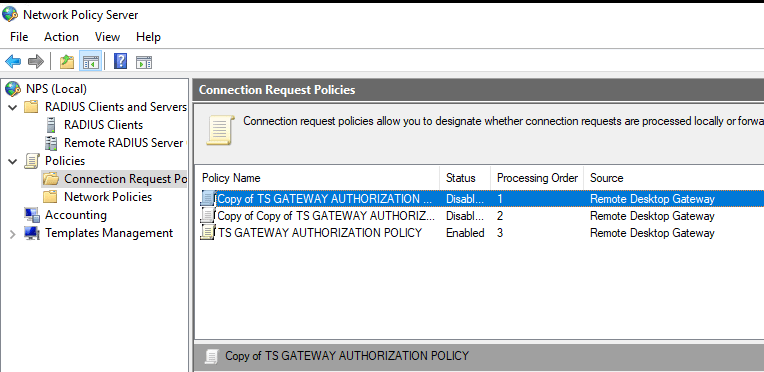
Edit the first copied policy and rename it, for instance FROM NPS SERVERS.
Below is a screenshot how the policy should be configured. In contrary to most online guides, I found that SOURCE should be set to Unspecified.
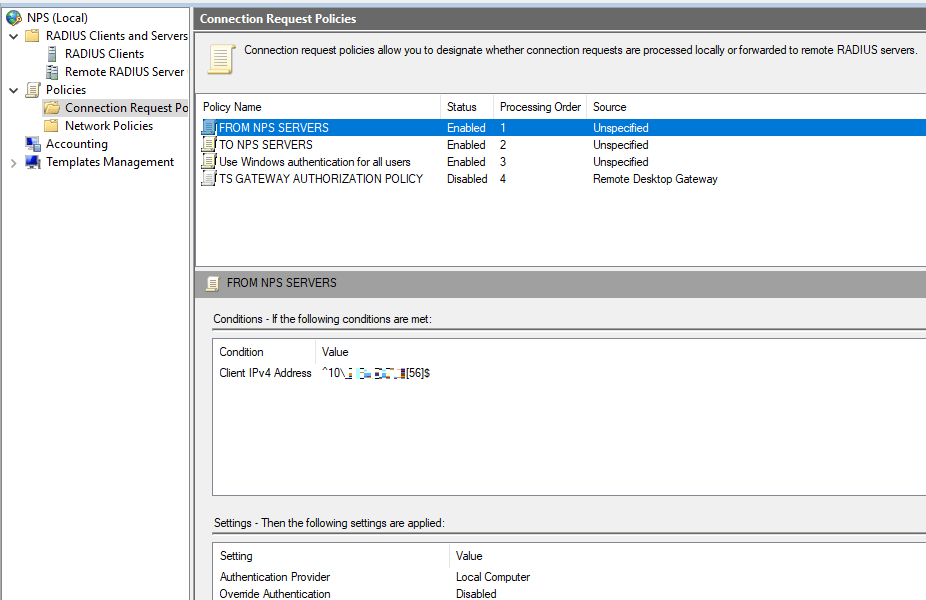
Important note when configuring multiple servers
The policy has one condition, ClientIPv4 address. We have two servers, and therefore two IP addresses. If you were to configure two IP addresses as single Client IPv4 Address entries, the policy will not apply. The solution is to use REGEX or create a second policy. Personally I like the REGEX solution more.
Here is an online tool to create REGEX expressions for IP addresses.
Here is an online tool to validate and test a REGEX expression.
Edit the second copied policy and rename it, for instance TO NPS SERVERS.
It should be configured as shown below:
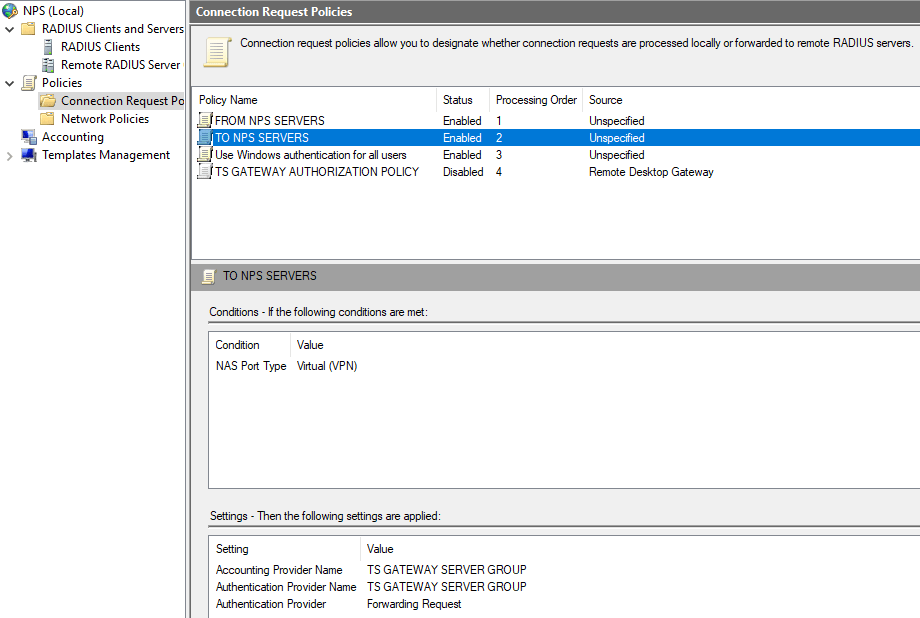
Disable the TS GATEWAY AUTHORIZATION POLICY and Use Windows authentication for all users.
Note: The TS GATEWAY AUTHORIZATION POLICY should not be removed. By removing the rule, the Central server running NPS in the Remote Desktop Gateway Manager console will revert to local authentication.
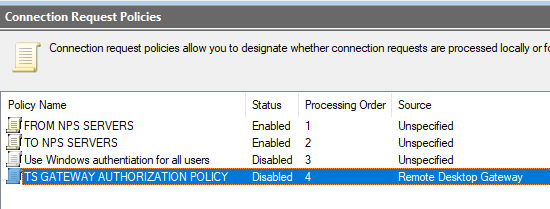
Make sure the processing order matches the order as shown in the example.
Also make sure all of the configuration is duplicated on all of the Remote Desktop Gateway servers.
Step 2: Configure the NPS Servers
Configure the NPS role
Logon to the NPS server. Open Servermanager and open the Network Policy Server console.
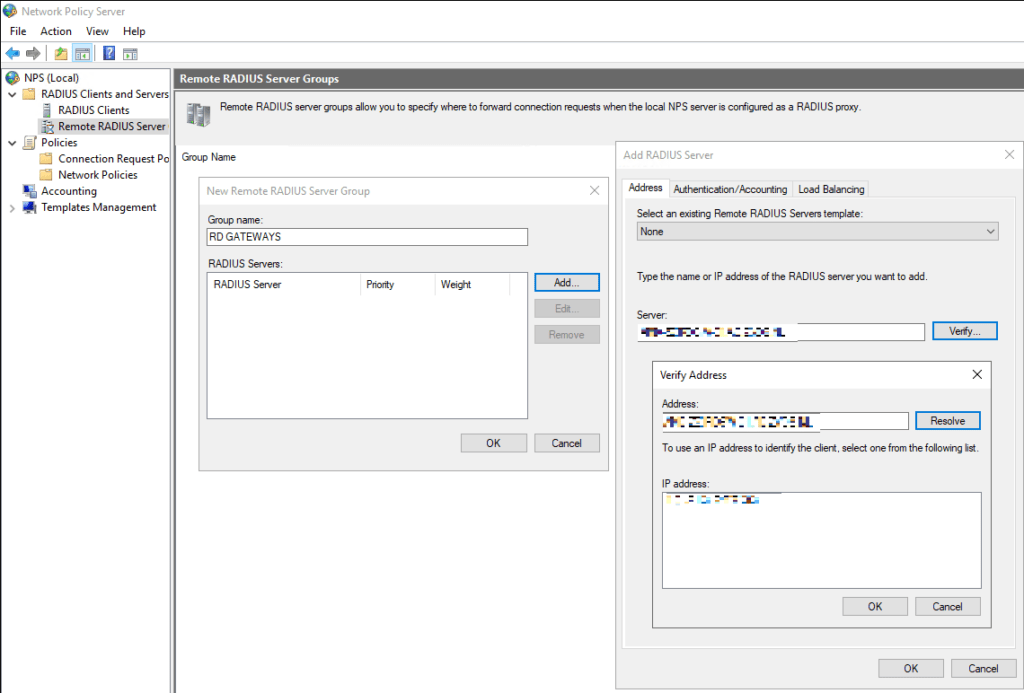
Open the Remote RADIUS Server Groups node. Right-click and select New. The following screen allows us to add RADIUS servers. In this case, we will enter our RD Gateway servers. Therefore enter the name RD GATEWAYS as the name.
Click on the Add… button. The Add RADIUS Server screens pops up with the ADDRESS tab active.
Enter the DNS name of the RD Gateway server and click the Resolve button. The IP address should appear in the bottom screen. Click OK.
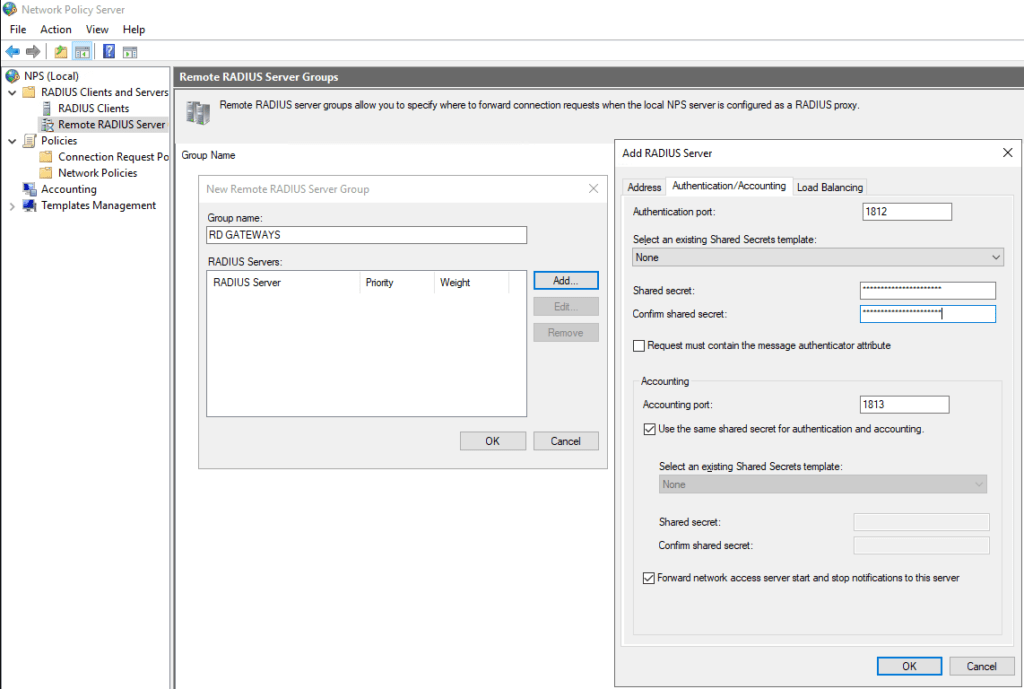
Click on the Authentication/Accounting tab. Enter (and confirm) the shared secret.
Click on the Load Balacing tab. Edit the Advanced Settings;
- Number of seconds without response before request is considered dropped: 60
- Maximum number of dropped requests before server identified as unavailable: 5
- Number of seconds between requests when server is identified as unavailable: 60
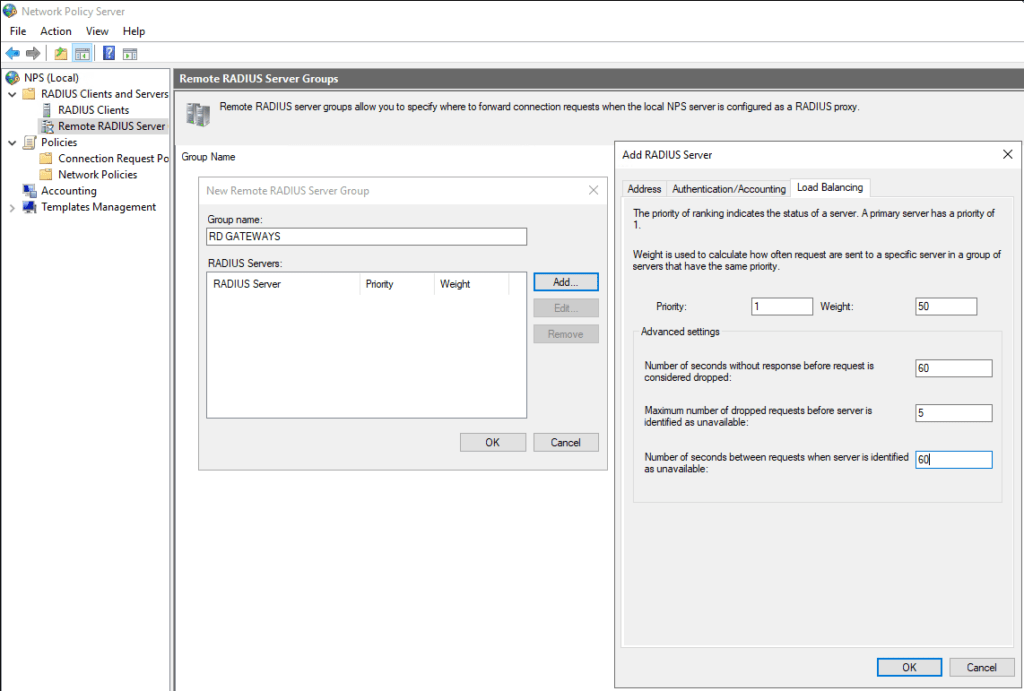
Click the OK button and repeat the process until all of the RD Gateway Servers are added.
Open the RADIUS Clients node. Right-Click and select New.
Add the RD Gateway servers as a RADIUS client. The procedure is the same as when we added the NPS servers to the RD Gateway servers.
Next up, we need to configure the Connection Request Policies in the same way as we did on the RD Gateway servers.
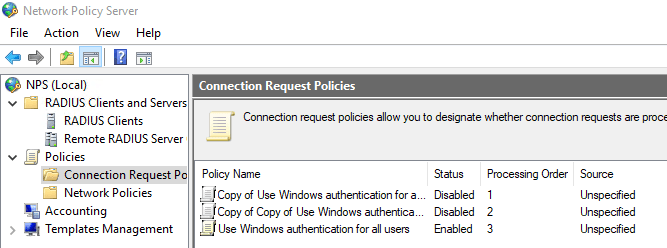
Duplicate the existing policy and define the processing order:
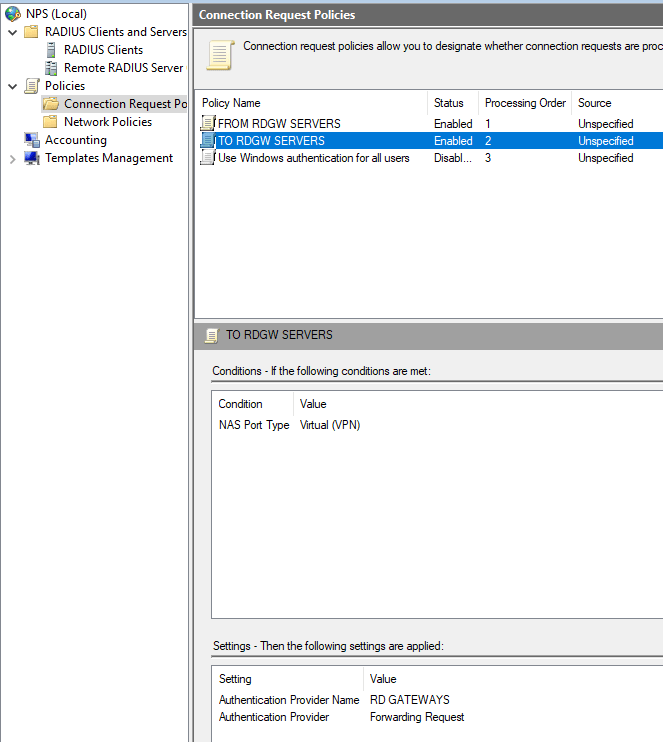
Edit and rename the first policy TO RDGW SERVERS and configure the policy as shown below:
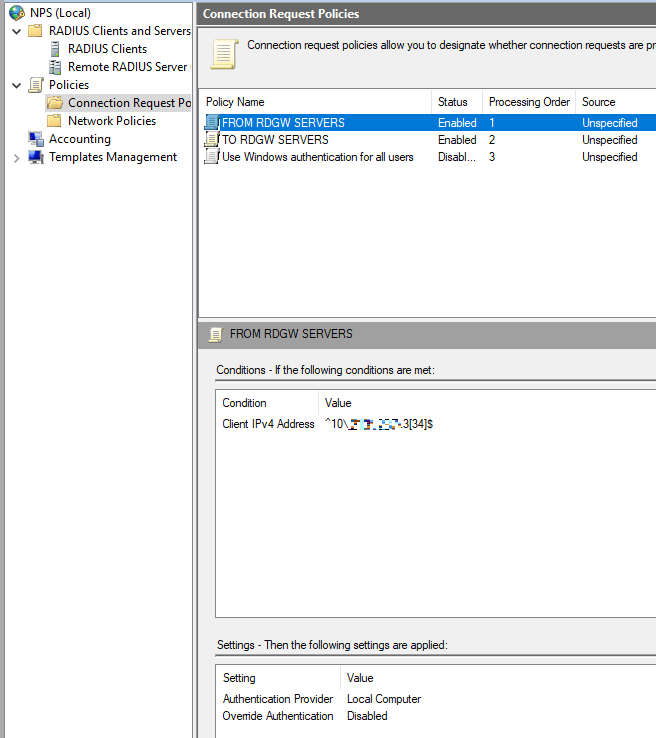
Edit and rename the second policy to FROM RDGW SERVERS and configure the policy as shown below. I used a REGEX expression for the two gateway servers, as described before.
Make sure the Processing Order is the same as above and disable the Use Windows authentication for all users policy.
Configure the Network Policy
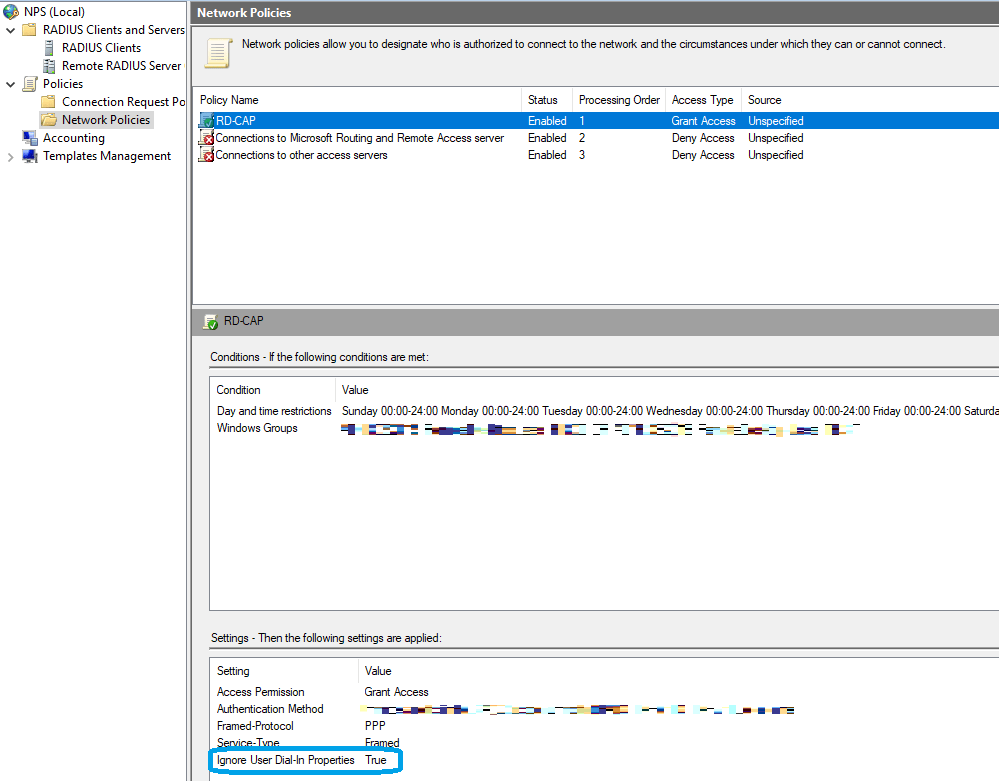
We need to create a Network Policy to allow network communication to the NPS server. Open the Network Policies node and duplicate the existing Connections to other access servers rule. Move it up to the first place in the Processing Order. Configure the rule as per your design. In this case I configured Windows Groups (with the RDS users), set the Ignore User Dial-In Properties to True and select the Allow clients to connect without negotiating an authentication method.
Here is a screenshot of how the network policy could look like:
Configure the NPS extension
In this section we will cover how to install and configure the NPS extension which we need to perform MFA authentication against Azure AD.
Make sure you are logged on to the NPS Server. The installation should NOT be done on the RD Gateway server.
Download the NPS extension from Microsoft and install it on the RD Gateway we already prepared. Once the installation is finished, we’ve installed the NPS extension and we can make use of the Powershell scripts provided by Microsoft.
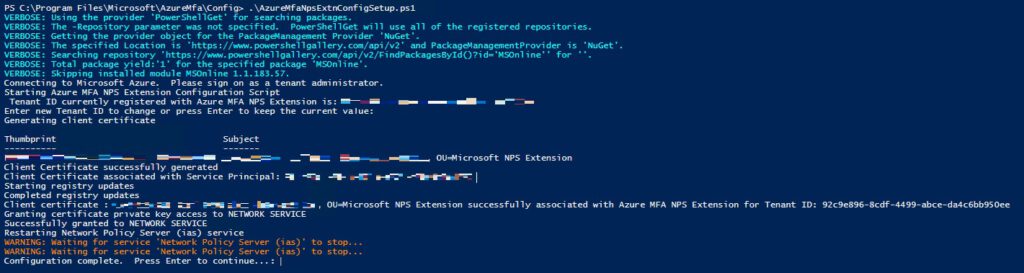
Next up, we need to configure the NPS extension. As per Microsoft, the Microsoft provided Powershell script performs the following actions;
- Creates a self-signed certificate
- Associates public key of certificate to service principal on Azure AD
- Stores the cert in the local machine store
- Grants access to the certificate’s private key to the network user
- Restarts Network Policy Server service
- Update the nuGet provider
- Install modules from an untrusted location (which is the default Powershell Gallery)
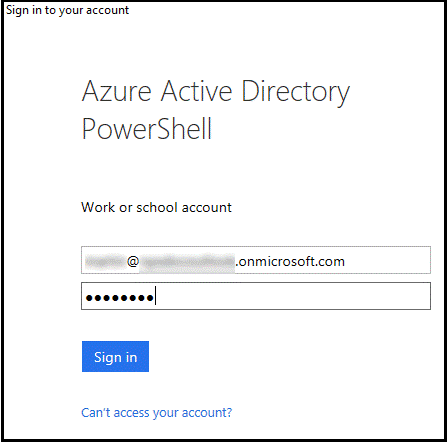
The script will then ask us for the Tenant ID. We can simple copy and paste the value in the script. If you don’t know the Tenant ID, here’s probably the easiest way to find it.
Login to portal.azure.com and open up the Azure Active Directory blade. We can see the Tenant ID in the overview screen.
The script will proceed with some configuration steps and should end with a press Enter to continue to close notification. Here’s an example from my lab. Since I ran the script for the second time, we can see it presents us with the Tenant ID. It gives us the option to change it or to confirm it by pressing the enter key.
That’s all for the NPS extension!
Allow users to login without MFA
Once the previous configuration is done, all users will need to be enrolled for Azure MFA.
Link: https://aka.ms/mfasetup
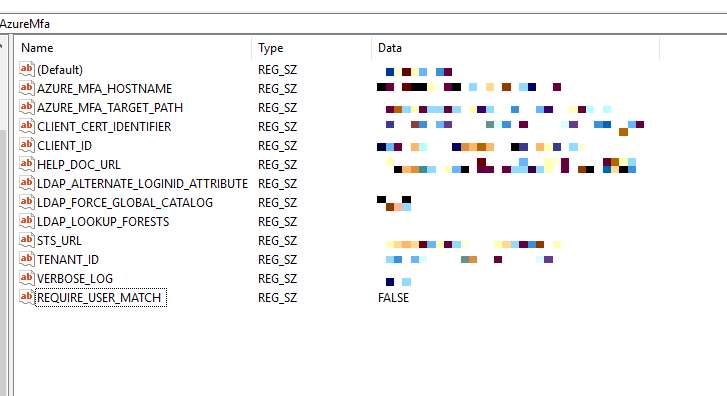
It is possible to configure the NPS servers to allow users without enrollment to sign in to the RDS environment. For this to work, we need to open the Windows Registry Editor and add the following key:
HKLM\Software\Microsoft\AzureMFA
Add the REG-SZ entry named REQUIRE_USER_MATCH with the value FALSE.
Repeat this on every NPS server.
IP whitelist for Azure MFA
It is possible to create IP exceptions. Users will not receive multifactor requests from these locations.
To configure this IP exception, open the Registry Editor on the NPS server. Navigate to the following key:
HKLM\SOFTWARE\Microsoft\AzureMFA
Add the string named IP_WHITELIST and provide a semi-colon separated list of IP addresess, for example:
10.0.0.1;10.0.0.2;10.0.0.3.
Repeat this on every NPS server.
More resources
I used the following resources to create this post. The first article from Microsoft was a great help and it has great tips what to check when something does not work.