What’s up, everyone!
Last week I’ve noticed that watermarking went into general availability and that gave me the idea to dedicate a post to it. Watermarking is a feature that can help to prevent data leakage by displaying QR codes, which act like a watermark, in the desktop of the user. There’s also a screen capture protection feature that admins can use alongside or separately from the watermarking feature which prevents user from taking a screenshot of the desktop. Since the two are complimentary, I thought it was a good idea to add this feature to this post as well.
Let’s see if we can get the features up and running on AVD as well as Windows 365 Cloud PC’s!
Prerequisites
These are the prerequisites for implementing Watermarking;
- A remote desktop client that supports watermarking. (Use a current version of the Remote Desktop client or use a current version of the Windows 365 App)
- Azure Virtual Desktop Insights should be configured for you environment.
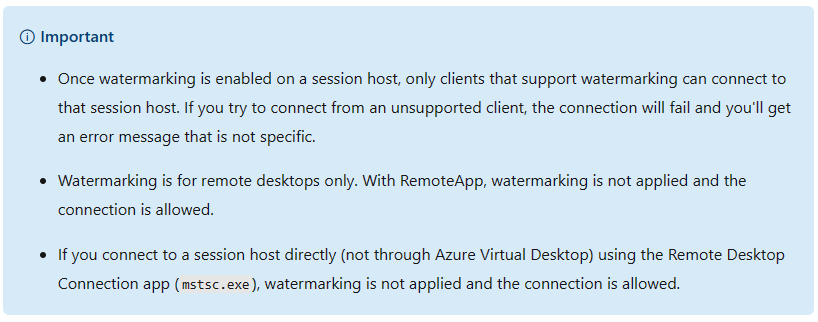
- Be aware of the following important messages;
An introduction into the screen capture protection feature and watermarking
Let’s start this post with a short introduction into screen capture protection feature and the watermarking feature. Both features are intended to help protect against data leakage and even though they compliment each other well, you can use them independently from each other.
The screen capture protection feature actually prevents the user from taking a screenshot of the desktop in AVD or W365 from the local device. You could also use this feature to block screenshots from the Cloud PC or AVD session host itself. If a user takes a screenshot, they will just see a black screen instead of the desktop and the content. Pretty neat right! Now haters will say that users (if they really want to) can just take out their smartphone and take a picture of the screen. And they would be right. In this case the data would still leak and no one would actually know this happened.
You guessed it! This is a great example where watermarking could save the day! As an admin you can implement watermarks all over the desktop of the user. These watermarks are actually QR codes which contain the information of the connection ID. The connection ID can be resolved to a user so if a user has bad intentions and snaps a picture of sensitive data, you can always find out who was responsible.
The good and the bad
The good news is that setting up both features is really easy to do and of course I will do a demo later on in this post. You can decide which feature you want to use, setting up the screen capture protection feature, the watermarking feature or both.
The bad news is that watermarking is pretty intrusive and my personal opinion is that it diminishes the user experience. The QR code is (and should be) always there, it will always be visible on top of every screen. Also, you’ll need to have a supported client for it to work and remember that it will not work for RemoteApps, just for full desktops.
Ways to configure the features
Both features can be configured using the administrative template for Azure Virtual Desktop. This means that you can use a group policy (GPO) or a local group policy. The administrative template is also available in Microsoft Intune.
The process is really well documented in Microsoft Learn so I will only give a brief description how the process works.
GPO and Local Group Policy
I would suggest to use a GPO to configure the settings, otherwise you will have to create local GPO on every relevant session host. You can use both a local group policy or a GPO scoped to a single session host if you want to test this feature. In short, these are the steps;
- Download the administrative template for Azure Virtual Desktop. Here’s the Microsoft link: https://aka.ms/avdgpo
- For GPO: Save the administrative templates to the group policy central store. Use gpmc.msc to configure the relevant settings.
- For local group policy; Save the administrative template in the policydefinitions folder and the language file to the corresponding subfolder. Use gpedit.msc on the local session host to configure the relevant settings.
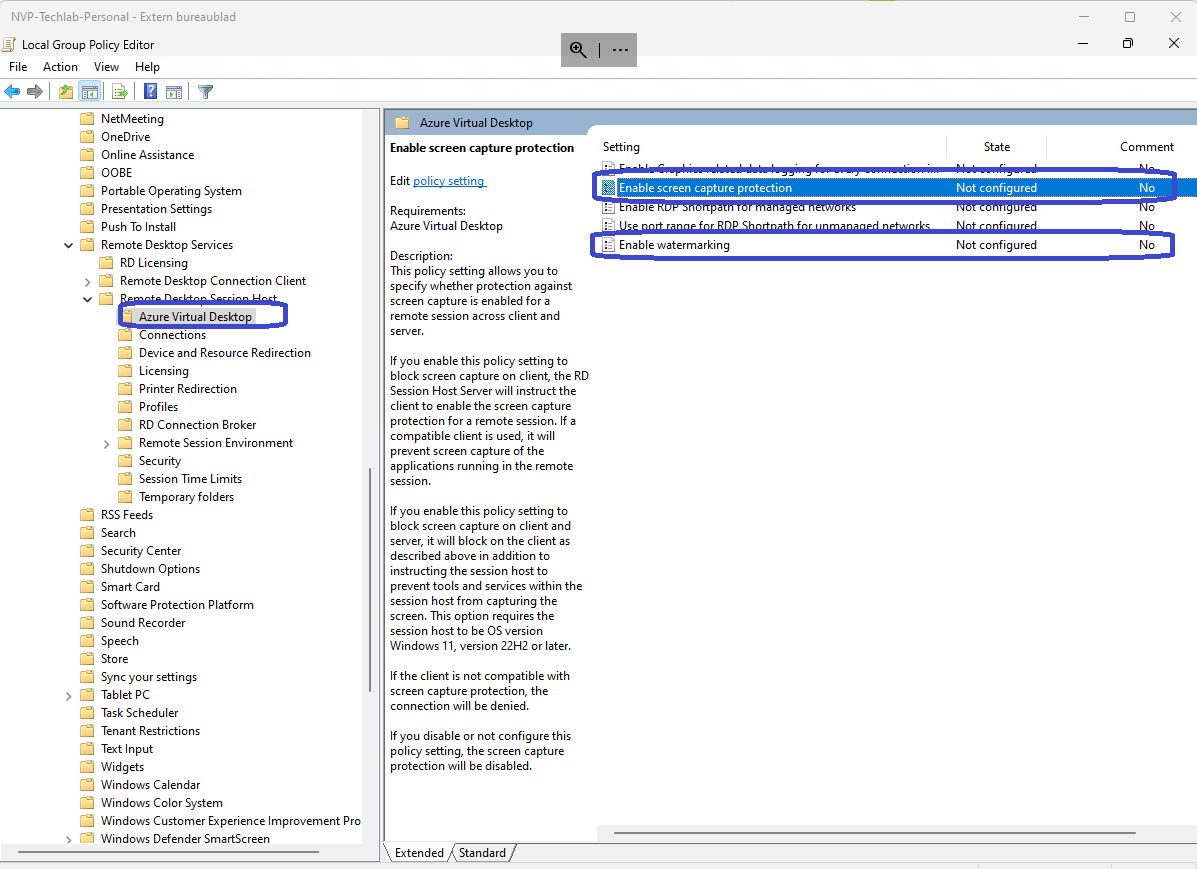
- Open the relevant console and navigate to Computer Configuration, Policies, Administrative Templates, Windows Components, Remote Desktop Services, Remote Desktop Session Host, Azure Virtual Desktop.
- Configure ‘Enable screen capture protection’, ‘Enable watermarking’ or both.
Microsoft Intune
You can also use Microsoft Intune to configure these settings. Sign into the Microsoft Intune admin center, Devices, Policy, Configuration Profiles.
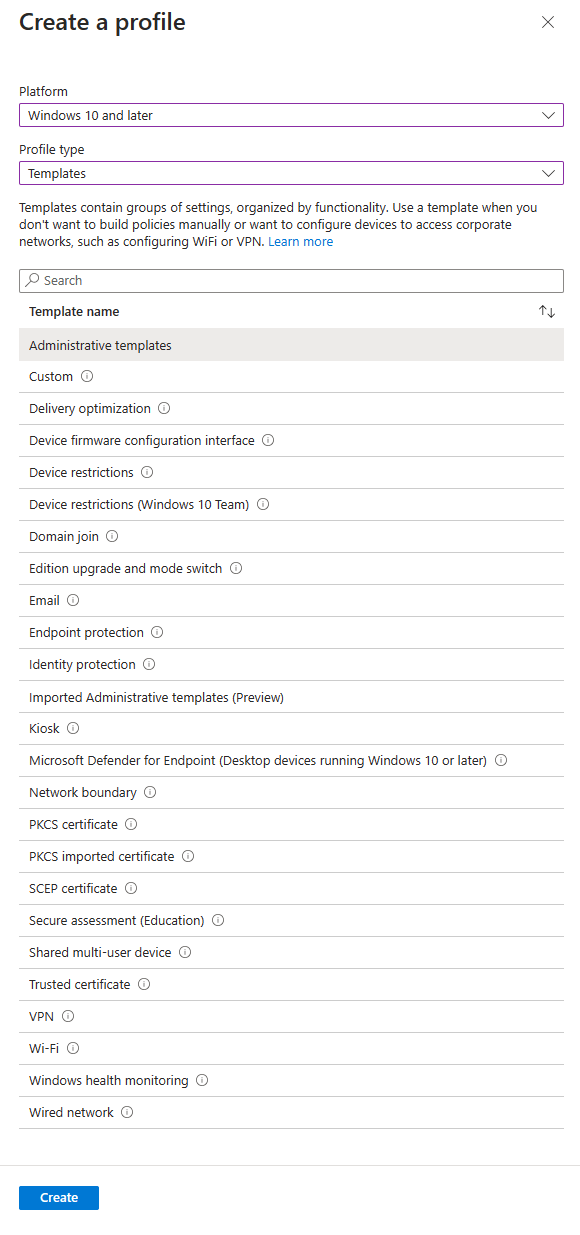
Click the + Create profile button in the ribbon and select the following and click the create button once you are done;
- Platform: Windows 10 and later
- Profile: Templates
- Template name: Administrative templates
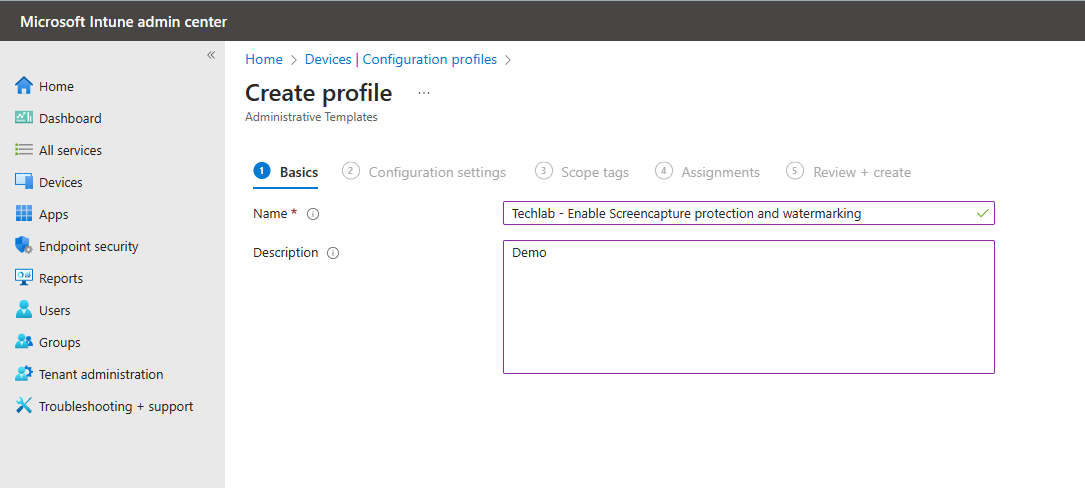
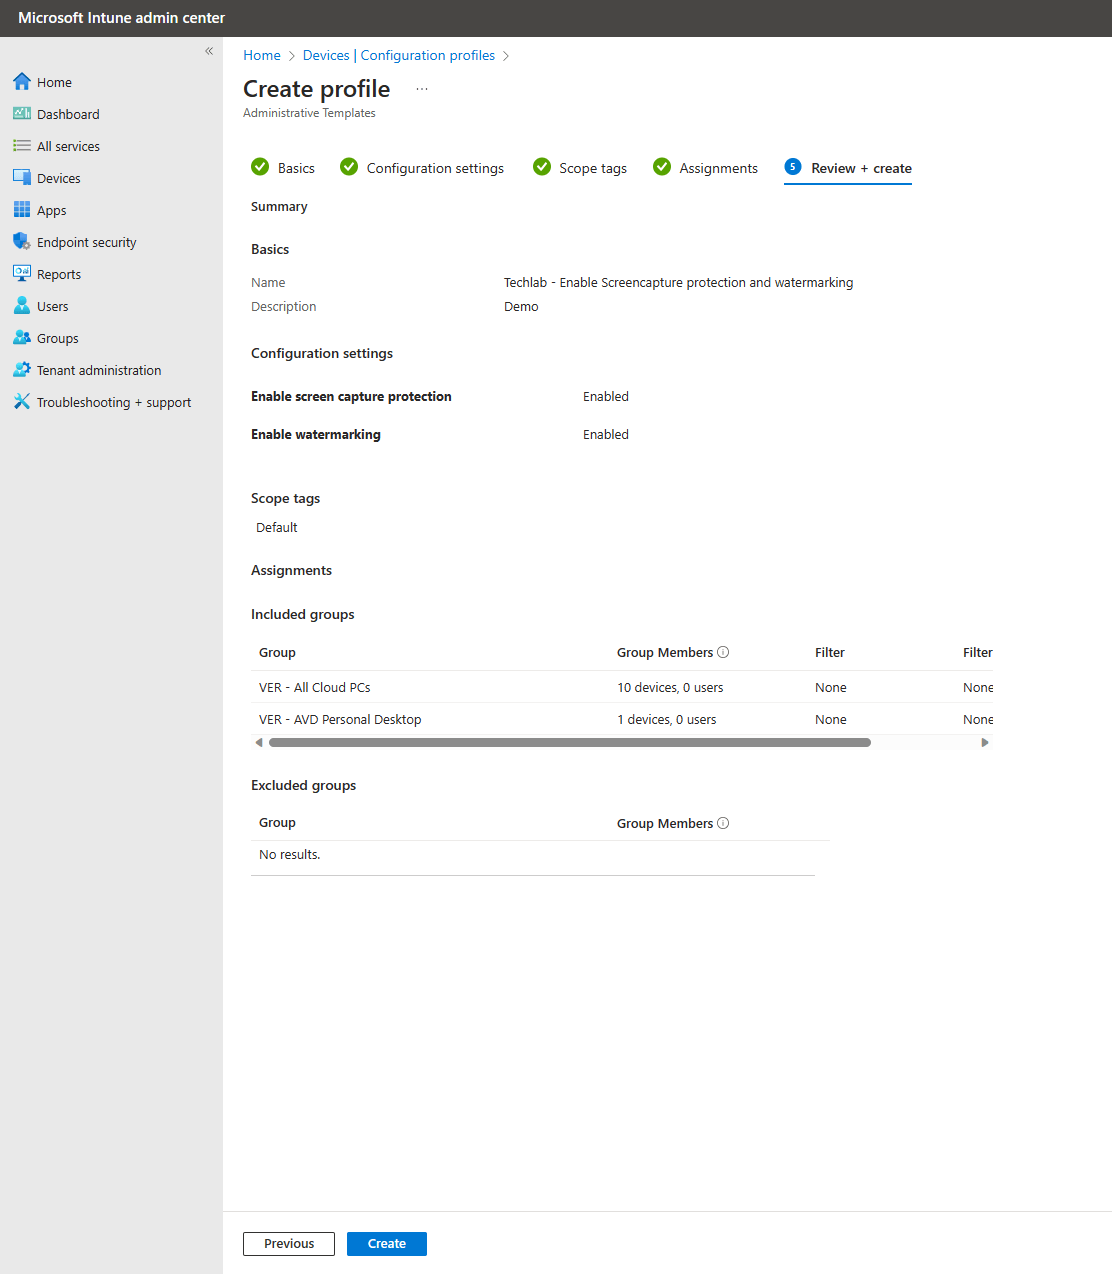
Let’s go through the familiar steps. Give the new configuration profile a name and optionally a description.
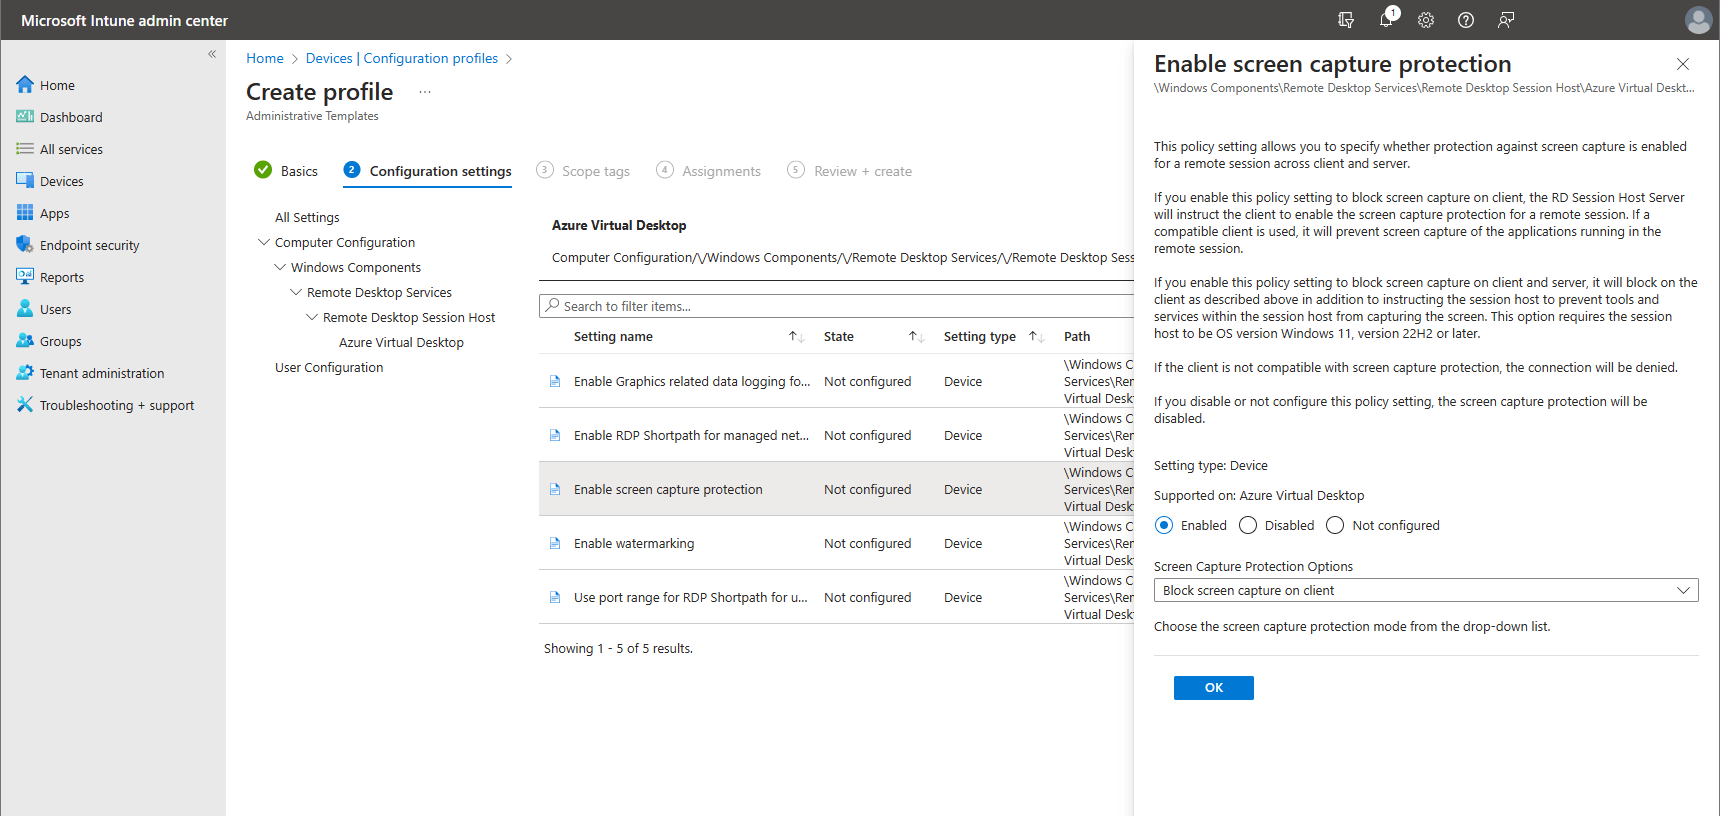
Now it’s time to configure our settings. I will enable both the screen capture protection and the watermarking features. If you haven’t worked with administrative templates before, just imagine that you can find the settings in the same way as you would with a GPO or a local group policy. Just drill down through each step until you reach Azure Virtual Desktop and you see the settings pop up. Just click on Enable Screen capture protection, click on Enable and select the option you want;
- Block screen capture on client
- Block screen capture on client and server
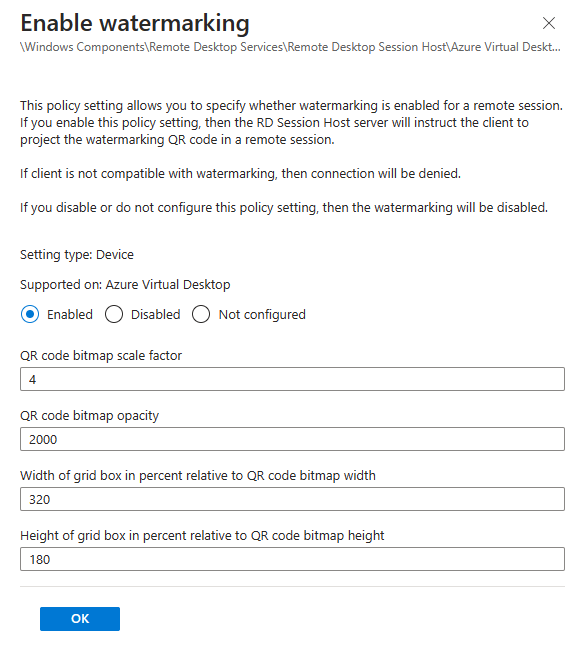
The same goes for the Enable watermarking setting. First you’ll need to enable the setting and optionally finetune the four optional settings.
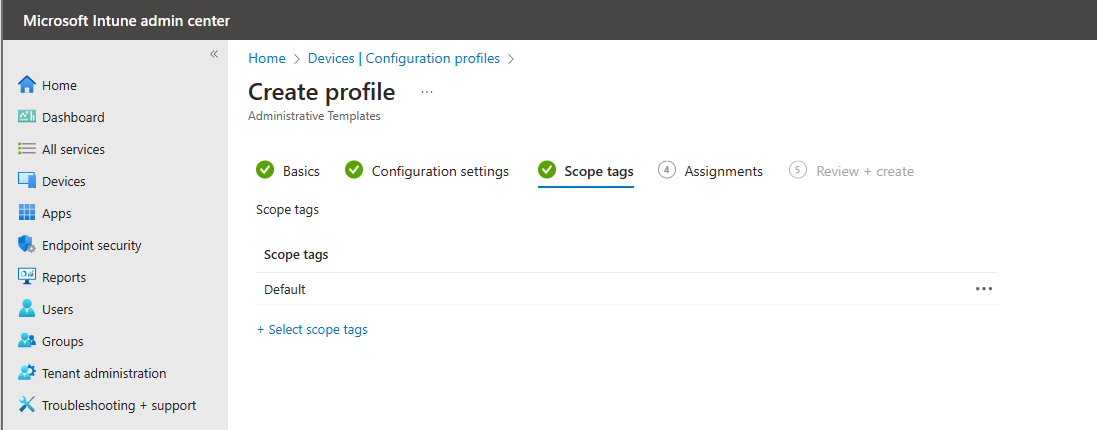
You can optionally add some scope tags once you configured the settings. The default works for me in this demo.
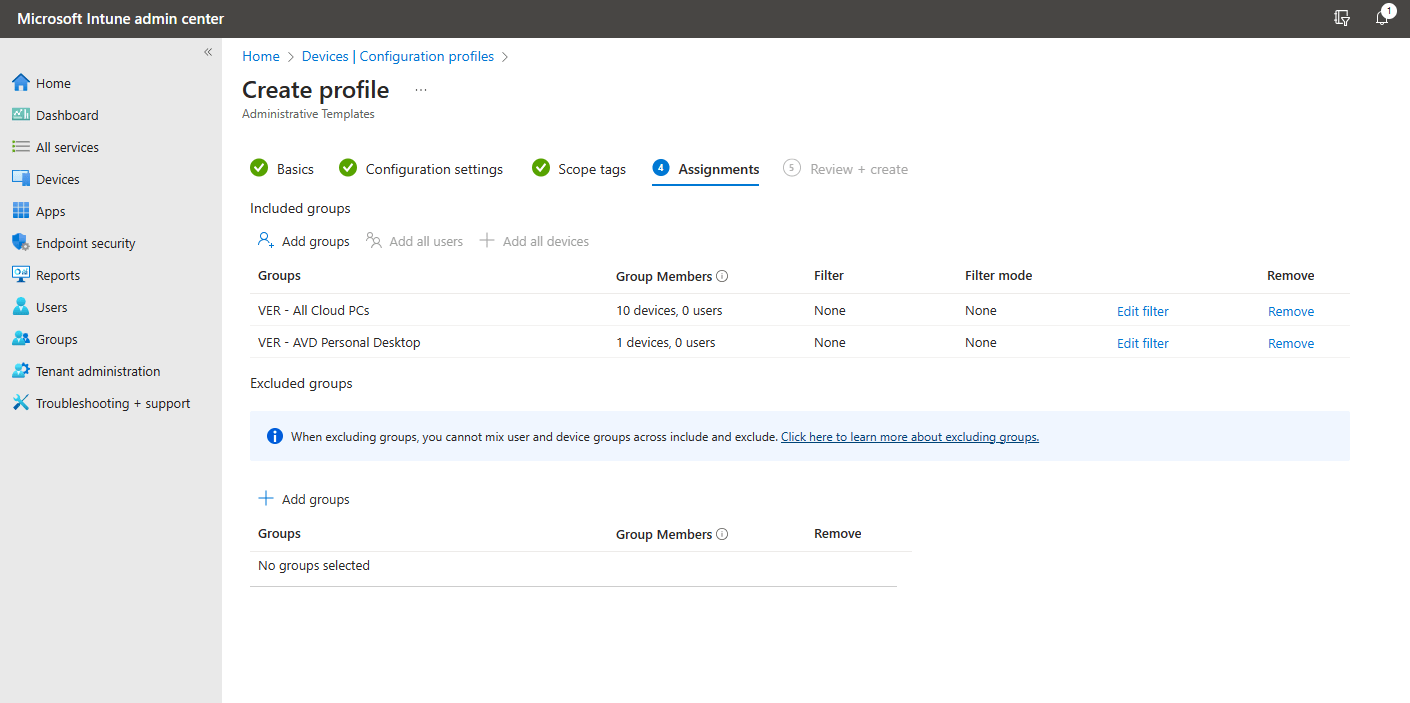
Remember that these are computer settings so make sure to add groups with the relevant computers in the Assignments tab.
I added a group with my Cloud PCs and a group with a personal desktop in AVD.
All that’s left is to take a second to admire your awesome work and click the create button if you are happy with the policy.
These settings might take a bit of time before they are applied to the endpoints. If you’re testing these features, you can speed things up by triggering a sync on the endpoint.
Search for Access work or school on the endpoint and click on the arrow pointing downwards next to Connected by user@domain.tld. This will reveal the info button. Once clicked you can scroll down a bit and click on the Sync button. Another way to trigger a sync is by opening up the services console and restart the Microsoft Intune Management Extension.
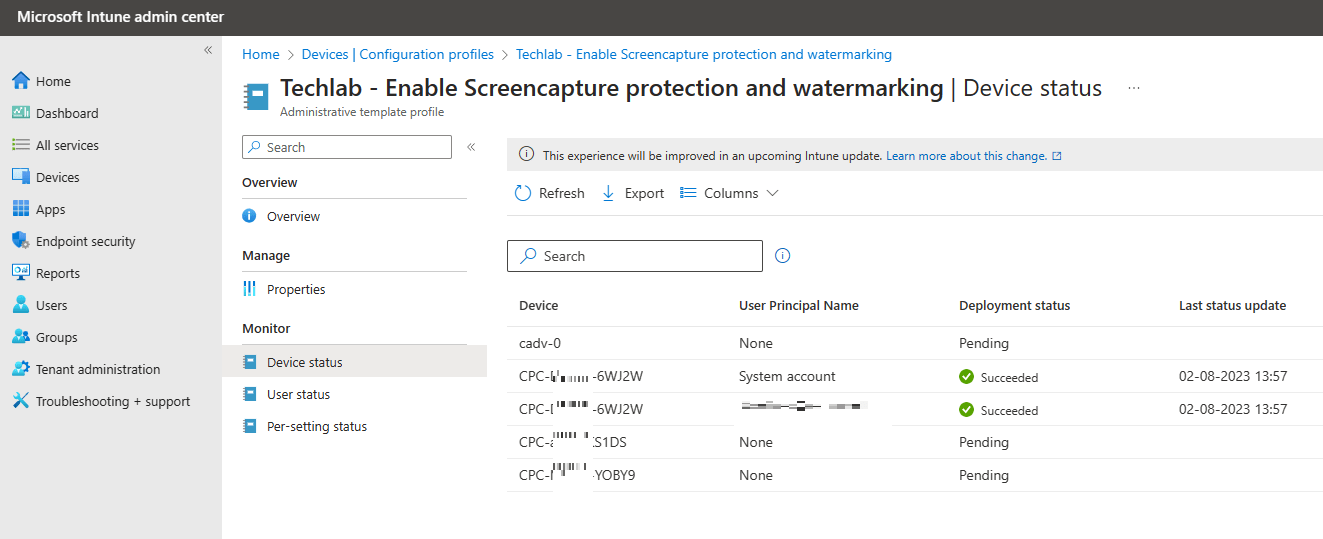
Microsoft Intune can actually show you if a particular setting was applied or if something went wrong. The only downside is that it can take a bit of time before you see results. From the Microsoft Intune admin center, Devices, Policy, Configuration Profile. Click on the configuration profile.
The monitor section will give detailed information. Check the device status to see which devices should receive the configuration policy.
Check the user status to get an overview which users should receive these settings and among other info on how many devices these settings where applied.
The Per-settings status will give you detailed information on the status of each setting.
Demoing the user experience
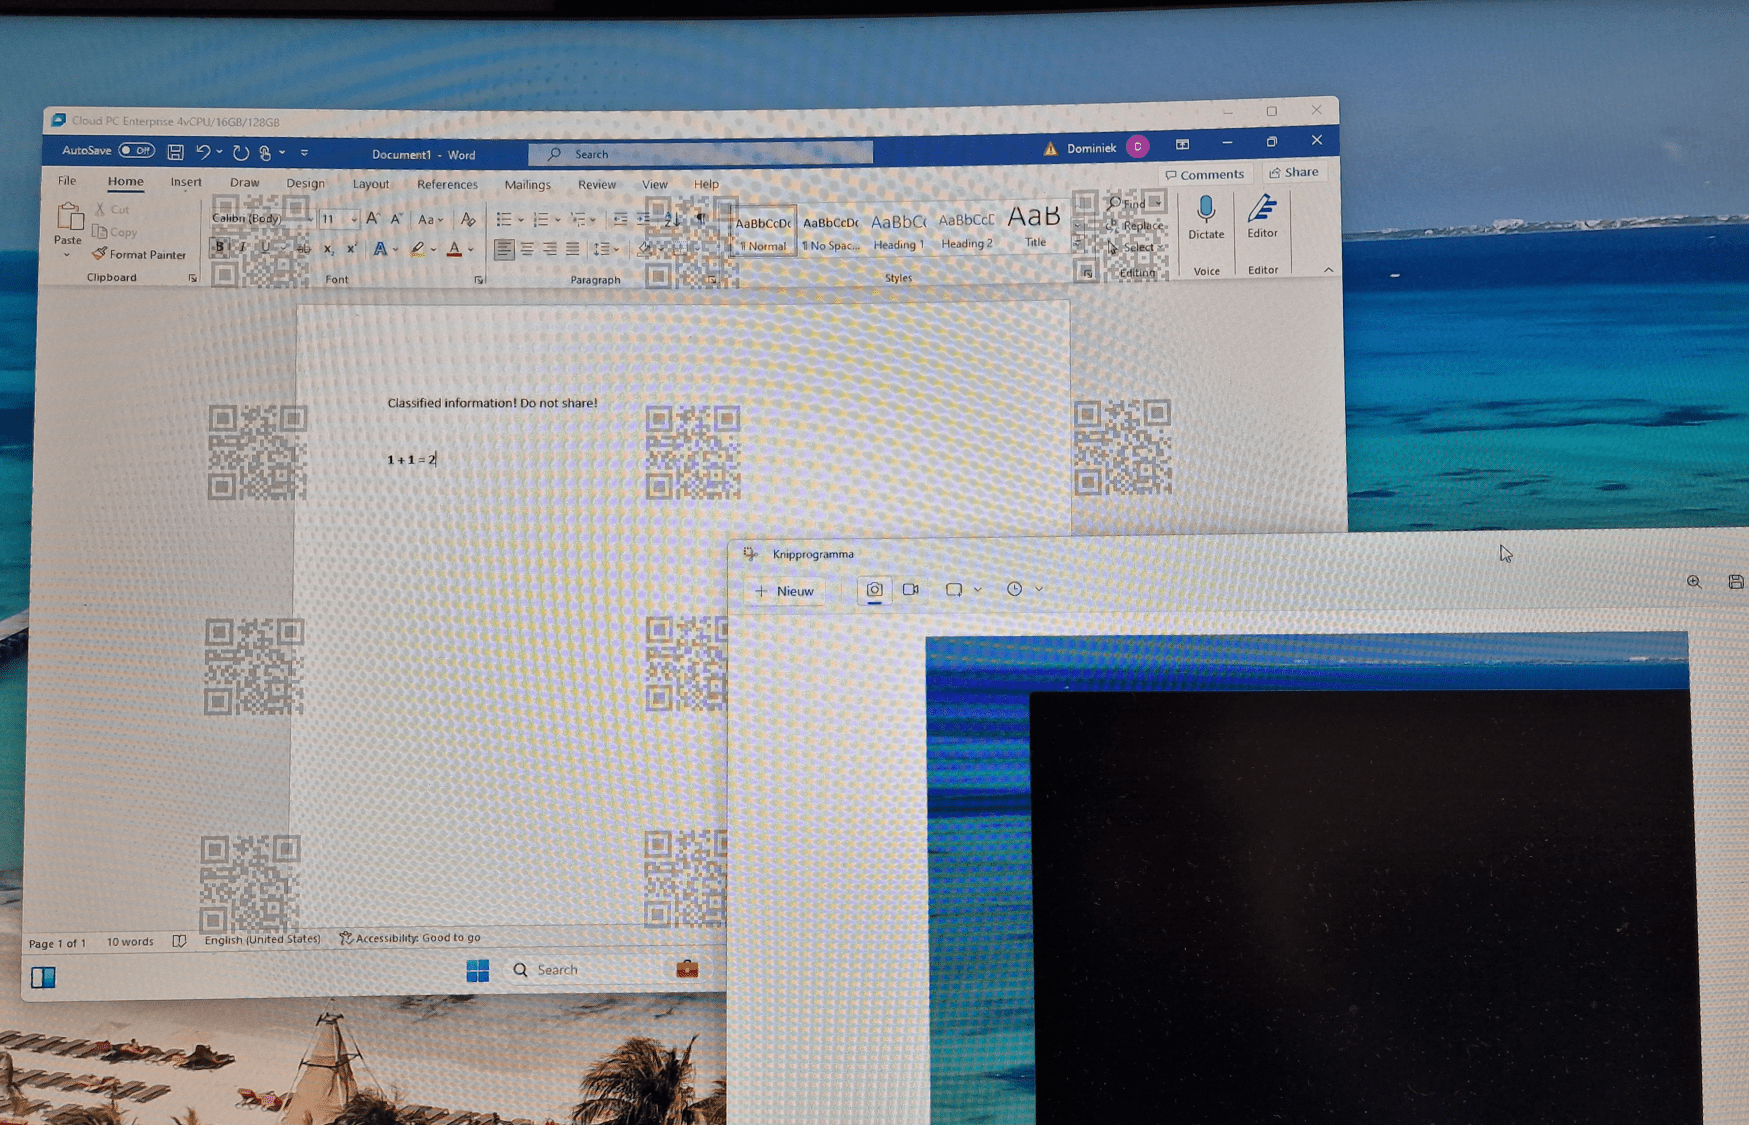
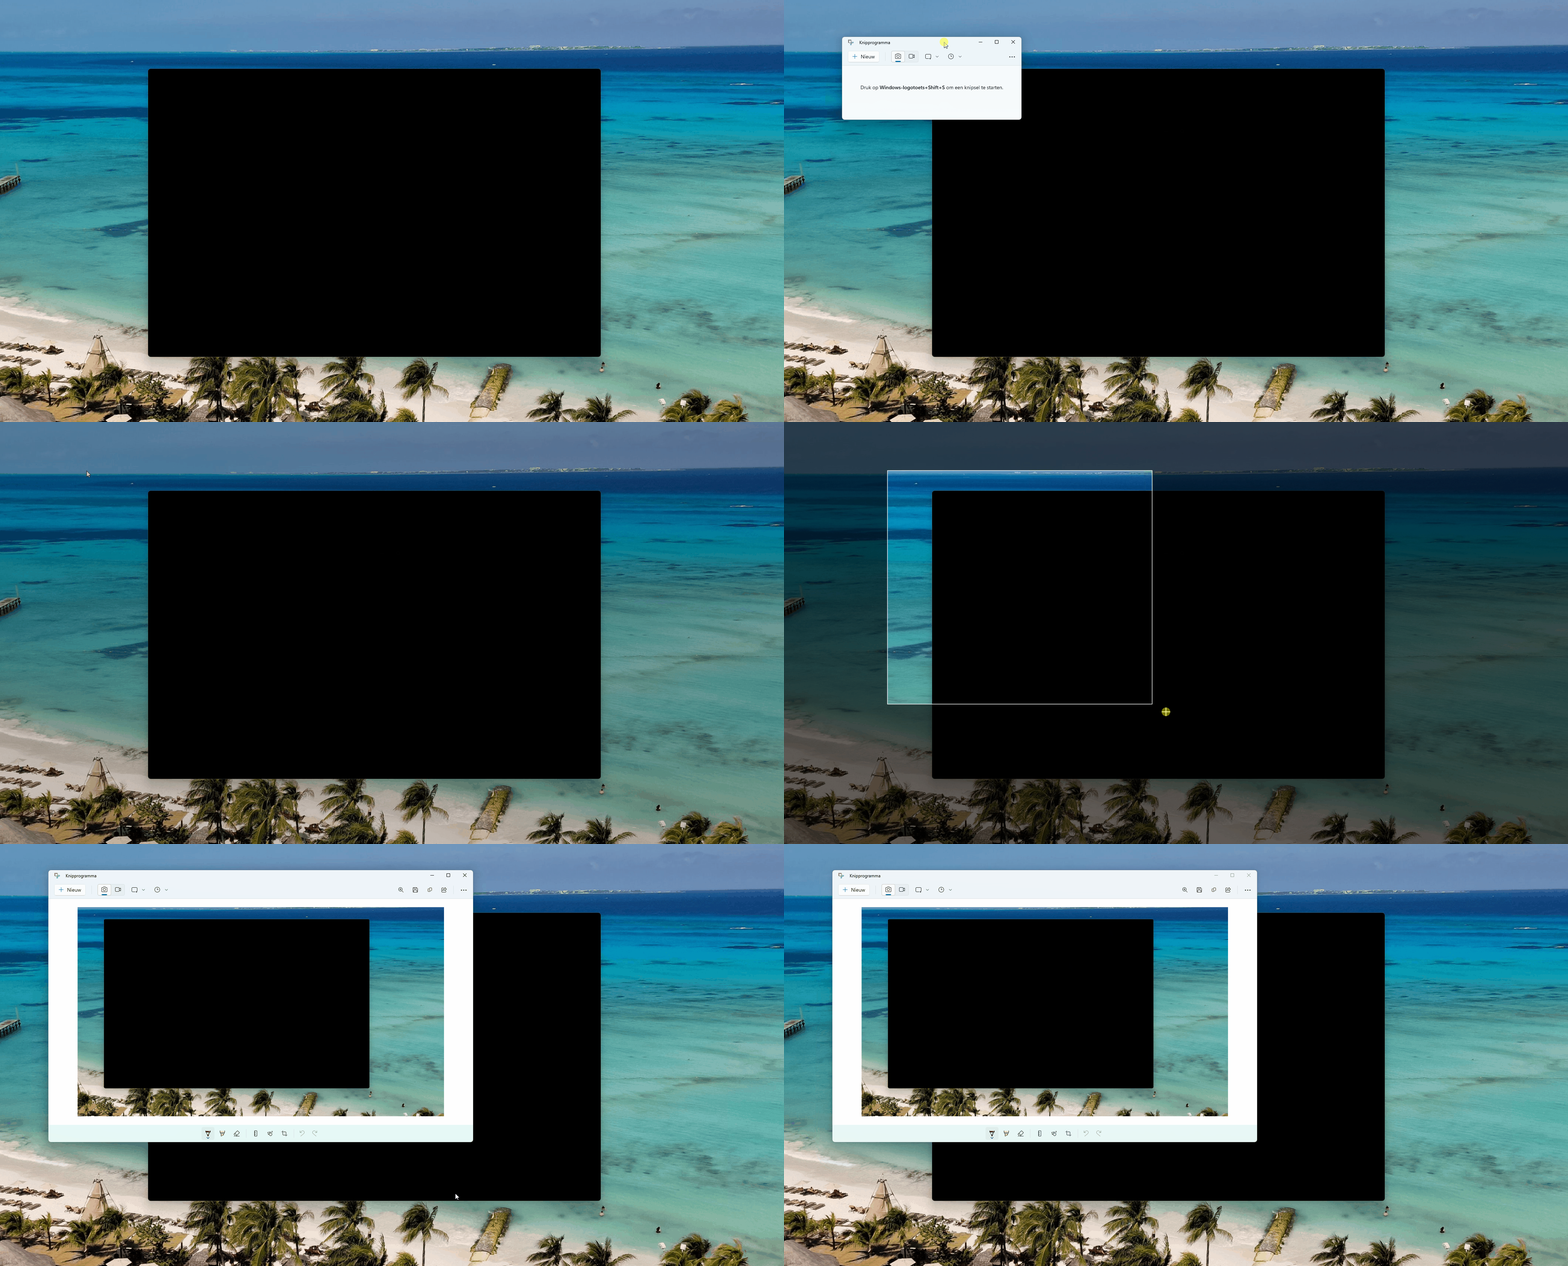
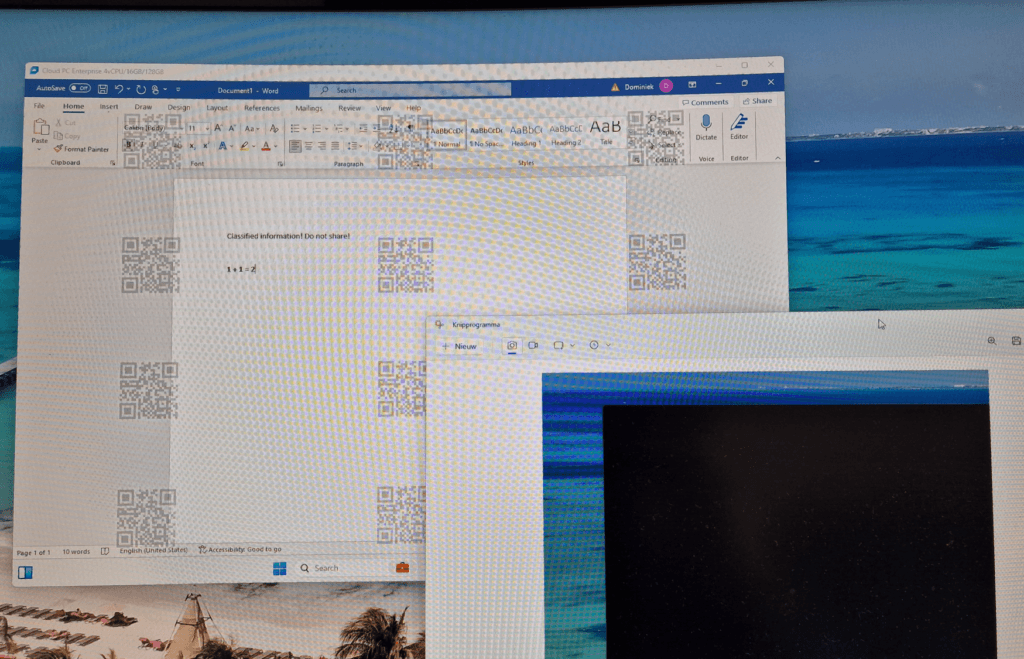
The policies have applied successfully on my Cloud PC. In the following picture you can see that I signed into my Cloud PC using the Windows 365 App. Watermarking is successfully applied and annoying. I used the built-in snipping tool to take a screenshot which failed because the entire Cloud PC screen blacked out. That means the screen protection is working perfectly.
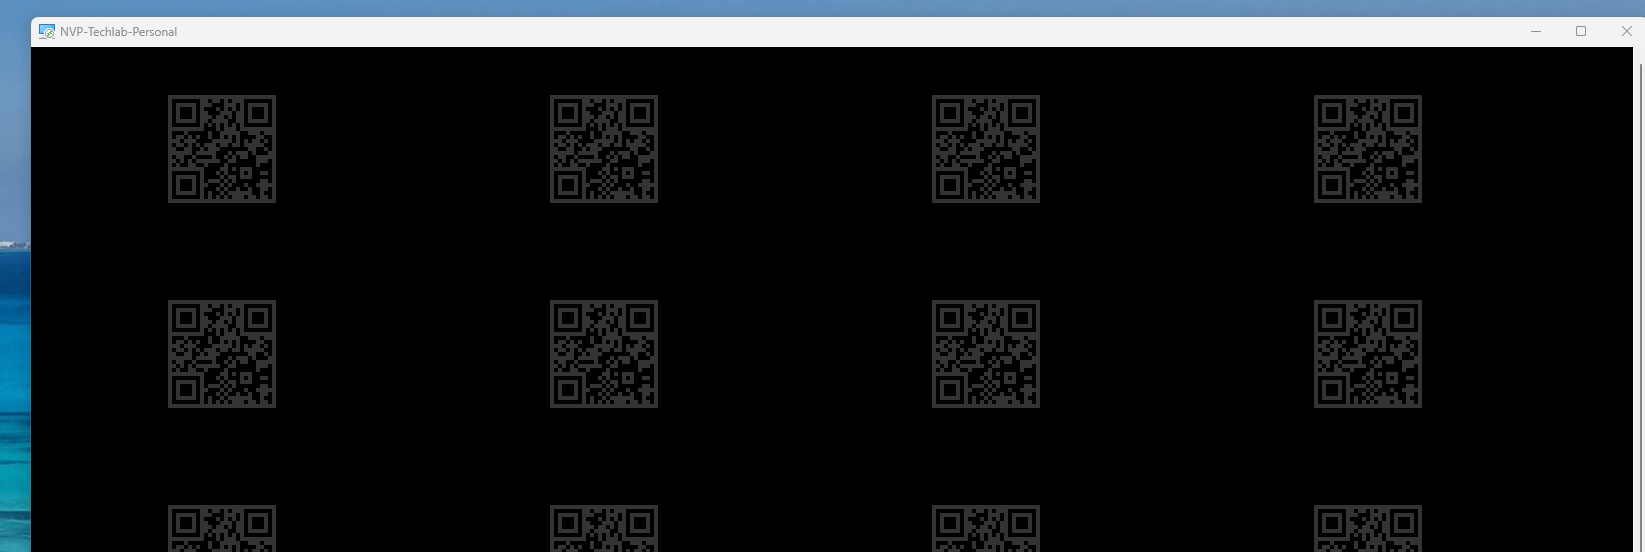
In the following picture you can see what the user experience is like when you use the Remote Desktop client to connect to a personal AVD desktop;
But wait a second, does this only work if users use the snipping tool?
Good question and the answer is no. This feature works for other ways to create a screenshot as well. For some posts I create a GIF as a demo and this apps basically creates a bunch of screenshots and puts them together in a .GIF file. This is great example to show you that other apps that create screenshots fail as well. You’ll basically only see a blacked out screen from start to finish;
The same is true if you should share your screen via Microsoft Teams. The remote party would not see your protected screen.
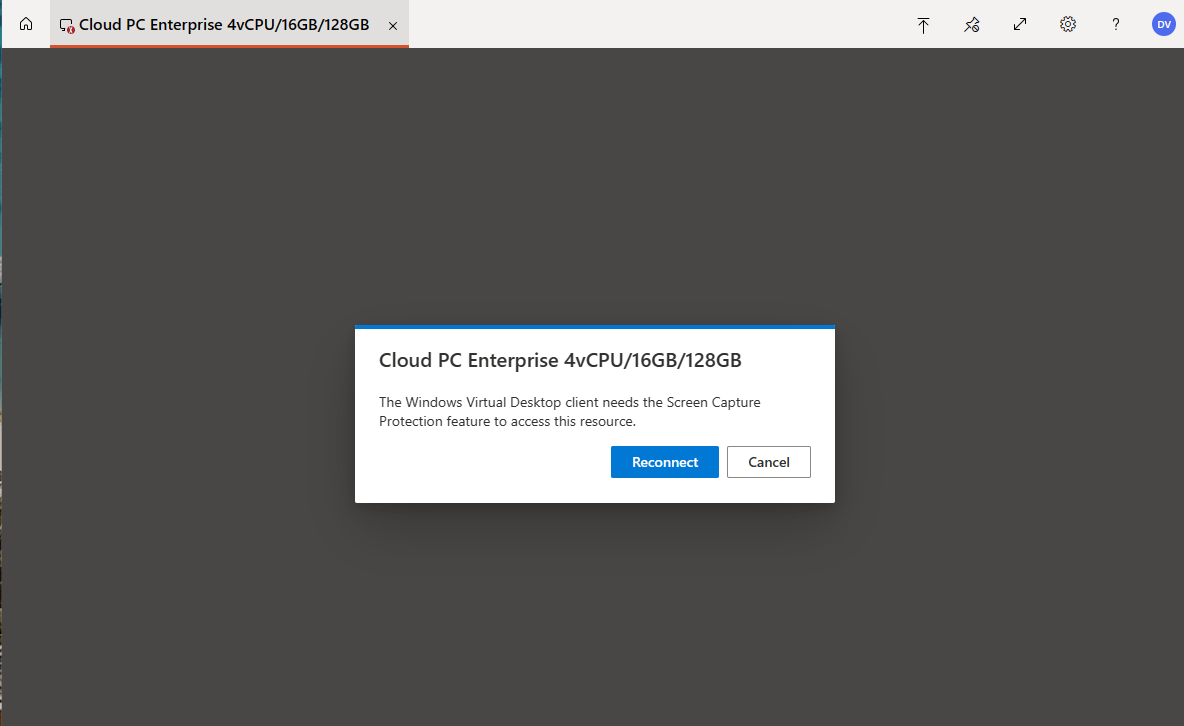
What happens if the user uses an unsupported client?
The webclient is a good example of a client that does not support screen capture protection. If a user signs in using the webclient, they will get the following notification and they cannot use the desktop:
Resolving QR codes to a user
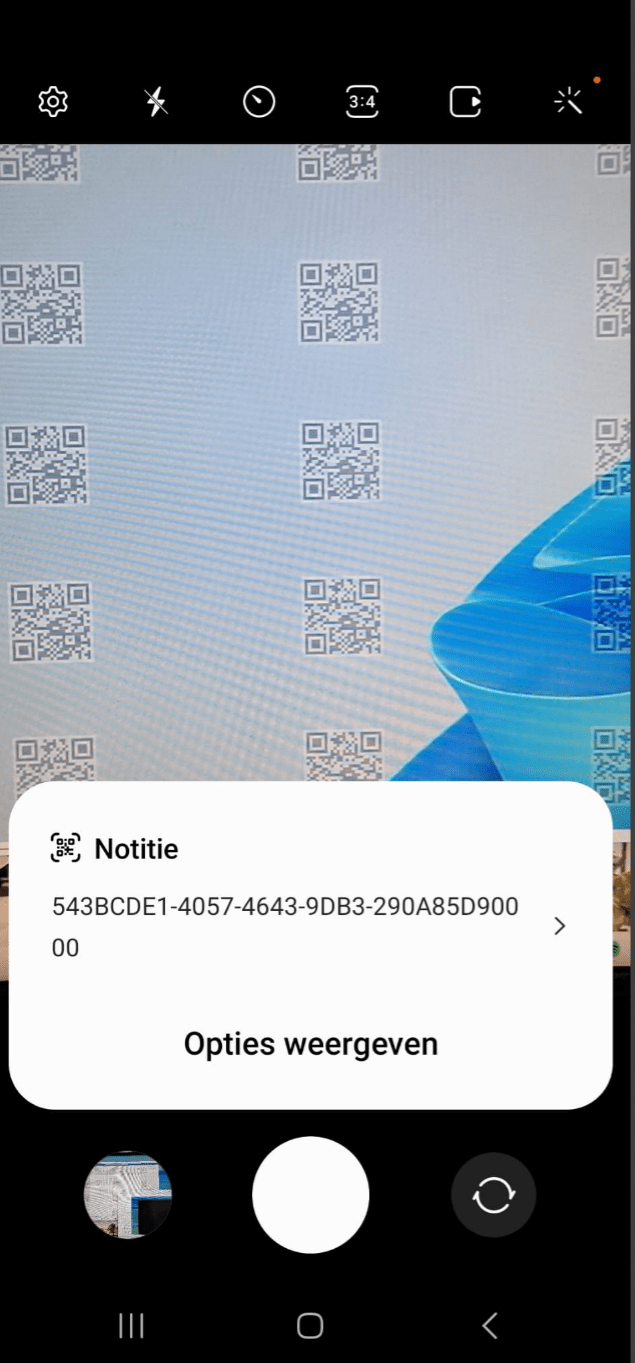
In this demo I will show how to resolve the QR code to a specific user. I will use my personal AVD desktop for this demo. First, you can use just about any app to scan the QR code. My samsung smartphone’s camera app will do just that for me.
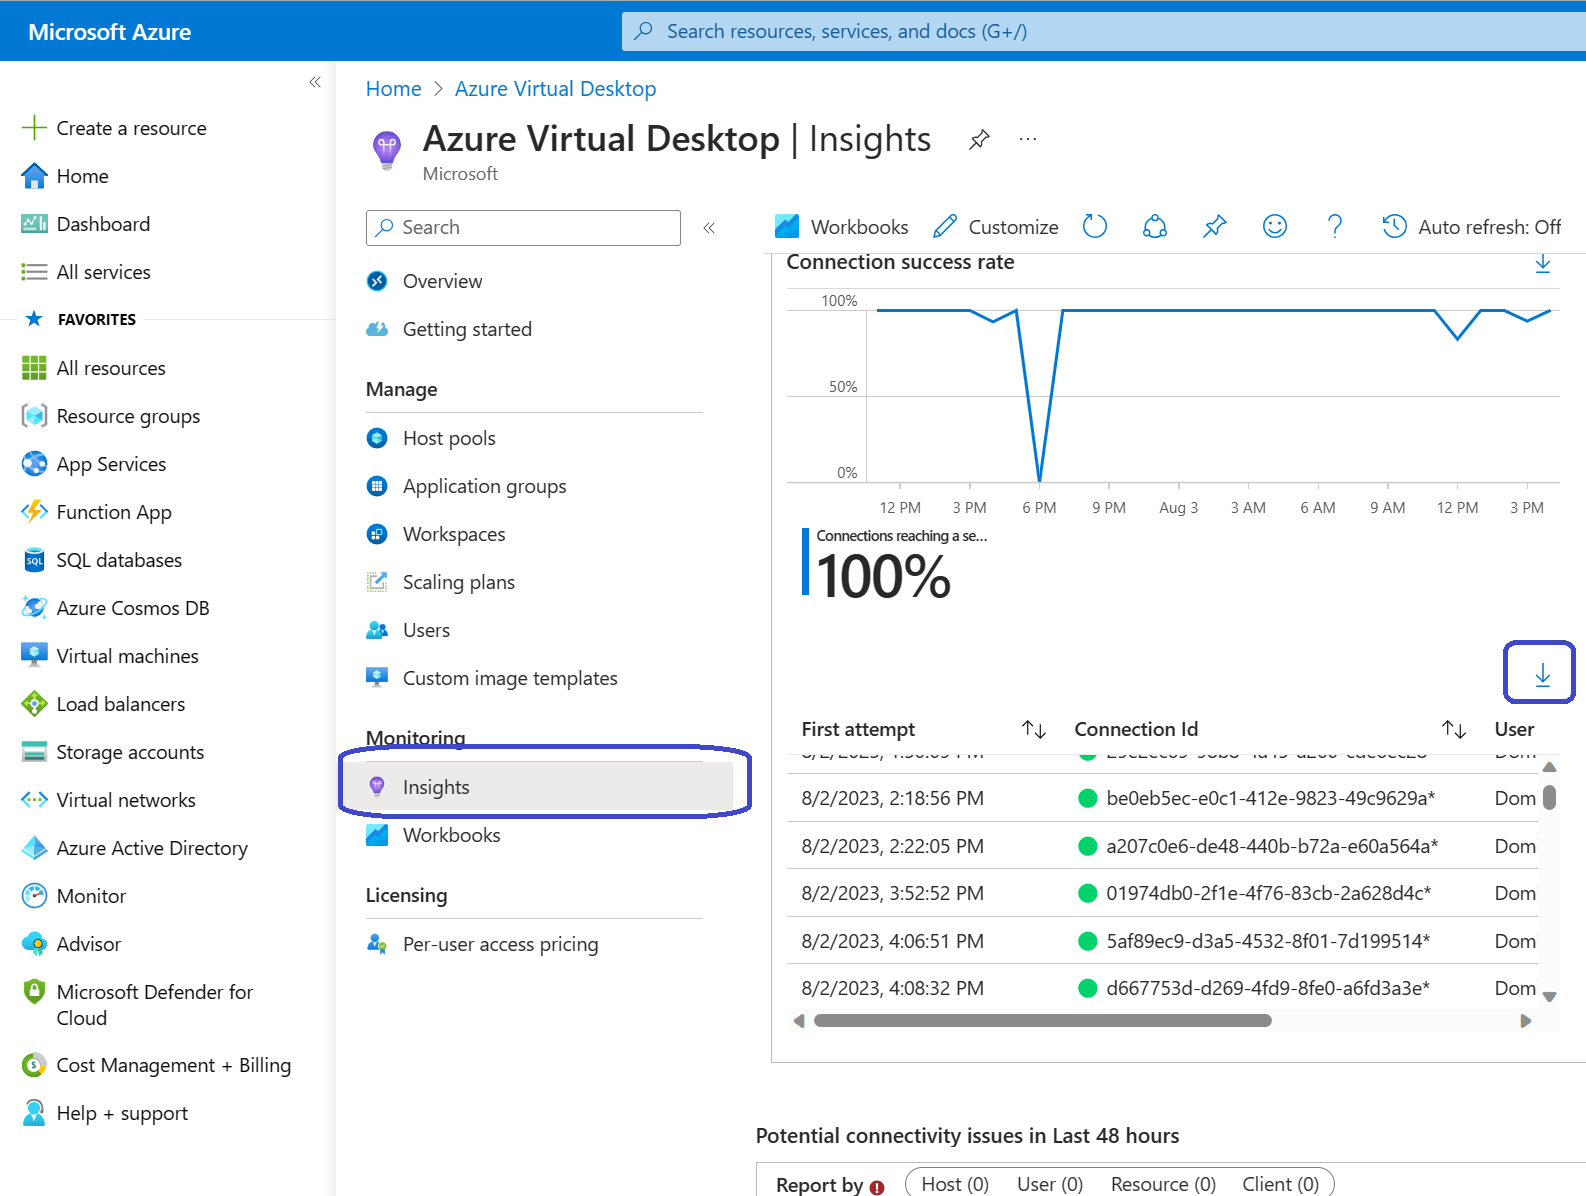
That’s all there is to it! So the session ID that we will have to lookup is 543BCDE1-4057-4643-9DB3-290A85D90000. We should be able to find the session in the Azure Virtual Desktop Insights pane. Sign into the Azure Portal, open Azure Virtual Desktop, Monitoring, Insights.
Look for the Connection success rate section. You should be able to find the connection ID there.
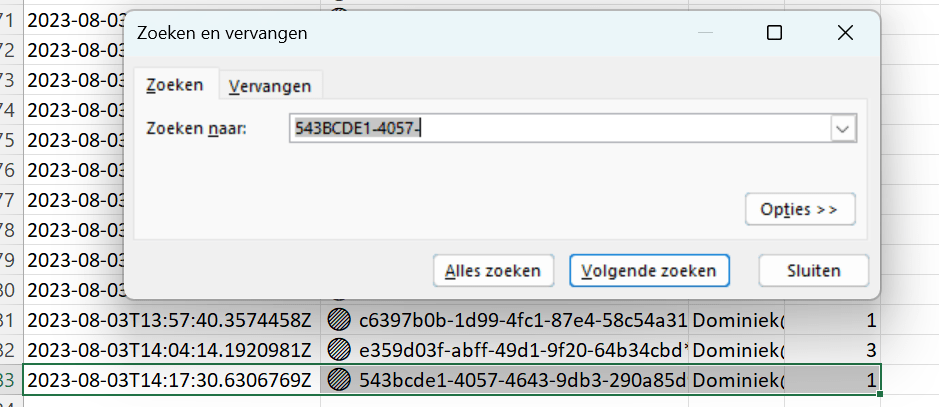
As you can this is a pretty small window to work with. A better way would be to export the information to an Excel document and search for the connection there:
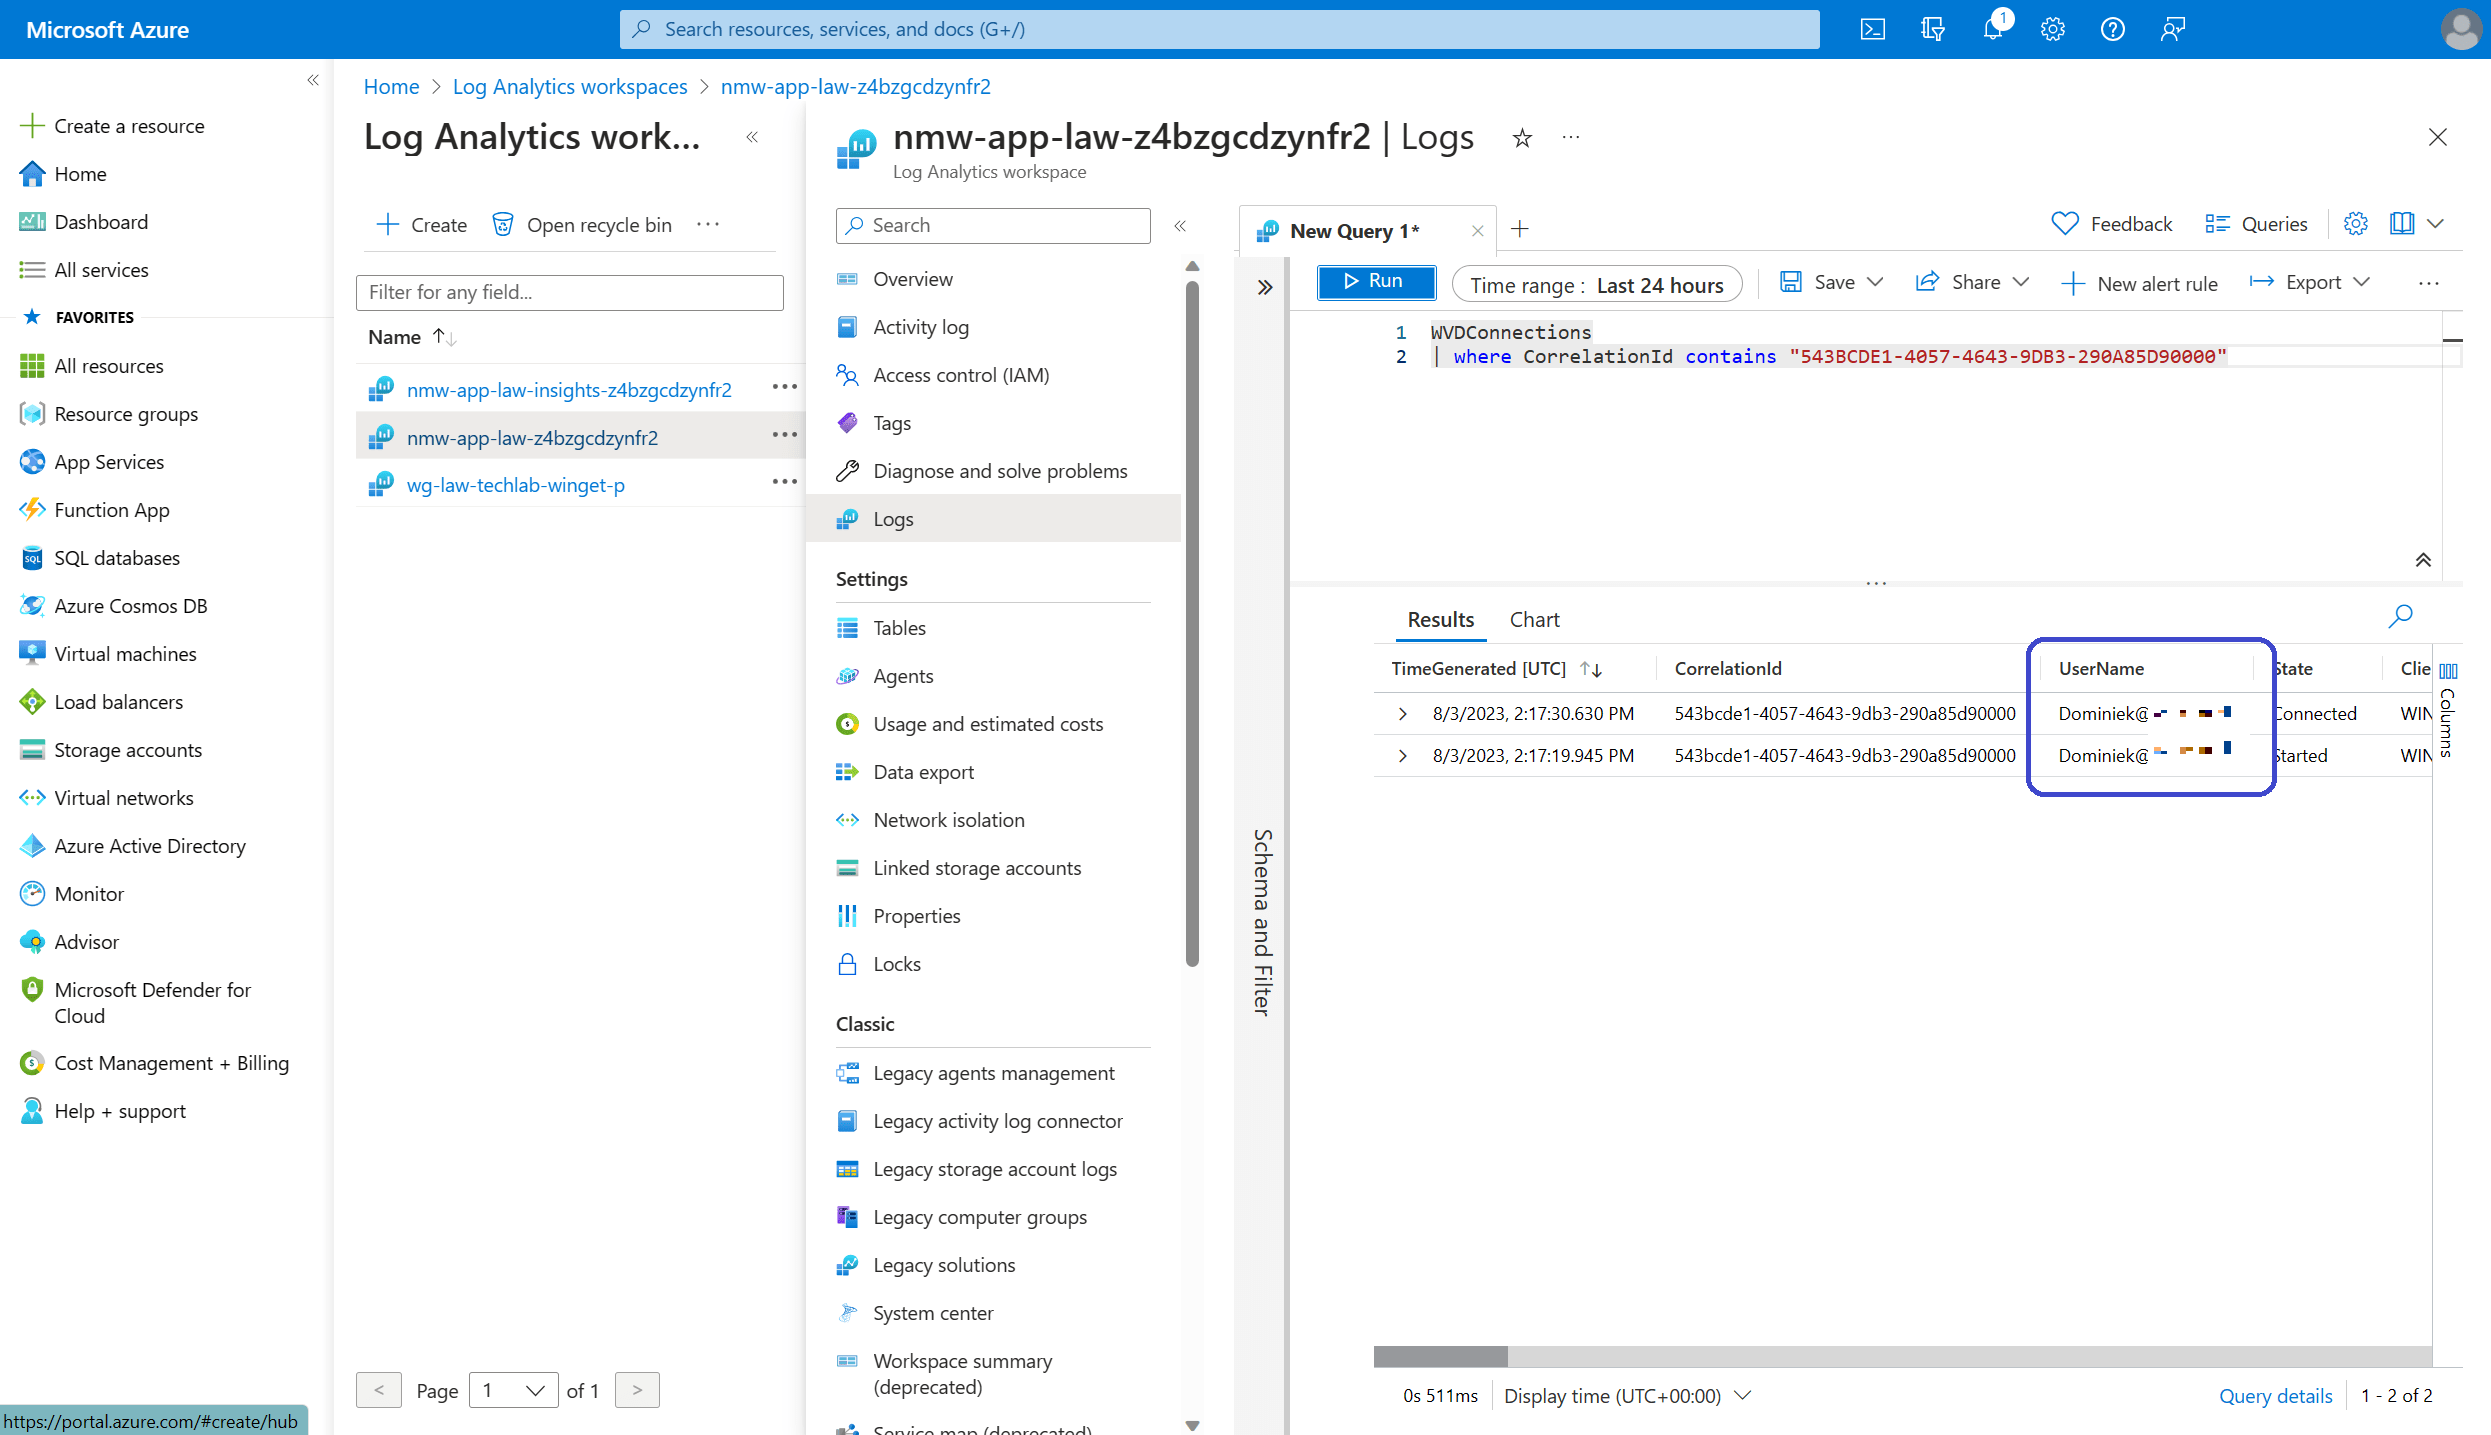
Perhaps the easiest way to go is by using a kusto query against the log analytics workspace.
To do so, open the Azure portal, Log Analytics Workspaces, open the workspace that is connected to your environment, Logs.
You can create a new query here. Just copy in the Kusto query that Microsoft already prepared and enter the session ID that you are looking for. The code:
WVDConnections
| where CorrelationId contains "<connection ID>"
Click on the Run button once you entered the customized Kusto query and you should end up with something like this;
There you go! No big shocker, I just looked up my own session ID!
Resources
I used the following resources for this post:
Azure Virtual Desktop Watermarking Support – Microsoft Community Hub

