Welcome to the first post of 2024!
I’ve covered a couple of security related topics in the past but I never explained one the key things to keep your Cloud PC safe from malware. You probably guessed the topic of this week by now! This week I’ll explain how to connect Microsoft Intune with Microsoft Defender for Endpoint to share device information and create a device configuration policy to ensure that your devices connect to Microsoft Defender for Endpoint. Enjoy!
Prerequisites
Here are the prerequisites that need to be met before you can enroll Cloud PCs into MDE:
- Defender for Endpoint P1 or P2. You can use the standalone version or as part of other Microsoft 365 plans.
- Microsoft Defender for Business (for smaller companies)
- An up to date browser (Edge or Chrome) since management is performed via a webinterface.
- Make sure that you use a supported operating system. I’ll leave a link in the bottom of this post. Since we are talking about Cloud PCs, any recent build of Windows 10/11 will do perfectly.
Connecting Intune and Microsoft Defender for Endpoint
The first thing to do is to create something that’s called a service-to-service connection between Microsoft Intune and Microsoft Defender for Endpoint. Once enabled, Microsoft Intune will share device information with Microsoft Defender for Endpoint.
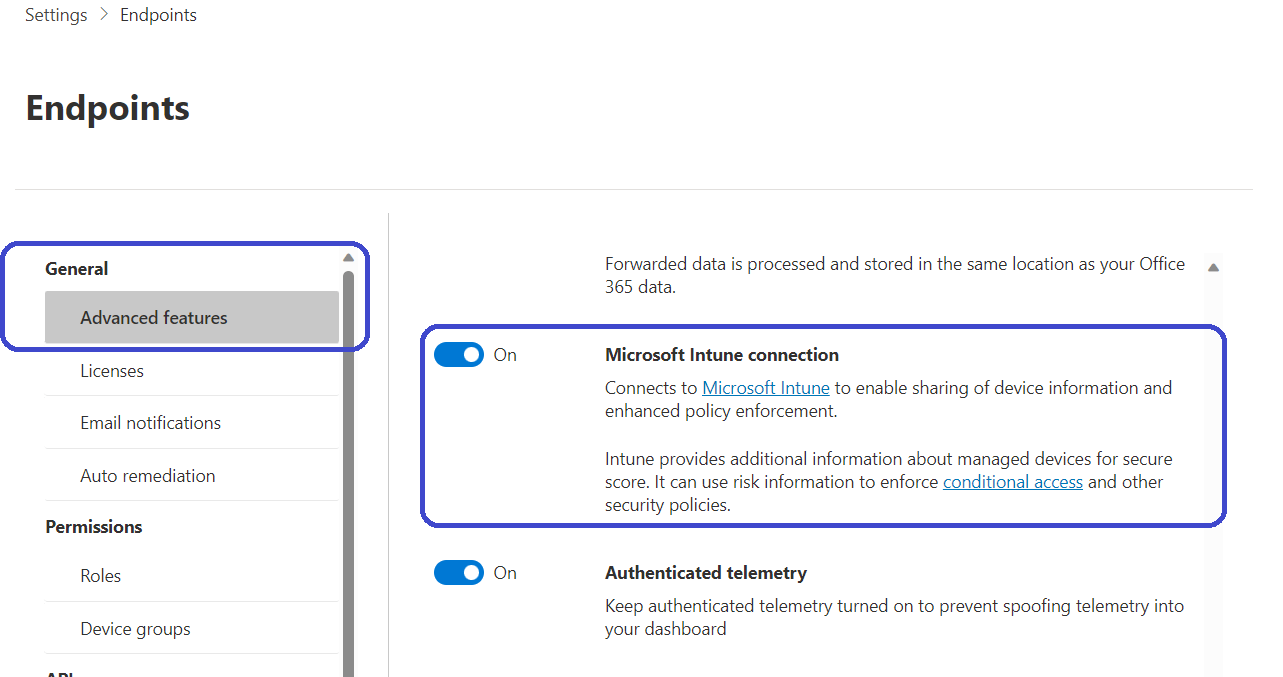
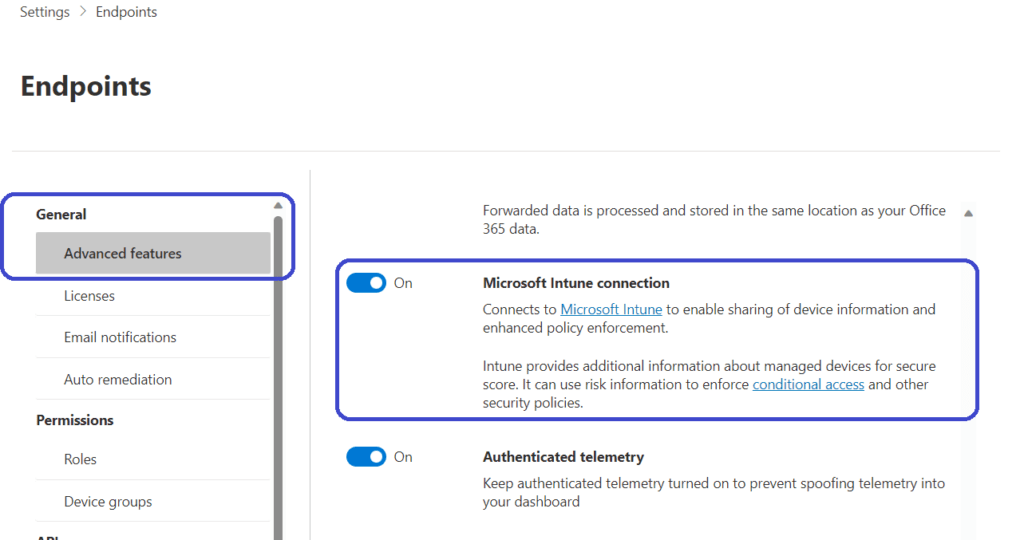
Sign into the Microsoft Defender portal (https://security.microsoft.com), go to Settings, Advanced features, and Enable the Microsoft Intune connection.
Once the connection has been enabled, we need to make sure that our Cloud PCs communicate with Microsoft Defender for Endpoint. The way to achieve that is to create a device configuration policy in Microsoft Intune.
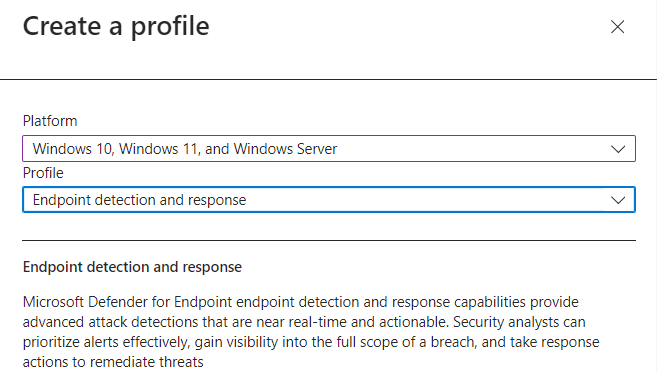
Sign into the Microsoft Intune admin center, Endpoint security, Endpoint detection and response. Click the + Create button in the ribbon.
Make sure to select the following:
- Platform: Windows 10, Windows 11, and Windows Server
- Profile: Endpoint Detection and response
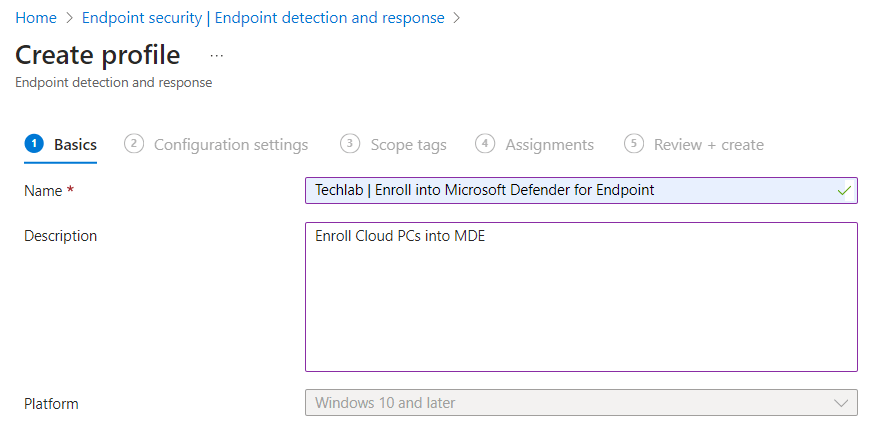
Give the new profile a name and optionally a description and continue to the Configuration settings step.
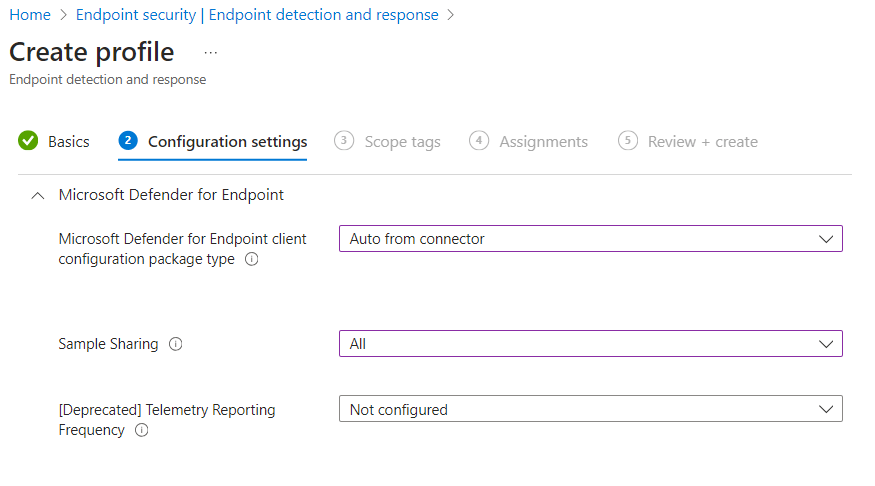
Select the following settings:
- Microsoft Defender for Endpoint client configuration package: Auto from connector
- Sample sharing: All (or None if you are scoping this policy to endpoints that have sensitive information)
- Telemetry Reporting Frequency: Not configured.
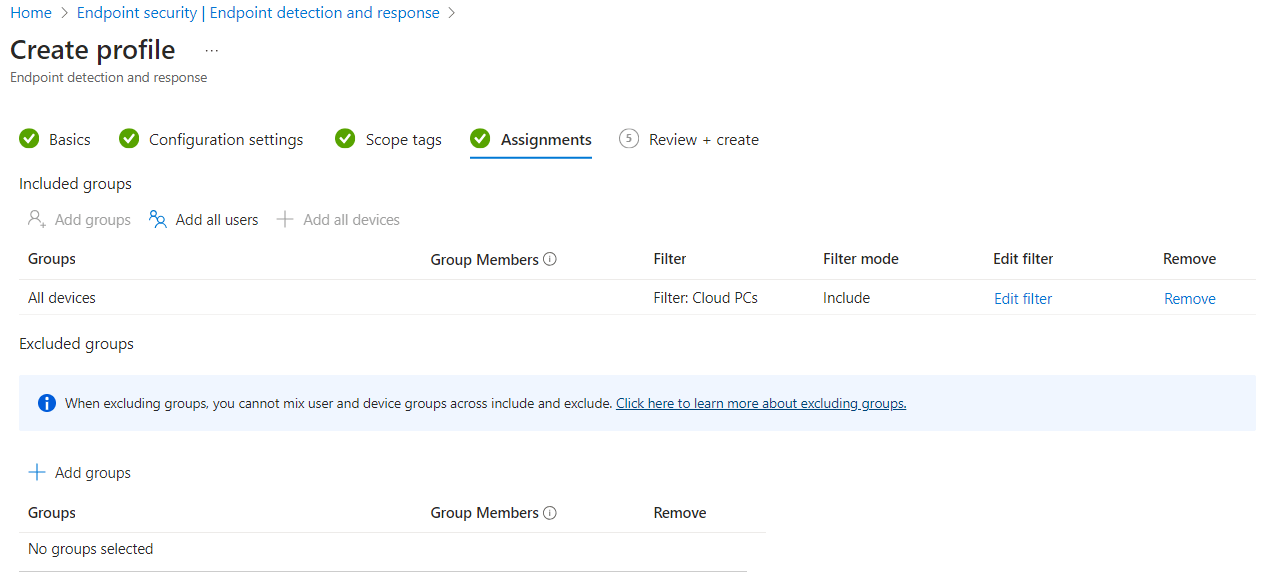
Add scope tags if required and continue to the Assignments tab. Assign the profile to a group of devices or use the built-in All devices group. You can use filters to be more specific, in this example I filtered on Cloud PCs.
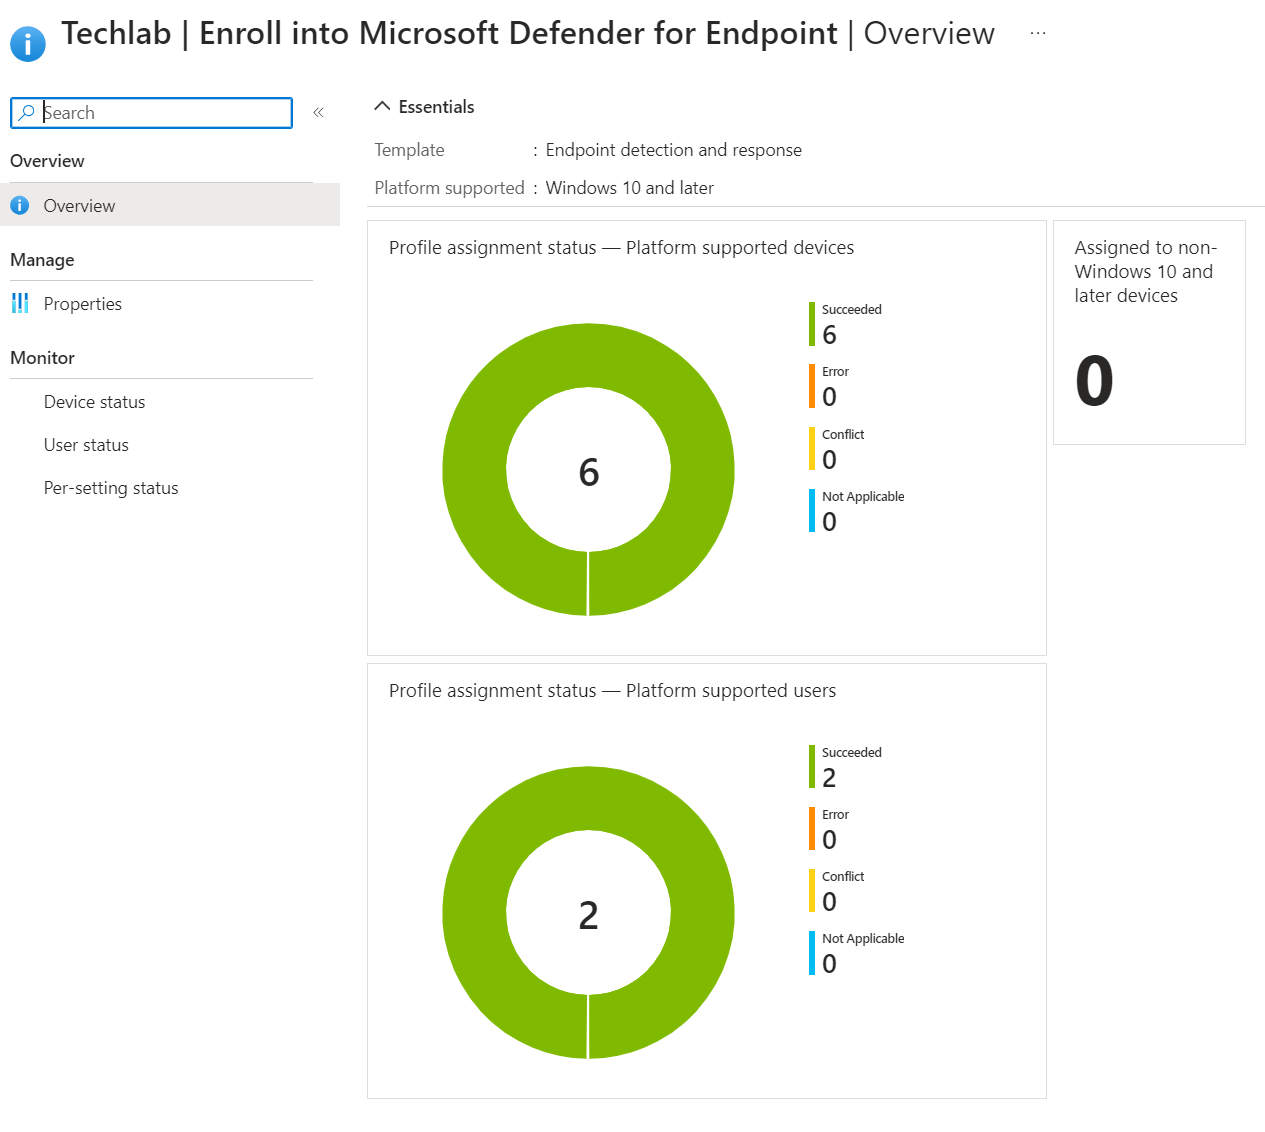
All that’s left is to take a moment to admire your awesome work and create the profile if you are happy with it. Once the devices have checked in, you’ll see them in the defender portal or in the EDR policy:
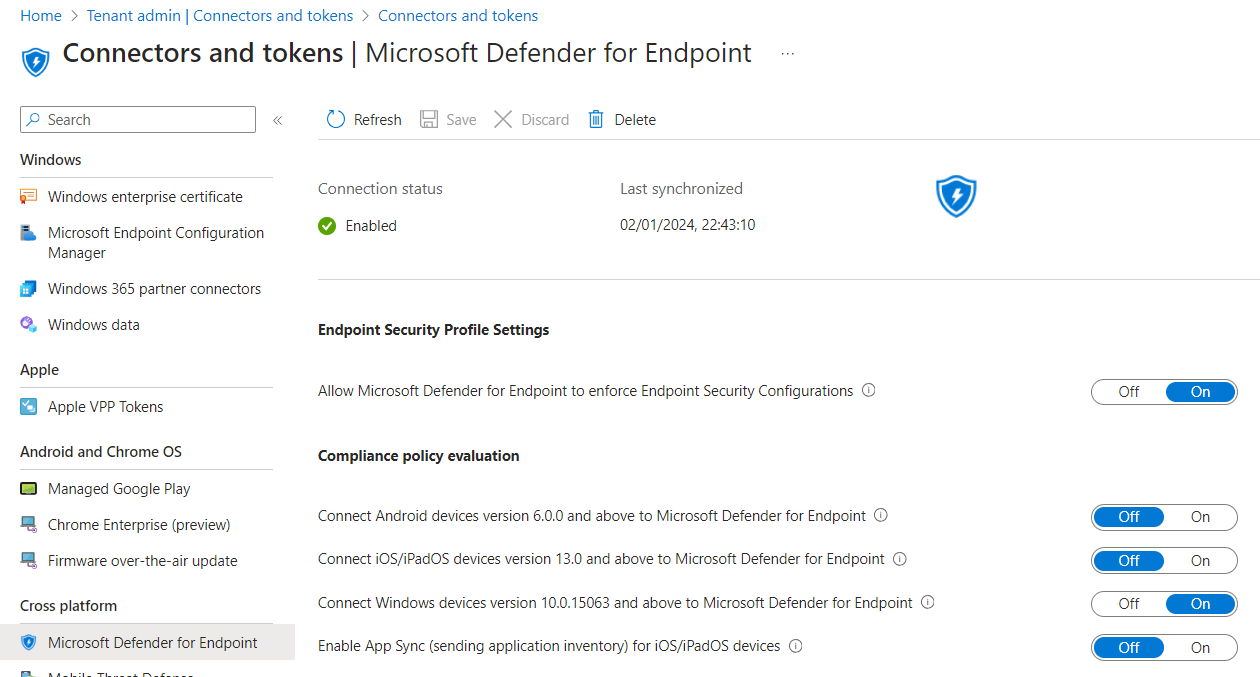
You can find the status of the connector and a bit more settings in Microsoft Intune, Tenant admin, Connectors and tokens, Microsoft Defender for Endpoint.
Resources
I used the following resources for this post:
Microsoft Defender for Endpoint | Microsoft Learn
Set up and configure Microsoft Defender for Endpoint Plan 1 | Microsoft Learn
Evaluate Microsoft Defender for Endpoint | Microsoft Learn (free trial if you want to evaluate Microsoft Defender for Endpoint)

