What’s up, everyone!
In this first post I will talk about configuring a custom startmenu and taskbar for Windows 10. I ended up writing two posts, since the startmenu for Windows 10 and 11 are not compatible:
- Configure a custom startmenu and taskbar for Windows 10 using Microsoft Endpoint Manager
- Configure a custom startmenu and taskbar for Windows 11 using Microsoft Endpoint Manager
There are several ways to configure a customized startmenu for Windows 10. We could use a GPO, Provisioning Packages or a mobile device manager solution like Intune. In this blog I will show how to create an .xml file containing the startmenu layout and how to edit the file to create a custom taskbar. Then I will be using Microsoft Endpoint Manager to create a configuration profile to deploy the custom startmenu and taskbar to the clients.
Let’s begin!
Prerequisites
In this demo I will use;
- A Windows 10 VM to create a custom startmenu.
- A Windows 10 VM enrolled in Microsoft Endpoint Manager.
- I installed Office 365 Apps and MS Teams.
Step 1: Create A Custom Startmenu
The first step for us is to create a .xml file containing the startmenu layout we want. An easy way to do this is by starting up a virtual machine and add and remove apps in the startmenu as needed.
In this demo I started a Windows 10 virtual machine and configured a simple startmenu;
Once we have the layout we need, we can use Powershell to export the layout to a .xml file.
Open up and administrative Powershell and enter the following command (assuming the path C:\Layout exists);
Export-Startlayout -Path ‘C:\Layout\Startmenu.xml’
The exported XML contains some settings to configure the startmenu groups and apps.
Step 2: Configure The Taskbar
Once the startmenu is done, we can move on to the taskbar.
Make a copy of the .xml file so you have a backup of the file when needed.
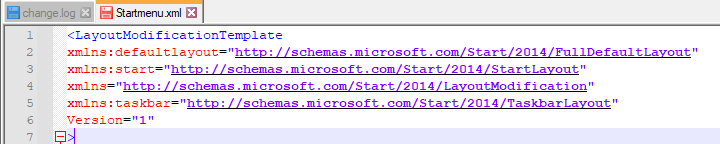
Edit the .xml file and edit the LayoutModificationTemplate. (First line). I made it more readable by putting every item on a seperate line. Also add the following code to enablea custom taskbar.
xmlns:taskbar=”http://schemas.microsoft.com/Start/2014/TaskbarLayout”
The first part now should look something like:
The next step is to add some code to define which apps are added to the taskbar. Here is a sample:
<CustomTaskbarLayoutCollection PinListPlacement=”Replace”>
<defaultlayout:TaskbarLayout>
<taskbar:TaskbarPinList>
<taskbar:UWA AppUserModelID=”Microsoft.MicrosoftEdge_8wekyb3d8bbwe!MicrosoftEdge” />
<taskbar:DesktopApp DesktopApplicationLinkPath=”%APPDATA%\Microsoft\Windows\Start Menu\Programs\System Tools\File Explorer.lnk” />
<taskbar:DesktopApp DesktopApplicationLinkPath=”%PROGRAMDATA%\Microsoft\Windows\Start Menu\Programs\Outlook.lnk” />
</taskbar:TaskbarPinList>
</defaultlayout:TaskbarLayout>
</CustomTaskbarLayoutCollection>
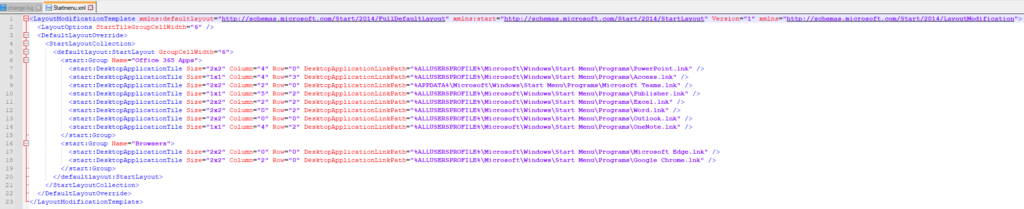
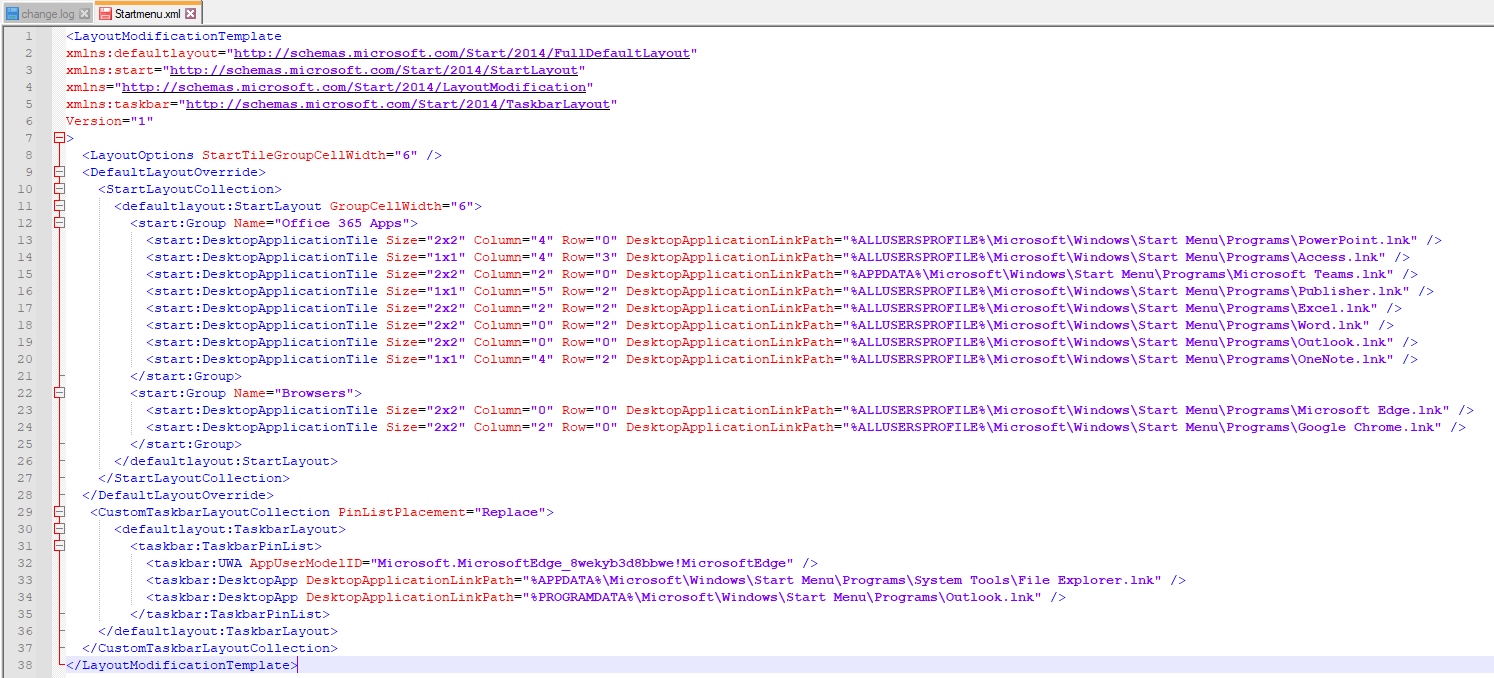
The .xml file should look something like this:

The full .xml would look something like this:
So what did we actually configure with this .xml?
- taskbar:UWA is used for Modern Apps.
- taskbar:DesktopApp is used for desktop applications.
In this setup, we configured Microsoft Edge on the first slot, File Explorer on the second slot and Microsoft Outlook on the third slot.
There are a couple of other options available, I will link those on the bottom.
Add or Replace
By default the .XML file will add the apps on the taskbar. There is an option to replace the icons. In this case we need to add PinListPlacement=”Replace” after CustomTaskbarLayoutCollection.
That line would look something like this:
CustomTaskbarLayoutCollection PinListPlacement=”Replace”
In my example file, I already changed that value:
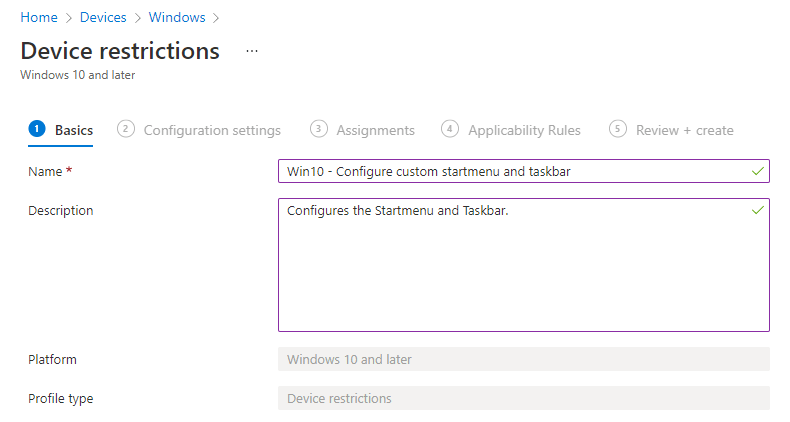
Step 2: Configure The Device Configuration Policy
Login to Microsoft Endpoint Manager. Create a new Device Configuration Policy (Device Restrictions Template):
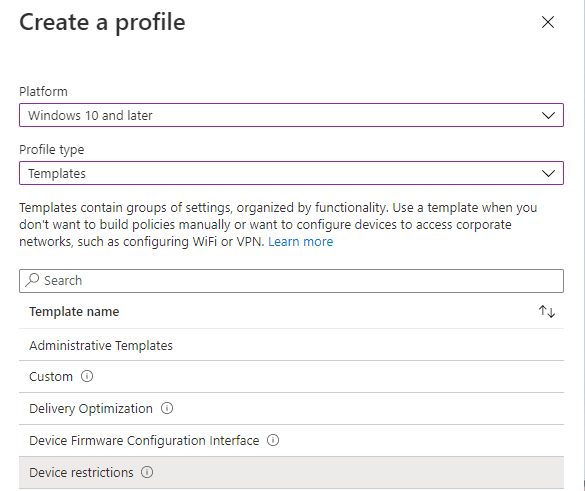
Provide a name and description.
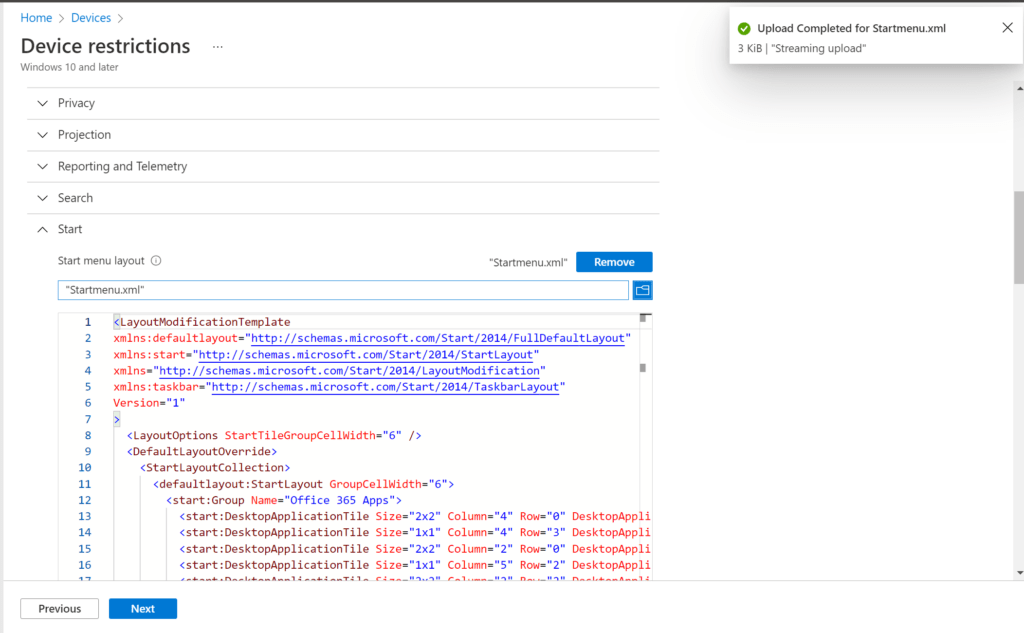
Open up the Start section and browse to the .XML file we created earlier.
Assign the policy, in my case all devices will do.
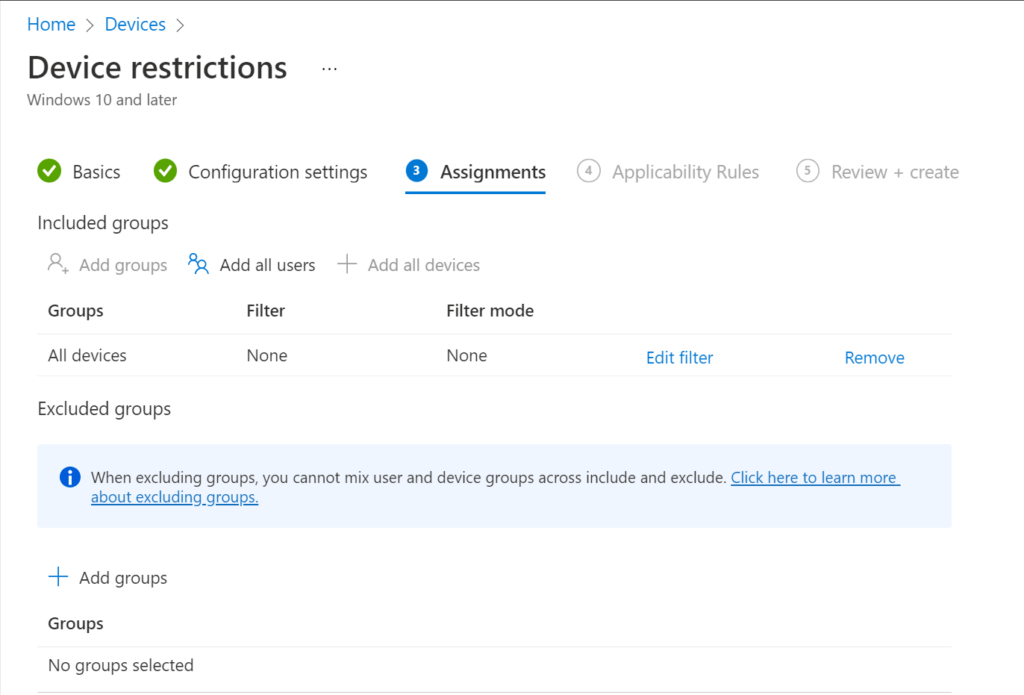
If needed, configure the applicability rules. Review and create the profile.
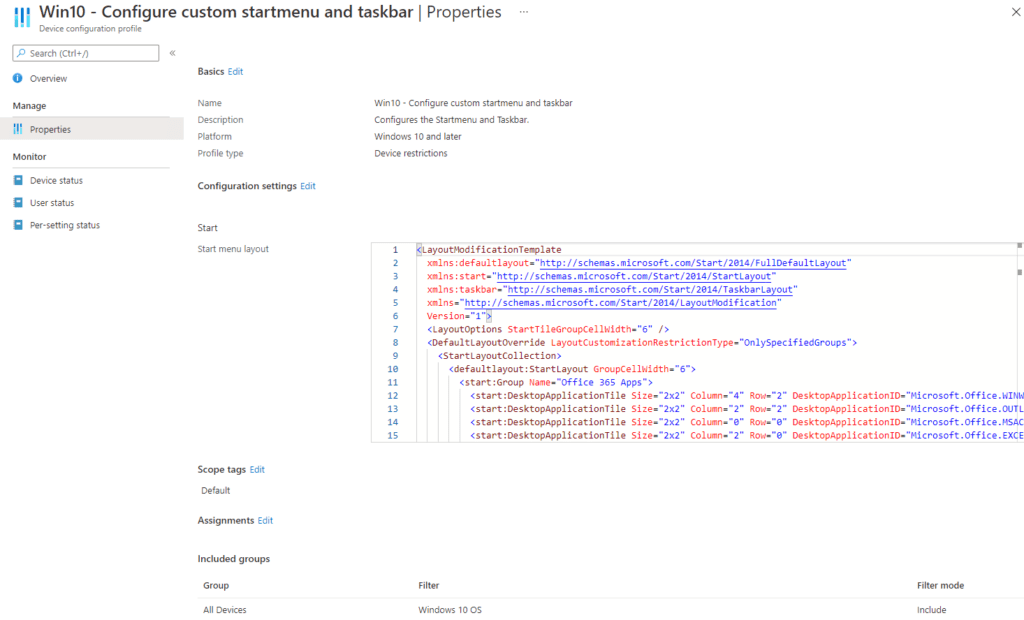
That’s all for the Device Configuration Profile.
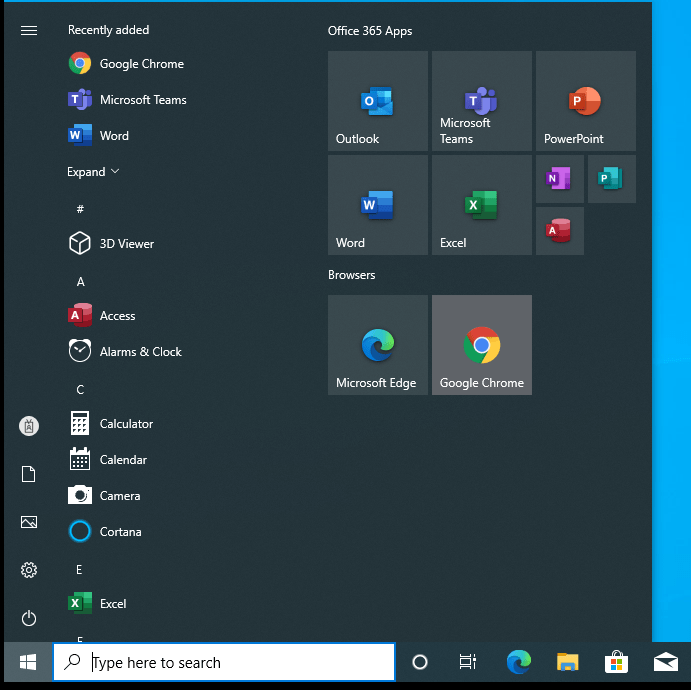
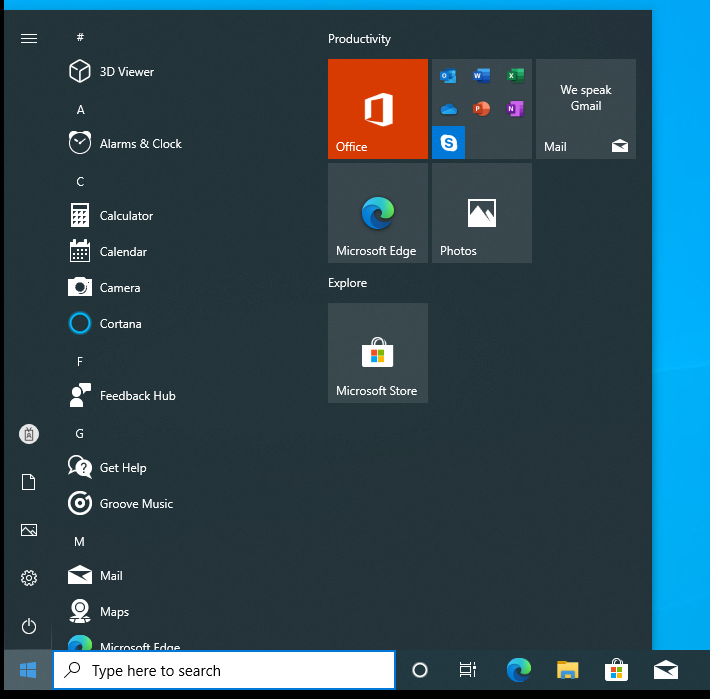
Step 3: Check The Windows 10 Startmenu and Taskbar
The default Windows 10 startmenu and taskbar look something like this:
The startmenu and taskbar will look like this when the policy is active:
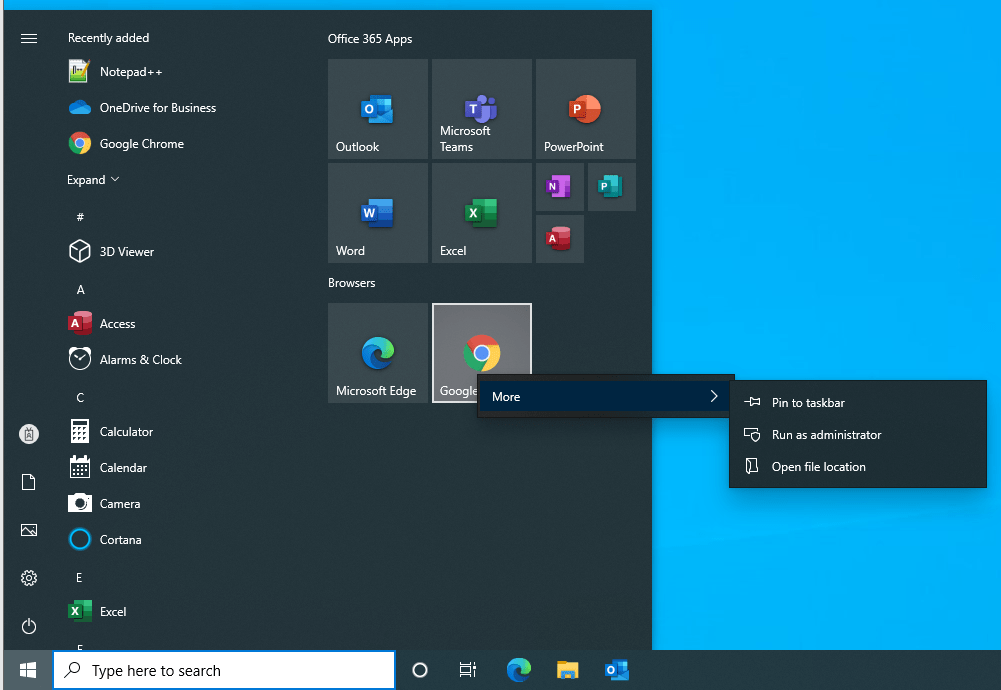
We see the startmenu and taskbar exactly as configured in the .xml file.
It is not possible to add and remove apps to the startmenu, it will simply give block the action.
We can add and remove apps from the taskbar.
How to filter Windows 10 and 11 operatings systems?
In the next post, I talked a bit about using filters. If you have both Windows 10 and Windows 11 devices, you can easily create filters and use them to make sure only the appropriate device configuration profiles are committed.
Resources
I used the following resources for this blog.
Customize the Start menu and taskbar layout on Windows 10 and later devices