
What’s up, everyone!
Let’s take a look at how to install Rimo3! We already had a look at the two different deployment models. Basically you can host all the resources in the Rimo3 tenant or you can host most of the resources in your own tenant. For this demo, I will show how to setup Rimo3 components in your own tenant (Azure Linked Deployment model).
This post is part of the following series | Application Management With Rimo3
Requirements
- A Microsoft tenant
- An active subscription / Subscription owner
- Rimo3 created the backend in their tenant
- You need to register by creating an account
- Rimo3 implementation kit
- Set the executionpolicy to unrestricted and run the script
The Setup Process
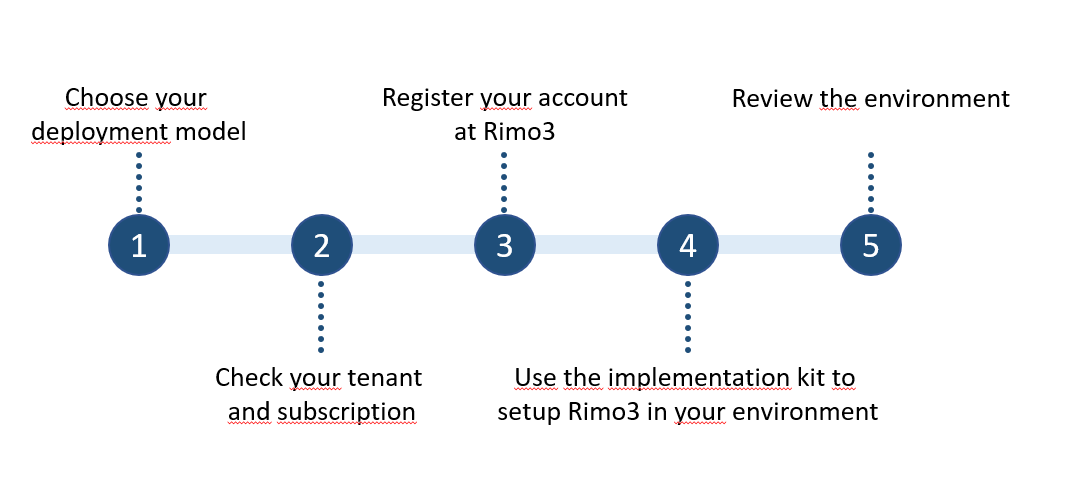
As discussed before, the first step is to decide where you want to run the components of Rimo3. You should take into account that you have more testing options if you run the components in your own tenant.
Check your tenant and subscription
You need to have an active subscription and you need to have subscription owner rights if you run the components in your own tenant.
Register your account at Rimo3
Rimo3 will need to prepare a couple of things before you can setup the components in your own tenant. They will create the backend for your environment on their side. Once this process is complete, they wil send you an email. Use this mail to register an account for your organisation at Rimo3.
Use the implementation kit to setup Rimo3 in your environment
Rimo3 will send you an implementation toolkit. This kit contains all the relevant documentation along with a Powershell script that creates all the necessary resources in your tenant and a settings.json file that you can edit with the correct values for your environment. Let’s take a look at the settings.json file.
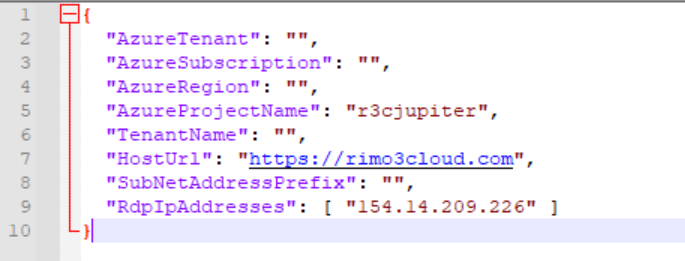
- AzureTenant: Fill in the tenant ID. See Azure AD, you can copy the ID from there.
- AzureSubscription: Fill in the subscription ID. Go to your subscriptions and open the subscription that you want to use. You can copy the ID from there.
- AzureRegion: Defines the region where the VM’s will be created.
- AzureProjectName: Contains a prefix to identify resources that will be used by Rimo3. Should not be changed.
- TenantName: If this parameter is empty, contact Rimo3 for the correct tenantname. This is not your own tenant, but the backend at Rimo3 that you are connecting to.
- HostUrl: Contains the URL used by the gateway virtual machine. Should not be changed.
- SubNetAddressPrefix: Enter your desired subnet for the virtual machines. The script will create the subnet for you.
- RdpipAddress: Contains an IP address which is used by Rimo3 support. You can add your own IP addresses. The gateway VM will not have a public assigned IP address.
Save the settings.json file in the same folder as the Powershell script.
Now you can run the Powershell script. Make sure that you set the execution policy to unrestricted before you run the script and make sure that you run the script with elevated privileges. The script is pretty straightforward and explained in detail in the documentation that you can find in the deployment kit. It requires the Az PowerShell module and if it’s not installed, the script will install it automatically.
If you get the error Cannot validate argument on parameter ‘Tenant’, check the PowerShell script and make sure the settings file has the correct name.
It will ask for a couple credentials. These are;
- The GA credentials for you tenant
- Provide a username and password for the gateway
- Enter your credentials for the Rimo3 website (remember the email with the join button to create an account)
If you aren’t really sure that you filled in all the correct details, don’t worry. You can run the script and Powershell will show you all the errors in red if anything goes wrong. Should this happen, just open the Azure portal and check your resource groups. Delete the resource group that this script created and wait until everything is deleted. Correct the problem and re-run the script.
If it still fails, just contact Rimo3 support. In my experience they react pretty fast!
My first attempt failed, because I interpreted the 3rd credential set wrong. So I just deleted the resource group and ran the script again. It completed without any errors.
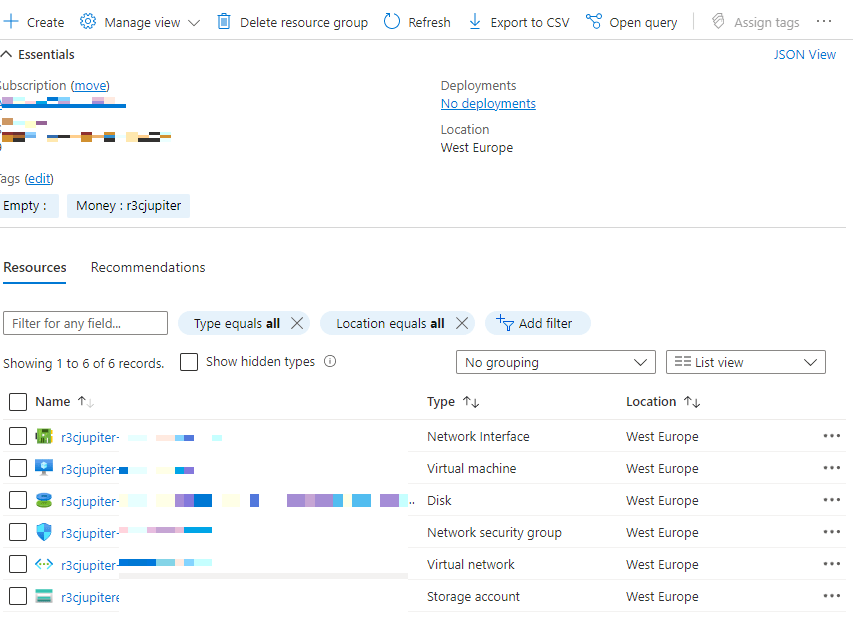
Review the environment
Let’s take a look at the result. Open your Azure portal, check your resource groups and check what resources have been created.
The First Logon Questionnaire
One thing I didn’t mention before is what happens when you login to the Rimo3 website for the first time. Remember the mail that you received when the backend was setup and you could create your account? Well, if you login for the first time you will be prompted for a questionnaire. Just follow the questions and this will pre-configure the environment for you.
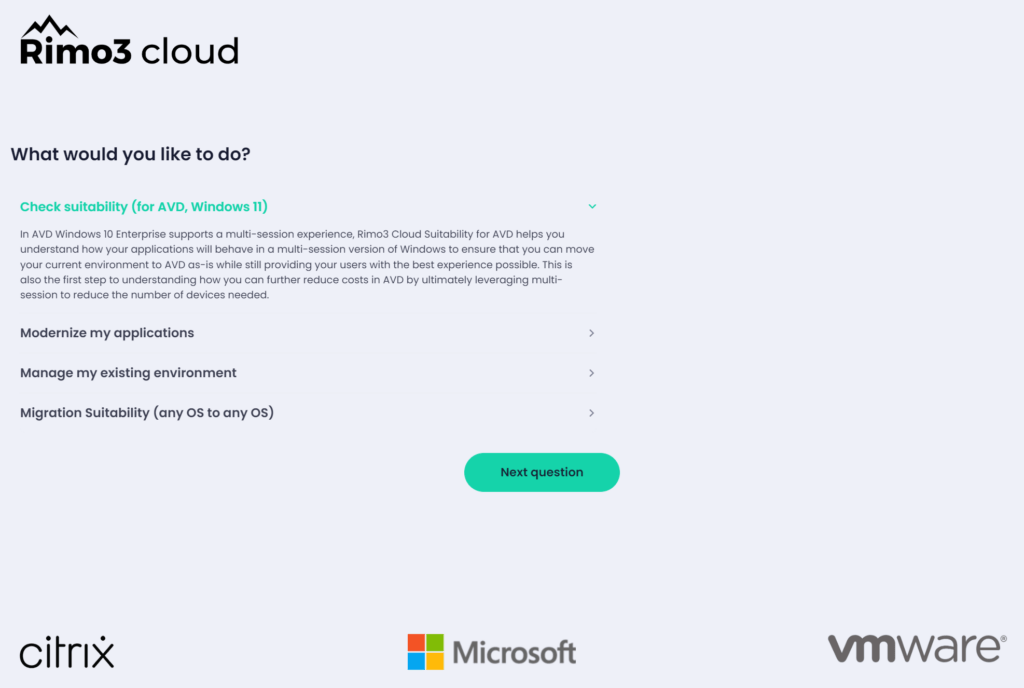
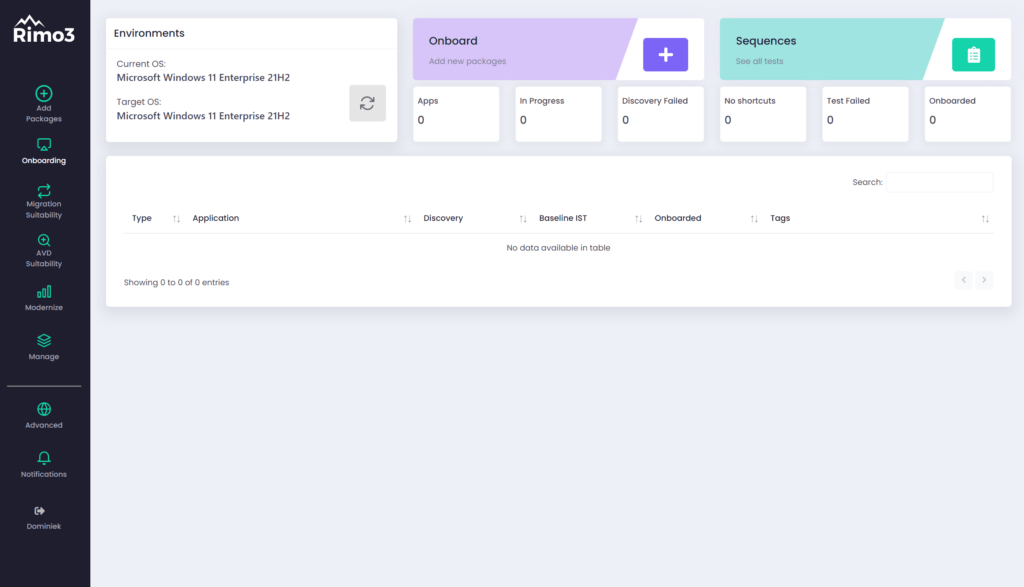
Select the scenario that is right for you and click Next question. The other questions might differ for each scenario. Ultimately you will end up in the Rimo3 dashboard.
This concludes the setup of Rimo3 in an Azure Linked Deployment. In the next post we’ll have a look at the different options we have now that Rimo3 is setup.
Resources
I used the following resources to write this post;
Rimo3 documention (from the deployment toolkit) and support