
What’s up, everyone!
This post is part of a series I’ve been wanting to do for a long time now. It is about Azure Virtual Desktop / Windows 365 in combination with Nerdio Manager for Enterprise. It is a great third party tool that enables us to create, manage and optimize our Azure Virtual Desktop environment.
Alright, we now have a very basic Azure Virtual Desktop environment. It only has a generic image from the marketplace. It’s time to checkout a way to add more applications! In this demo I will talk about MSIX as a packaging format and how we can use MSIX packages in our AVD environment using Nerdio Manager for Enterprise.
Series – AVD and Windows 365 with Nerdio Manager for Enterprise
- Part 1: Setup Nerdio Manager for Enterprise
- Part 2: Configure Azure Files and Azure AD DS Authentication
- Part 3: Setup a host pool, app group and workspace
- Part 4: Ways to login to AVD
- Part 5: NME and MSIX
- Part 6: Custom Image for AVD
I will link every post in the series in each intro.
Disclaimer: The way I setup and configured Nerdio Manager for Enterprise might not be the quickest way and it cannot be considered as best-practices by Nerdio. This is not a sponsored series.
Prerequisites
- This demo will assume part 1 to 4 have been succesfully completed.
- A VM running Windows 10 (for packaging purposes).
- Code-signing certificates.
- An on-premises Active Directory Domain Services or an accessible UNC path to store our MSIX images.
What is MSIX?
In a nutshell, MSIX is a package format that provides a modern packaging experience for Windows apps. It basically combines the best features of MSI, Appx, App-V and ClickOnce. We get a lot of advantages if we use MSIX packages. They are optimized for reliability, network bandwith and disk space. If you are familiar with App-V, you might recognize the internals of an MSIX package. MSIX apps run in lightweight app container and are isolated using file system and registry virtualization. It also prevents winrot from happening. Packages are only downloaded when needed and they make use of a virtual file system and registry. So if we remove the packages, nothing is left behind.
MSIX packages are a great solution for Azure Virtual Deskop environment, using MSIX App Attach. Nerdio Manager for Enterprise also allows us to add MSIX packages. To do so we just need to link the Azure Files shares storage location, add the certificates and add the MSIX packages.
I found many great articles while checking MSIX out. You can find them on the bottom of the blog.
Certificates
For security reasons MSIX packages need to be digitally signed. We will need to use a code-signing certificate. It is possible to not sign the MSIX package for lab or testing purposes. This is not intended for production purposes. If you want to test without code-signing, remember to enable the developer options on your test machine.
We will use a self-signed certificate for our lab. Use the following Powershell command to create a self-signed certificate:
New-SelfSignedCertificate -Type Custom -Subject "CN=Techlab" -KeyUsage DigitalSignature -KeyAlgorithm RSA -KeyLength 2048 -CertStoreLocation "cert:\LocalMachine\My"
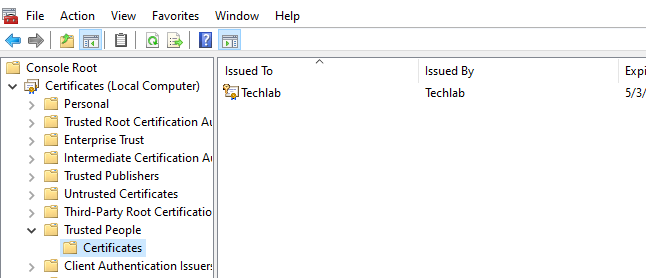
Export the self-signed certificate with private key to a .pfx file and import the .pfd file to the Trusted People LocalMachine store.
Create an MSIX Package
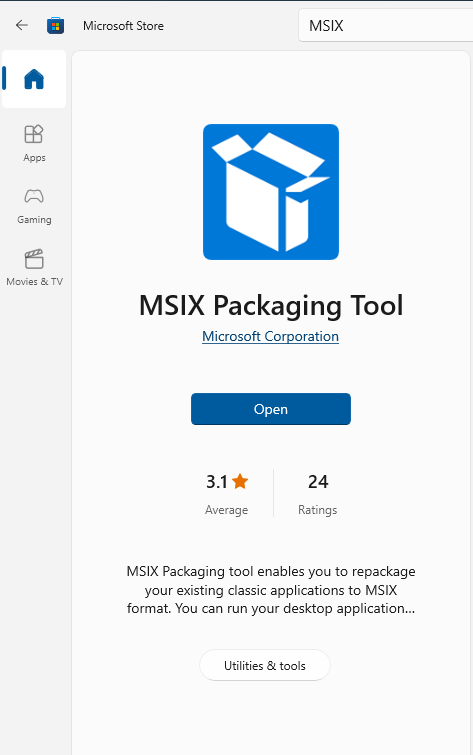
It’s time to create our first MSIX package. Let’s try with a simple application like 7zip. I started my Windows 10 test virtual machine and opened up the Microsoft Store. Search for the MSIX Packaging Tool from Microsoft and install the app. Open the MSIX Packaging Tool.
I already downloaded the 7zip installer and saved it on C:\Install.
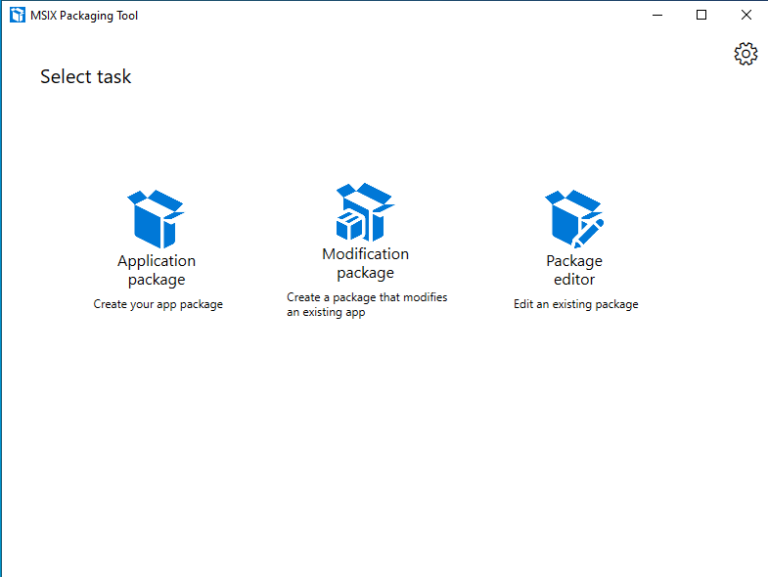
Click on Application Package. Choose Create package on this computer and click Next.
The packaging tool will check your VM and give some recommendations. Install the MSIX Packaging Tool Driver if needed and check the recommendations for optimal packaging results.
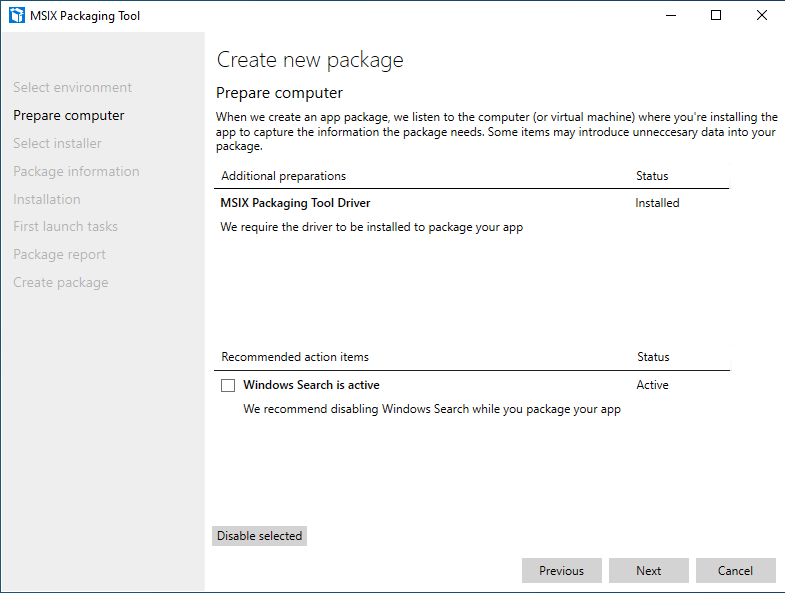
I disabled Windows Search and clicked Next.
Next, navigate to your installer, specify any required parameters (optional) and select your signing preference.
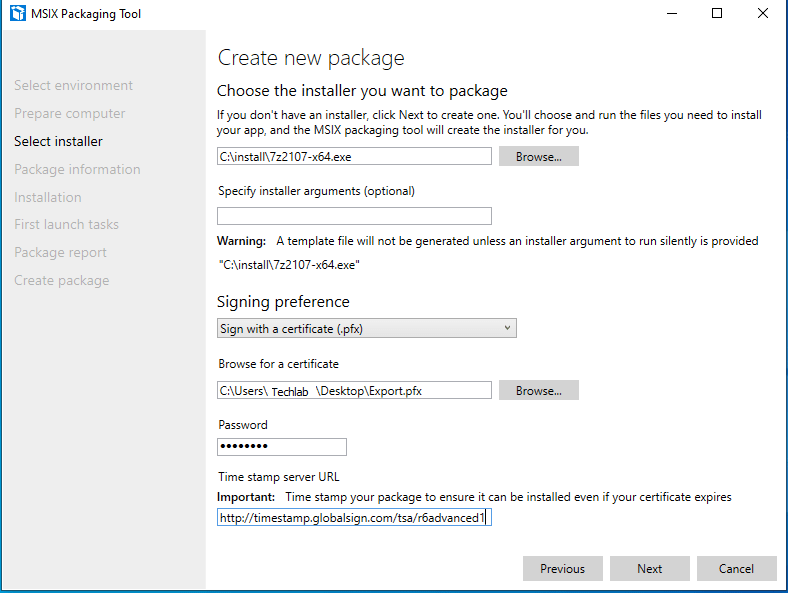
If you want to timestamp your package, use one the following timestamp servers.
Click Next to proceed to the next page.
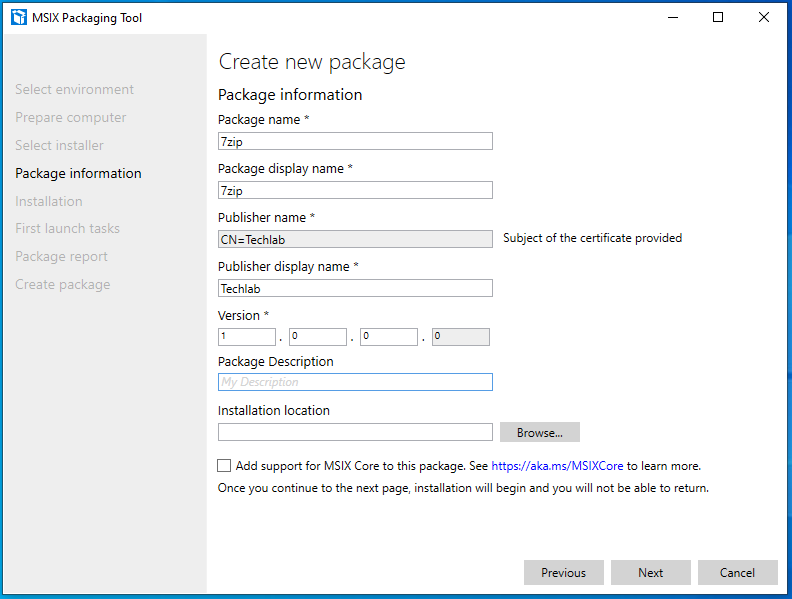
Fill in the required fields. Make sure the publisher name is the same as the exported certificate. Remember the certificate must be installed on your endpoint.
Only check the MSIX Core box if you plan to use MSIX packages on versions of Windows prior to 1709. More info on MSIX Core.
Click on Next to start the packaging process.
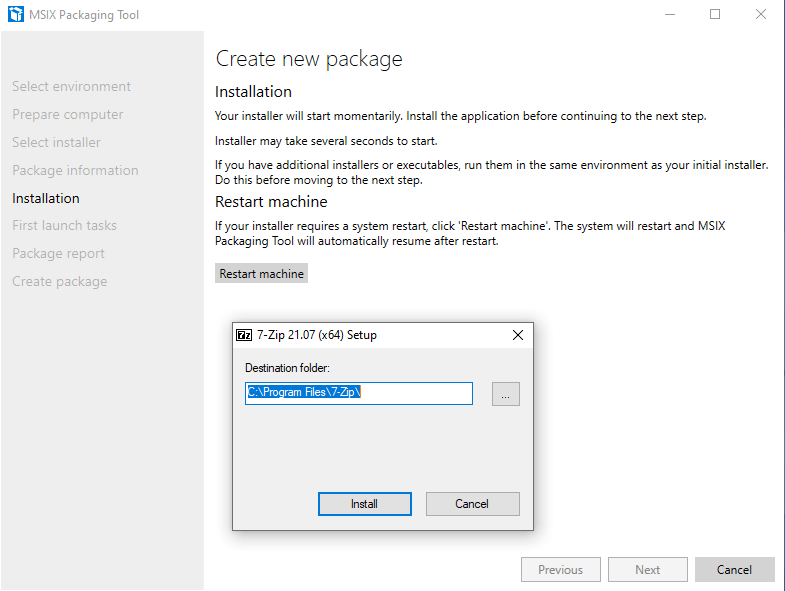
Continue through the installation process. Make sure to disable any auto-updating features as MSIX containers are read-only. Start the application once it is installed to make sure it installed correctly. Make sure to reboot your VM is needed by clicking on the Restart machine button. Click Next.
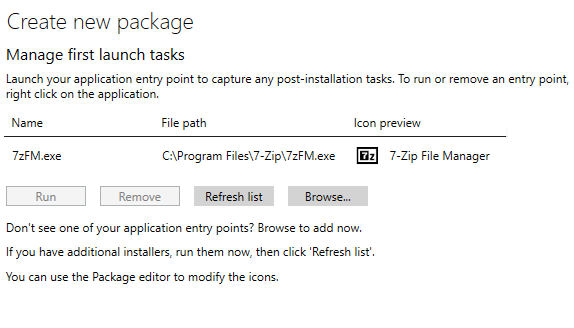
The MSIX Packaging Tool will check if the installion is complete. If you want to install some add-ons or others things, click on No, I’m not done. However, click Yes, move on if you are done with the installation process.

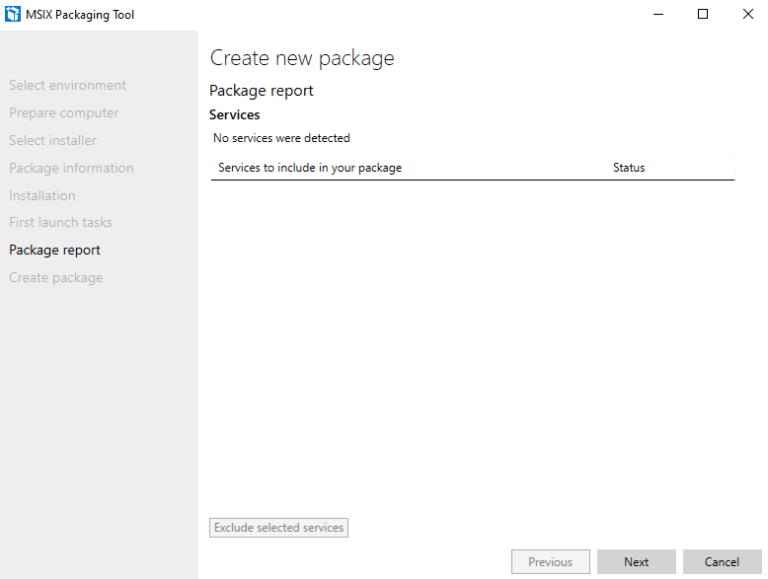
So yep, I’m done with the installation and it’s time for the next step. In the package report we can see if any services are detected during installation. It’s also possible to remove unwanted services. 7zip does not use any services, so for me this screen will be blank. Click on Next to create the package.
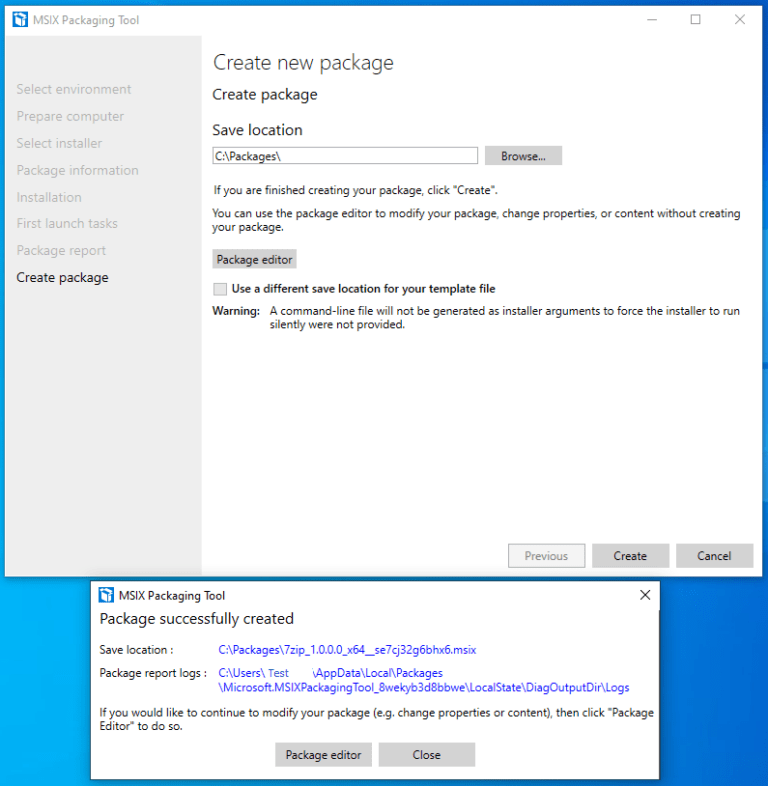
Click the close button to finish up and clean the packaging environment.
We will be returned to the select task screen in the MSIX Packaging Tool. At this point we can create a new package, modify an existing package or start the package editor.
Now it’s time to check if the newly created 7zip package works! I opened up Programs and Features and removed 7zip.

Next I checked the program files folder and verified that the installation folder is removed.
I am testing on the same virtual machine I used to create the certificate and the MSIX package. Let’s see what happens when I doubleclick on the package.
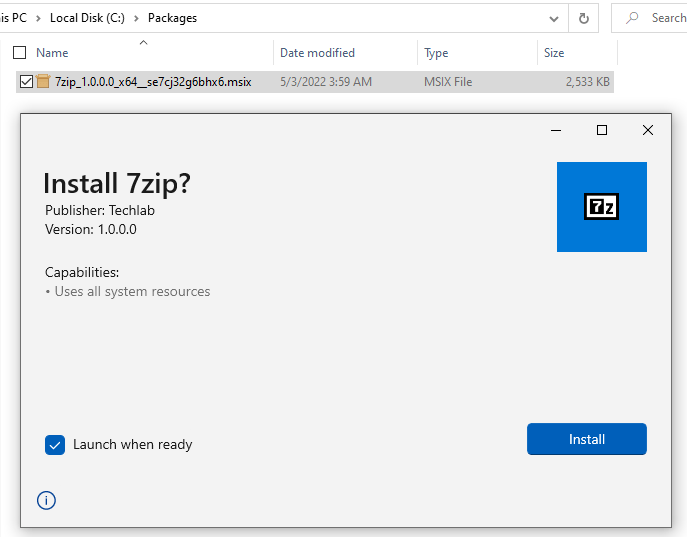
Wait for the installation process to complete:
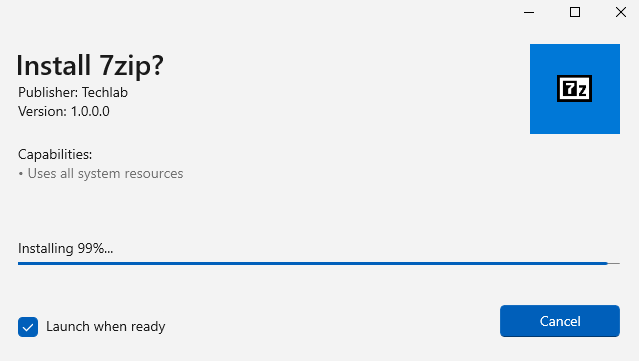
The app will automatically start since the checkbox is checked. 7zip works as expected.
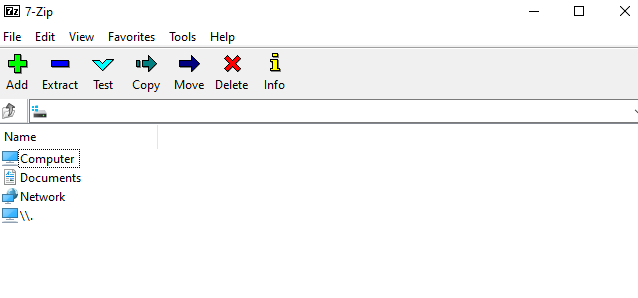
7zip can see everything on the local drives, so that works beautifully.
So, where does MSIX differ from a regular installation? The first thing that comes to mind is to check the Programs and Features. It does not show up in the list.
It does show up in the start menu with the 7zip icon. That would also be the way to remove the package from the VM if needed. (Uninstall option in the submenu)
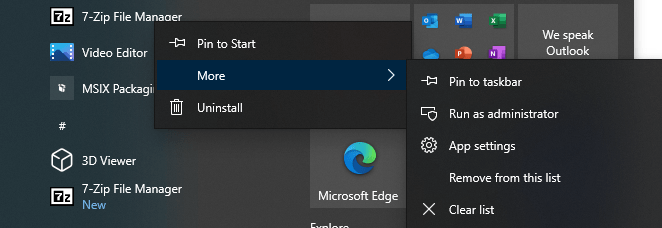
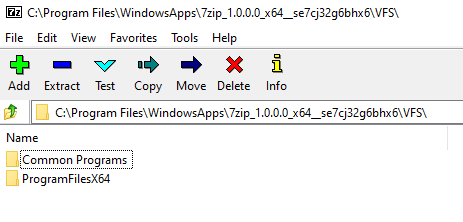
As mentioned before, MSIX packages are isolated. So there is no 7zip folder in the Program Files folder. Instead MSIX packages are stored in C:\Program Files\WindowsApps. This is a protected folder and best left alone.
But as you may know, 7zip does not care about permissions. So it’s a great way to show you the contents of the package. I will not go into huge detail about the folder structure and important files, but it is worth mentioning that the VFS folder stands for the virtual file system and registry.dat is the virtual registry.
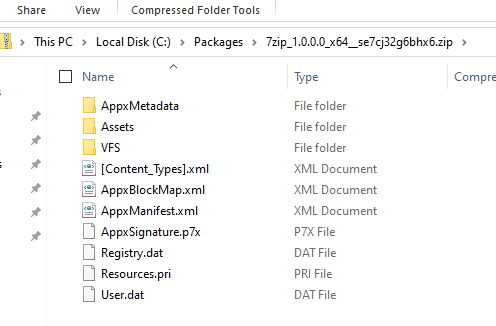
There’s also a way to view the contents of a package when it’s not installed yet. Just make a copy of the MSIX package and rename the extension to .zip. Open it with your preferred app and check the contents there.
I think the AVD Handbook: Application Management explains it best;
‘The medium used to deliver MSIX packages using MSIX App Attach is called an MSIX image’.
In this step will create an MSIX image from the MSIX package. This step is also known as ‘Expand an MSIX image’. We will need to decide which filetype to use and download the MSIXMGR tool.
There are three filetypes to choose from:
- VHD
- VHDX
- CIM
The three filetypes are virtual disks. VDH and VHDX are well known virtual disks. As per Microsoft ‘.CIM is a new file extension associated with Composite Image Files System (CimFS). Mounting and unmounting CIM files is faster that VHD files. CIM also consumes less CPU and memory than VHD‘
In this demo I will go for the .CIM filetype. I already downloaded MSIXMGR and extracted it to C:\Install\msixmgr.
Open up an administrative command prompt. Navigate to C:\Install\msixmgr\x64\.
The syntax for msixmgr is as follows:
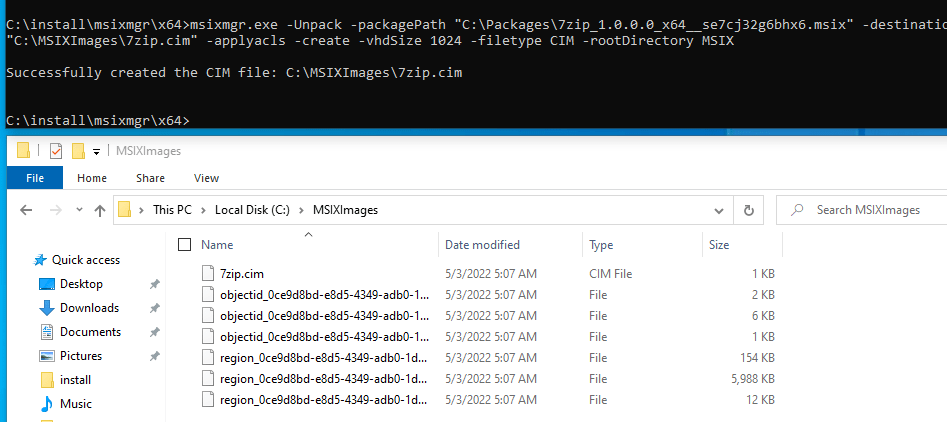
msixmgr.exe -Unpack -packagePath <path to package> -destination <output folder> [-applyacls] [-create] [-vhdSize <size in MB>] [-filetype <CIM | VHD | VHDX>] [-rootDirectory <rootDirectory>]I used the following command to create the MSIX image:
msixmgr.exe -Unpack -packagePath "C:\Packages\7zip_1.0.0.0_x64__se7cj32g6bhx6.msix" -destination "C:\MSIXImages\7zip.cim" -applyacls -create -vhdSize 1024 -filetype CIM -rootDirectory MSIXThe result would be something like this:
Storage Options for MSIX Images
My lab environment is based on Azure AD with Azure AD DS, so my first thought was to store the images in the cloud as well. My first idea was to make use of Azure Files with SMB using Azure AD DS authentication. But when I was configuring the fileshare, I realized I hit a limitation I didn’t think of before. Azure AD DS only supports Users, Groups and Service Principals. It does not support computer objects. The way to go is by using on-premise AD DS. So for me that means there is no way to assign role permissions to the session hosts in this configuration. Check this URL for more information.
At this point I decided to expand on the topic a bit. First I will show how to configure the Azure Files fileshare and how to configure NME (for as long as possible with the current setup) and then I will show how to upload a single MSIX image via NME and check if it works on a session host.
Let’s configure the Azure Files fileshare! Login to the Azure portal, open or create a storage account. Make sure to configure Active Directory. In my demo, it was already set to Azure AD DS. Create a new file share, I named it msiximages.
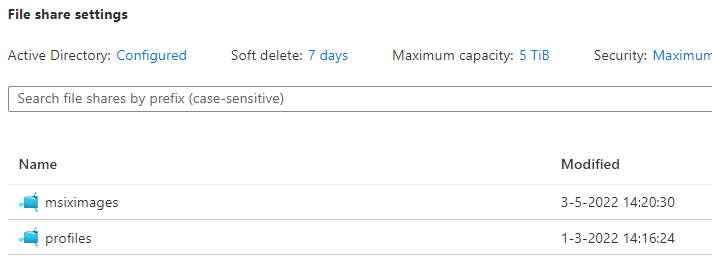
Open the fileshare and select Access Control (IAM). Click on Add role assignment and add a group containing the session hosts. Since I’m using Azure AD DS, this will not yet work in my environment.
Next, map the drive in Windows Explorer. Configure the NTFS permissions for the session hosts;
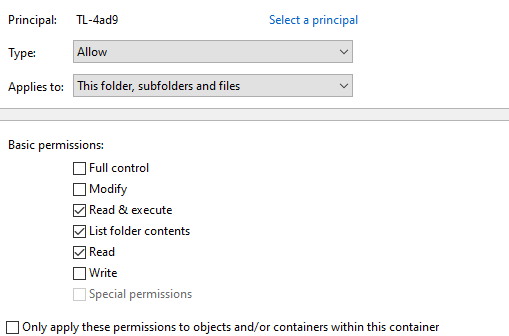
This is all that’s needed to configure the file share. The next step is to configure NME to use the Azure Files fileshare.
Configure Nerdio Manager for Enterprise
Login to Nerdio Manager for Enterprise and go to Settings, Integrations. You should find a box named ‘MSIX App Attach Storage Location’.
Click on Link and select your storage location.
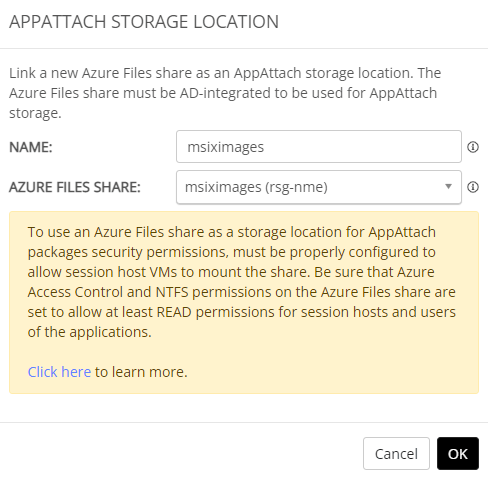
Click OK to finish up.
Go to MSIX APP ATTACH in the menu bar, click on Certificates. This is the place where NME helps us with the code-signing certificates. Add a .cer file of the certificate (you can get that from the VM we used earlier). NME will automatically inject the certificate onto the session host. Make sure to choose the correct format; Base-64 encoded X509.
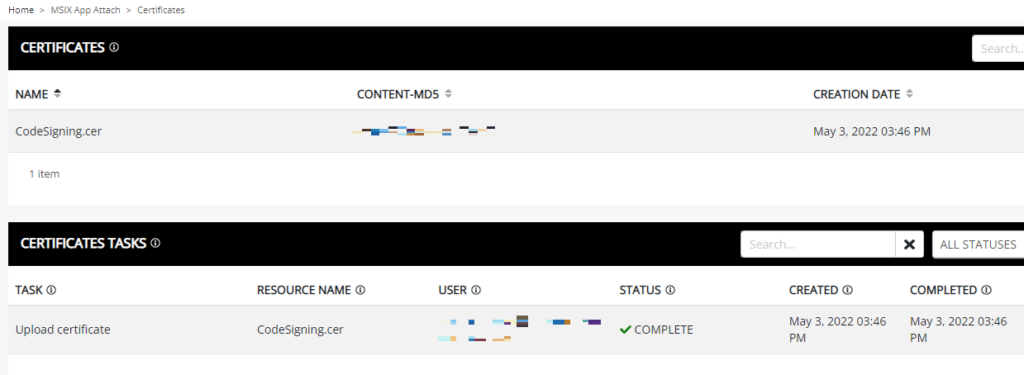
So now we have many things in place. It’s time to upload our MSIX images. Go to MSIX APP ATTACH, Images.
We can choose to upload a single MSIX image or upload multiple MSIX images. Since I only created one MSIX image, 7zip, as test, I will continue to upload only one.
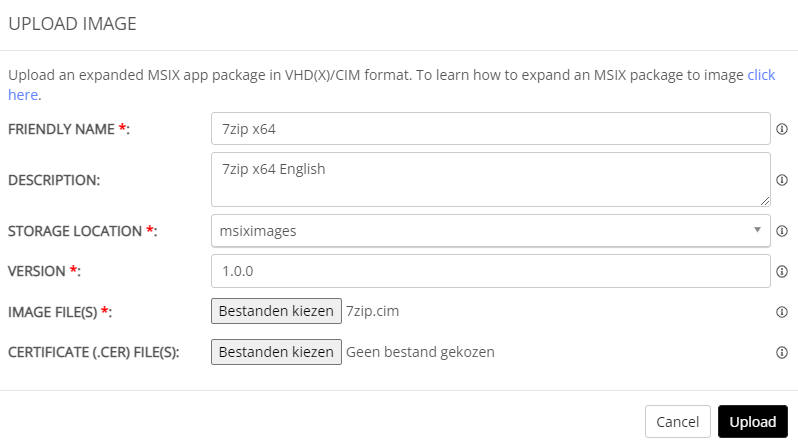
So if you click on Upload, you’ll see an error. Click on Select Files and select all the files of the MSIX image instead of just the .CIM file. Click upload again and all will be good.
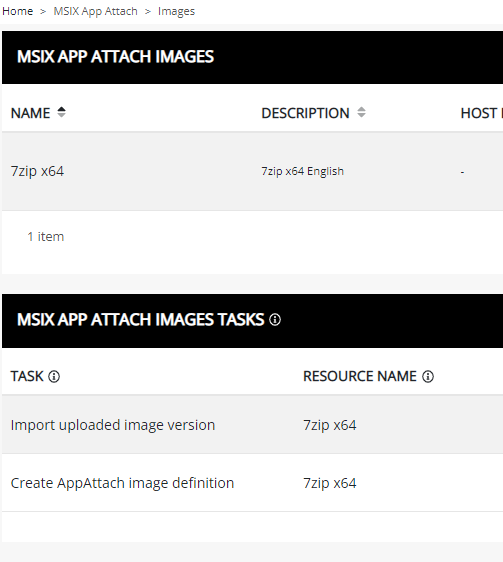
Alright, with MSIX App Attach, certificates and an MSIX Image configured, it’s time to assign the image to a host pool.
Go to Workspace, Dynamic Host Pool (or the host pool you need for your use case).
Click on Manage Hosts, Manage, MSIX App Attach.
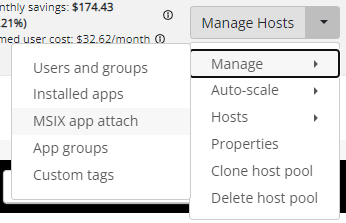
This screen gives us two options;
- Install Certifices (The ones we already installed, or add a new one!)
- Add (Start the Add MSIX App Attach Package wizard)
Let’s start with adding the certificates we already uploaded. Click on Install Certificates and click on OK.
Monitor the progress. As usual NME provides great feedback on the status.
NME checks if the session hosts are running. If they are not, NME will run them automatically and then install the certificates.

We can move on to assigning MSIX images to the host pool once these tasks complete.
Now it’s time to show how to use a single MSIX image.
Use A Self-Managed Image
This option allows us to store MSIX images on an accessible UNC path. It’s a great way for me to conclude this demo.
Before we go into the details on how to configure NME, let’s talk about the storage locations. NME provides two image sources;
- Image Library: This location points to the Azure Files fileshare we linked before under Settings,
- Self-Managed Image: This location points to a UNC path. I conveniently used a VM already joined to Azure AD DS and configured the share and NTFS permissions.
Open up the Workspaces, select the desired pool, click on Manage, MSIX App Attach. This will bring up the Manage MSIX App Attach for [hostpool] screen. We can Add, Remove MSIX Images and install certificates if needed.
By clicking on the Add button, we can choose the image source. Change the image source to self-managed image, Provide the UNC path including the name of the virtual disk. If everything is setup correctly, choose the package from the image (Most likely version 1).
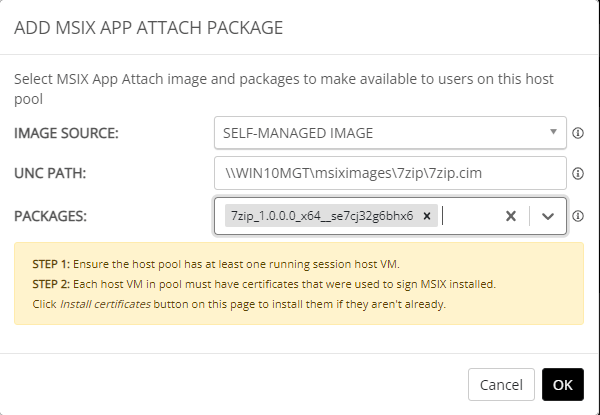
Click OK to add the MSIX image. NME will automatically expand the image and add the package.
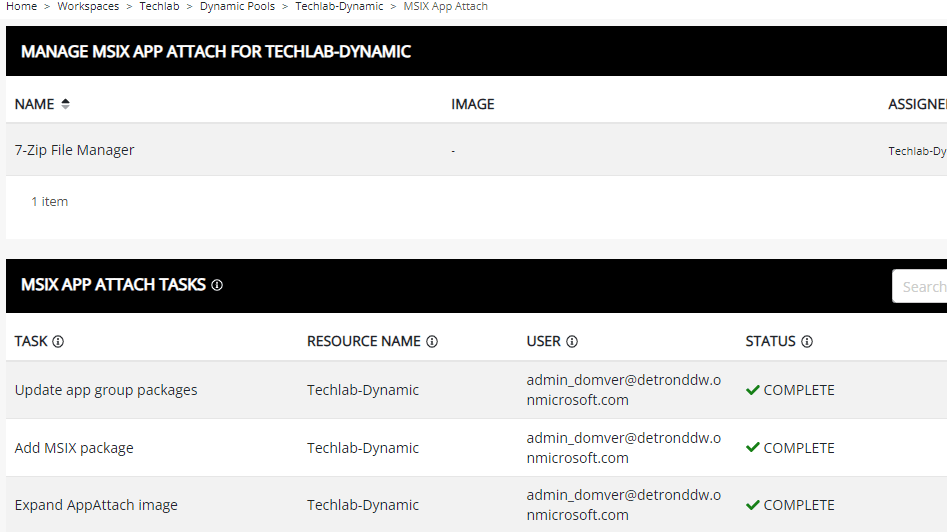
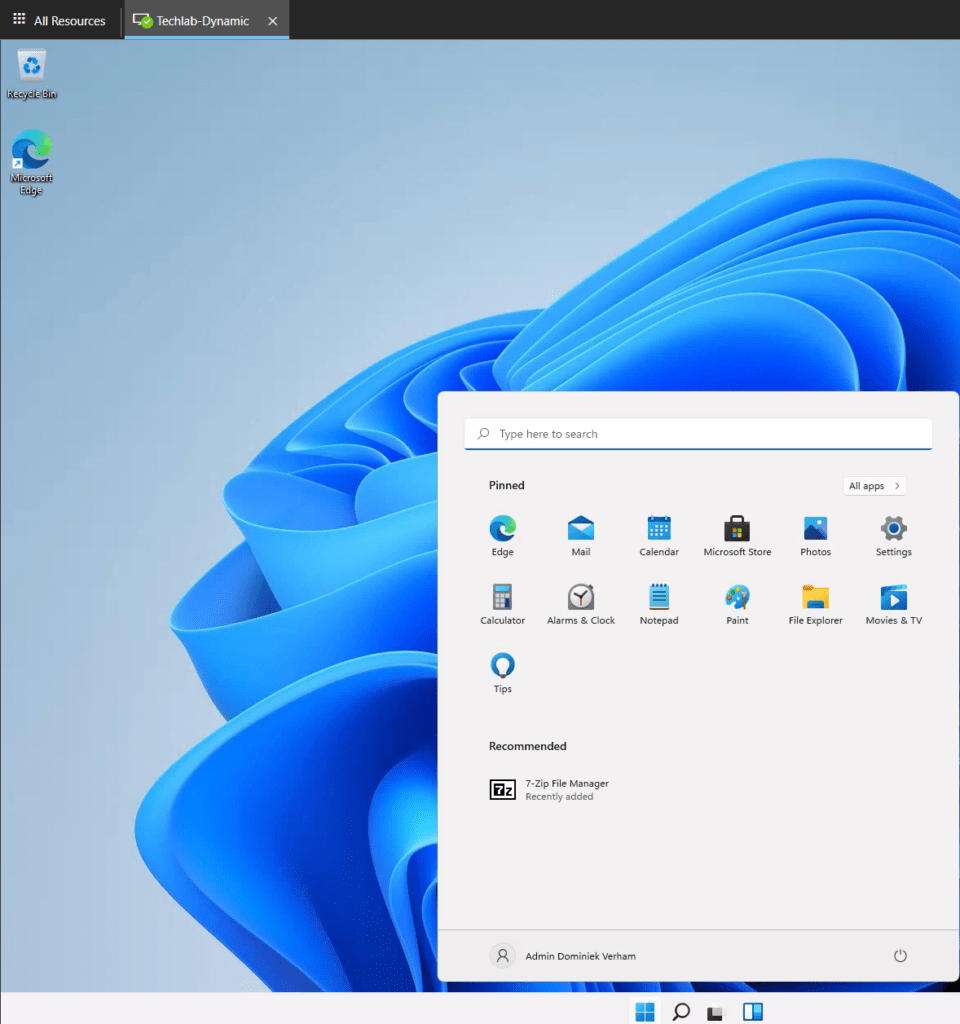
Let’s login to AVD and check if we can use 7zip. I opened up the AVD web client and logged in. I can already see that 7zip was recently added in the start menu.
A quick check to verify that the app is not manually installed;
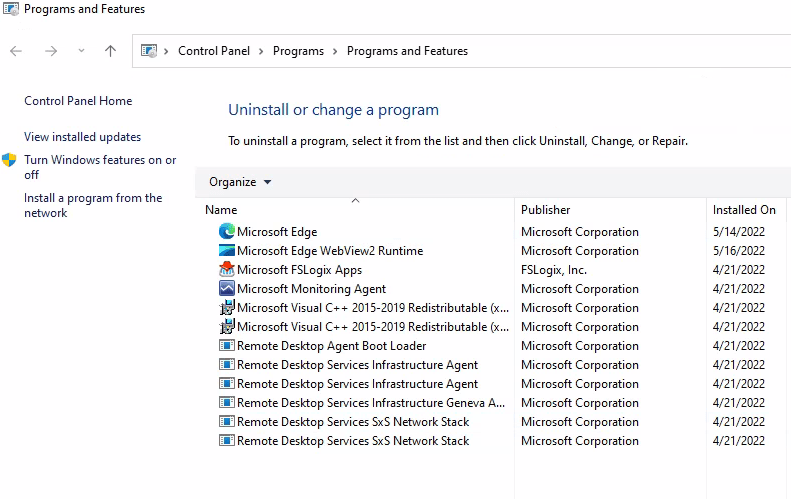
As expected, there is no entry for 7zip. If we start 7zip, the app opens up without any error messages or prompts.
That concludes this post about NME and MSIX.
Resources
I found the following resources very helpfull while checking MSIX out.
Azure Virtual Desktop Handbook: Application Management
Christiaan Brinkhoff has a great blog on MSIX and shows us how to use MSIX
