What’s up, everyone!
This post is part of a series I’ve been wanting to do for a long time now. It is about Azure Virtual Desktop / Windows 365 in combination with Nerdio Manager for Enterprise. It is a great third party tool that enables us to create, manage and optimize our Azure Virtual Desktop environment.
In this third part I will show how to add a Workspace and a Host Pool using NME. Then I will explain the auto-scale feature.
I will link every post in the series in each intro.
Series – AVD and Windows 365 with Nerdio Manager for Enterprise
- Part 1: Setup Nerdio Manager for Enterprise
- Part 2: Configure Azure Files and Azure AD DS Authentication
- Part 3: Setup a host pool, app group and workspace
- Part 4: Ways to login to AVD
- Part 5: NME and MSIX
- Part 6: Custom Image for AVD
Disclaimer: The way I setup and configured Nerdio Manager for Enterprise might not be the quickest way and it cannot be considered as best-practices by Nerdio. This is not a sponsored series.
Prerequisites
This demo will assume part 1 and 2 have been succesfully completed.
Step 1: What are we talking about?
So before we dive into the technical awesomeness, it might be a good idea to discuss the moving parts. This part will provide a short explanation. If you want to full read, follow this Microsoft link.
Host Pool
A host pool is a collection of Azure virtual machines that register to AVD as session hosts. There are two types of host pools (from Microsoft’s perspective);
- Personal: each session host is assigned to individual users.
- Pooled: session hosts can accept connections from any user authorized to an app group within the pool.
- Dynamic Host Pools: The host pools are based on a single Desktop Image that is used to update individual session host VM’s by automatically re-imaging them. They can have autoscale turned on or off. Session hosts can be added and deleted automatically or manually, depending on the autoscale configuration.
- Static Host Pools: The host pools are traditional AVD host pools containing session hosts. Static Host Pools can be created empty of containing session hosts. New session hosts can always be added. Static Host Pools can provide pooled session desktops, personal session desktops or RemoteApps. Static Host Pools are not autoscale-capable and the state of the hosts can be controlled by the administrator.
App Groups
An app group is a logical grouping of applications installed on session hosts in the host pool. There are two types of app groups;
- RemoteApp: users access the RemoteApps which are published to the app group.
- Desktop: users can access the full desktop.
Workspace
A workspace is a logical grouping of application groups in Azure Virtual Desktop. Each AVD application group must be associated with a workspace for users to see the remote apps and desktops published to them.
Auto-Scale functionality
This is a function from NME, it is not an AVD function. If turned on, NME will take over session host management. Session host management consists of:
- Host Pool Sizing
- Scaling Logic
- Pre-stage Hosts
- Messaging
- Auto-heal Broken Hosts
Auto-scaling must be temporarily turned off when update the golden Desktop Image associated with a dynamic host pool.
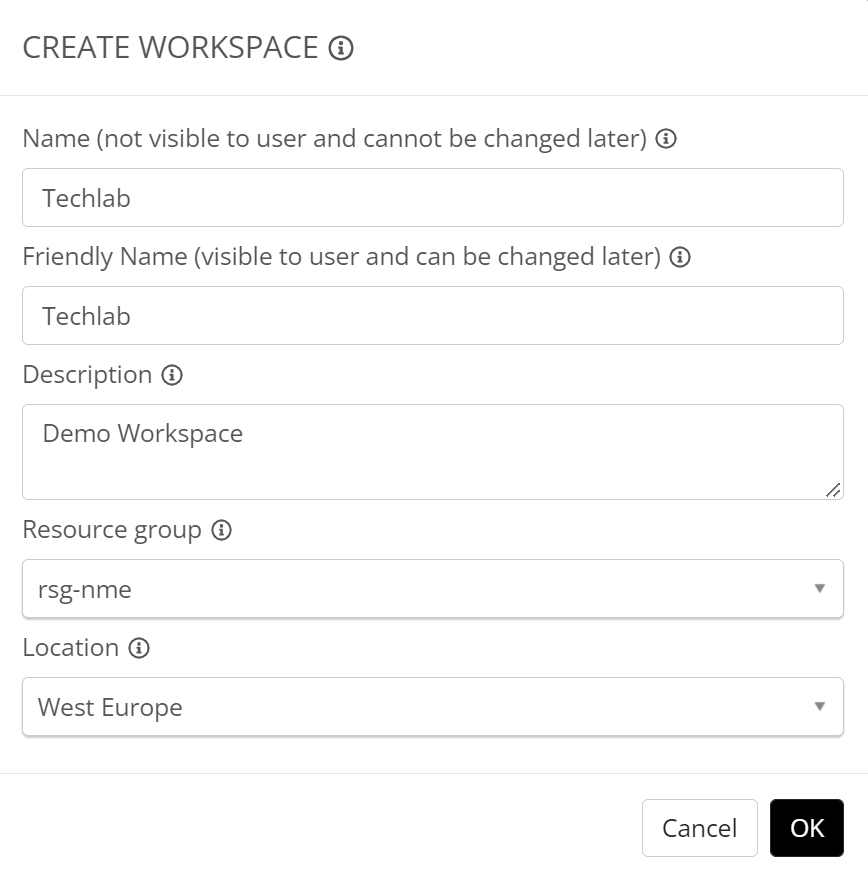
Step 2: Setup a workspace
Login to your Nerdio environment and click on Workspaces in the menu. Click on the Add Workspace button. Fill in the required values and finish by clicking OK.
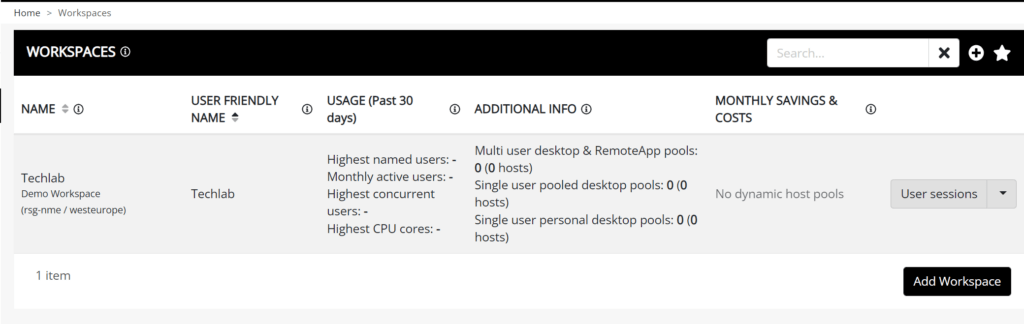
The new workspace will become visible.
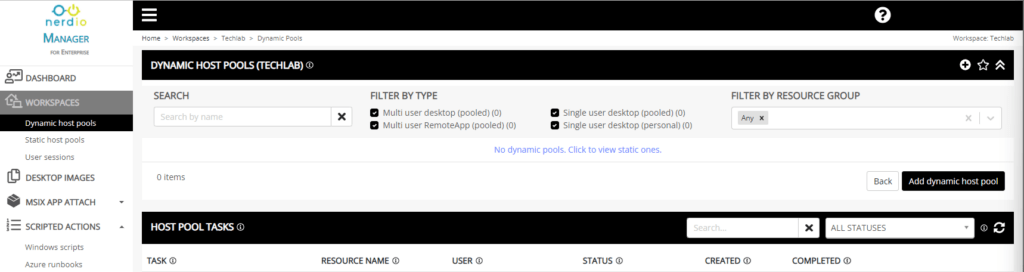
Click on the name of your workspace. You will then see the Host Pool options.
Step 3: Create a Host Pool
Now it’s time to create a host pool. For this demo I will create Dynamic Host Pool. This way we get to play with the autoscale features.
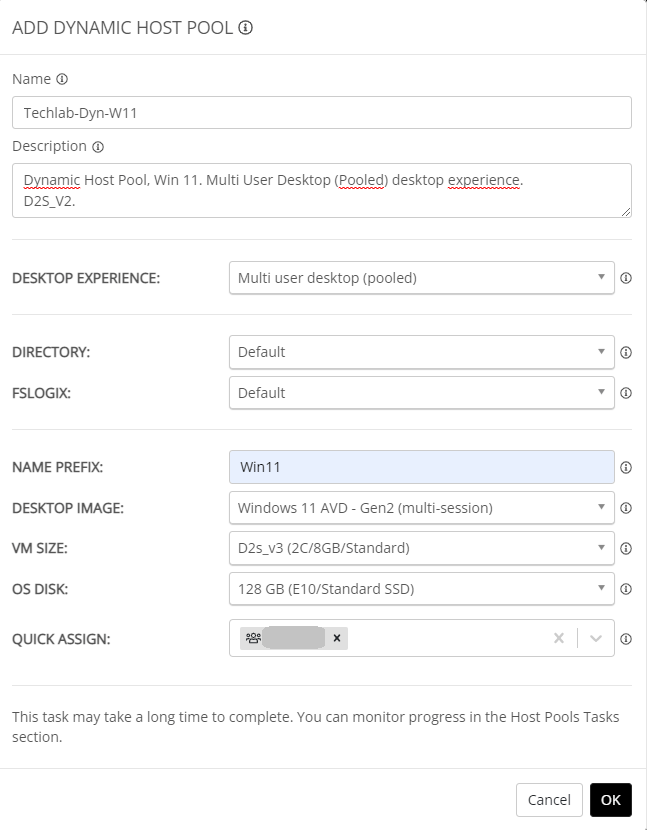
Open the Workspaces menu item and click on Dynamic Host Pools. Click on the Add Dynamic Host Pool button.
Fill in the required values.
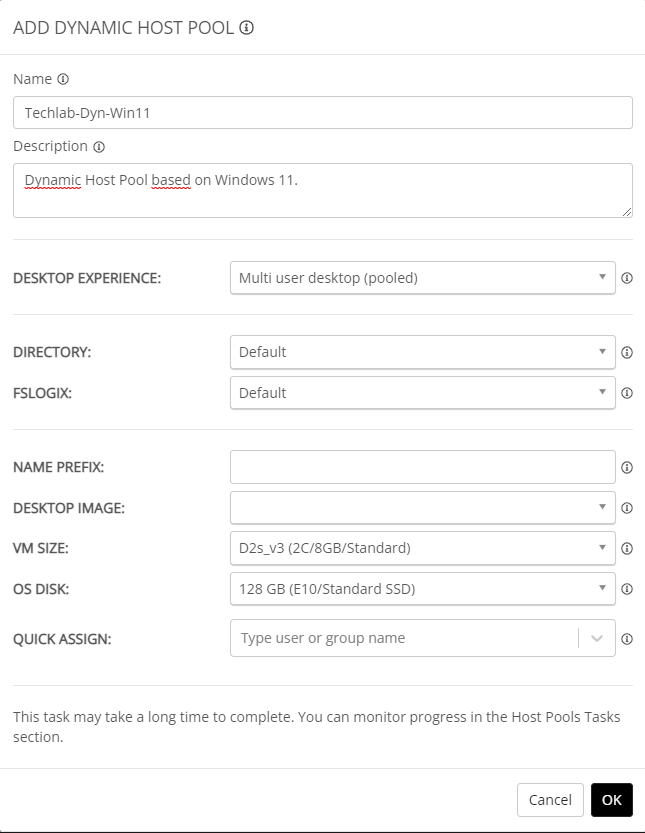
The Desktop Experience has the following options:
- Multi User Desktop (Pooled): Full desktop experience. Users aren’t assigned to individual session hosts and are placed on a host based on its load. Multiple uses are together on a group of hosts.
- Multi User RemoteApp (Pooled): Published applications, not a full desktop experience. Published RemoteApps are visible to users as native apps running on their local computer. The RemoteApps are provided by a collection (pool) of session hosts.
- Single User Desktop (Pooled): Full desktop experience. Users are placed on individual desktop VMs (one user per session host) and a pre-configured number of spare (available) desktops is maintained.
- Single User Desktop (Personal): Personal (persistant) full desktop experience. A dedicated session host VM is assigned to each user.
In this demo I will use the Multi User Desktop (Pooled) desktop experience.
Choose your Directory and the FSLOGIX configuration profile.
Enter a Name Prefix and choose your desktop image. At this point I do not have any custom Desktop Images. So I will choose Windows 11 AVD – Gen2 from the Azure Marketplace.
Choose the right VM Size and OS Disk.
Use the Quick Assign option to assign the host pool to users or groups. The user assignment can be modified after the host pools is created.
Click on the OK button to continue.
Step 4: Configure Auto-Scaling
Once completed, we can manage the auto-scale options for the dynamic host pool.
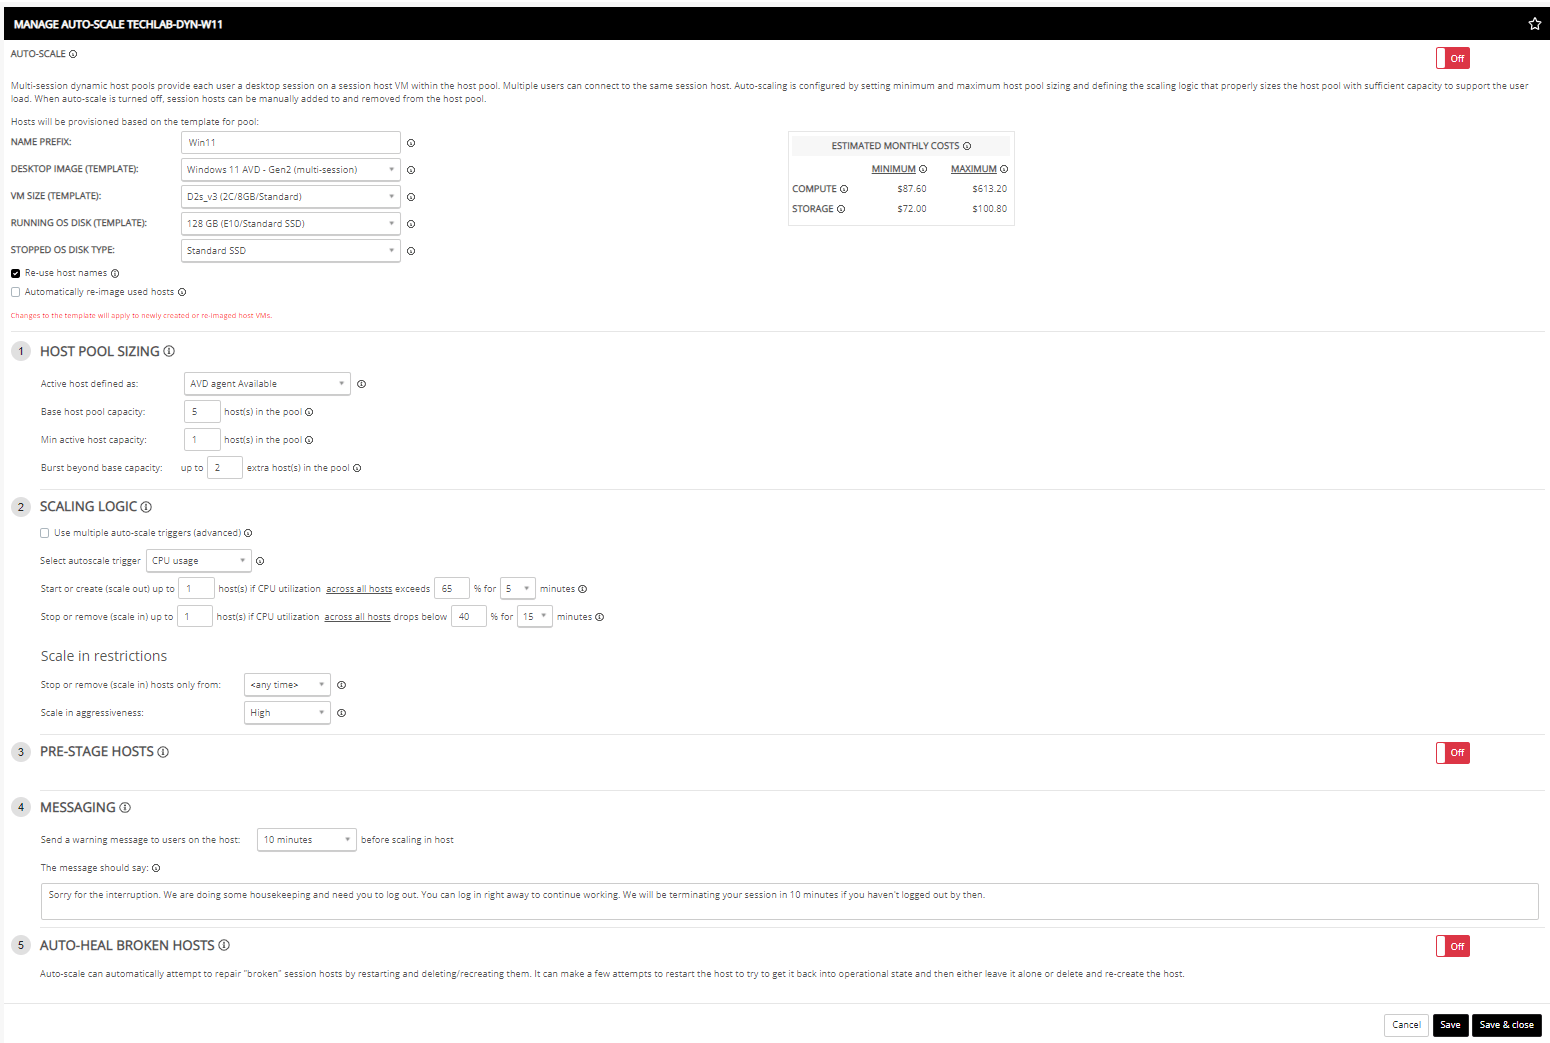
Auto-scaling can be turned on and off by clicking on the toggle on the top right side of the screen.
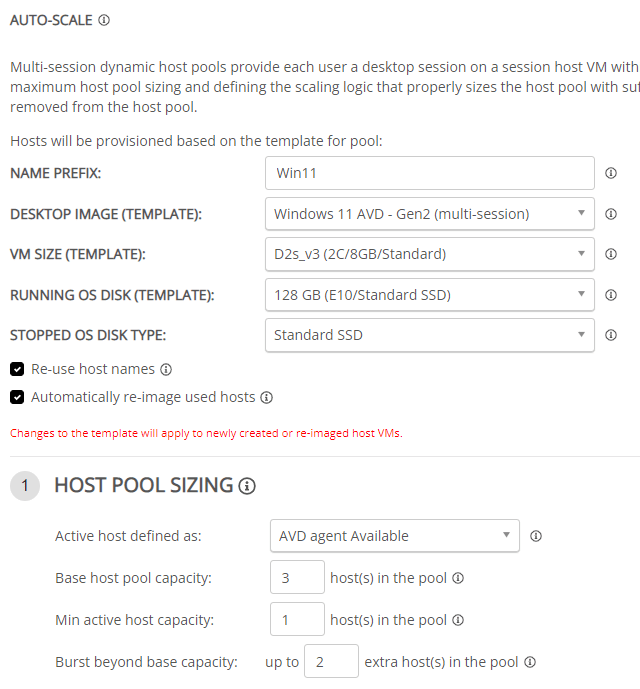
Review the provisioning settings and choose if you like to re-use host names and automatically re-image used hosts. If you enable the last option, keep in mind that in a multi-session environment, it will only happen once the last user has logged off.
Host Pool Sizing
In this part we can define when a host is active;
- AVD agent available (Default)
- VM started
Choose your burst beyond base capacity. The system will automatically burst above the standard number of session host VM’s when there is user demand. Default: 2.
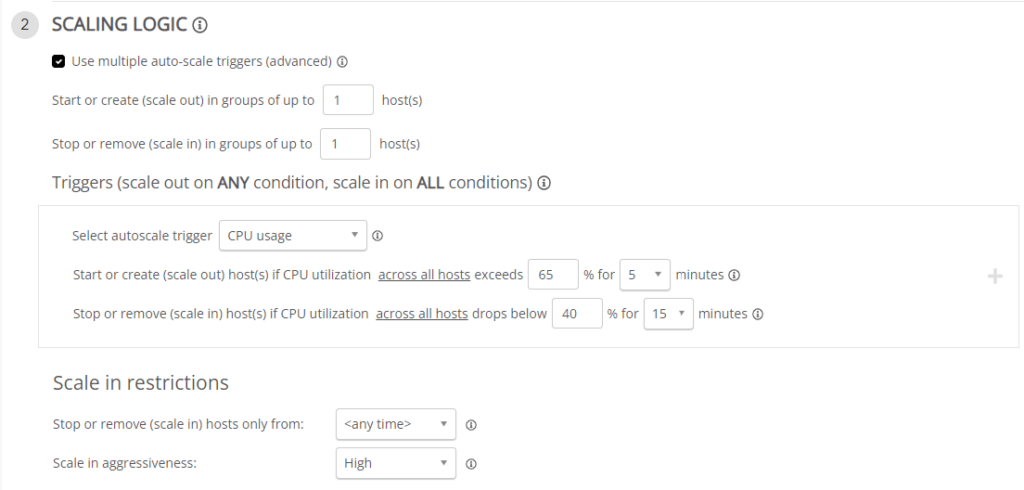
Scaling Logic
Check the Use multiple auto-scale triggers (advanced) option if you want to create more than one triggers.
If you checked the box, you’ll see a + sign appear on the right hand side. Click to add more triggers.
Select the autoscale trigger;
- CPU usage
- RAM usage
- Average active sessions
- Available sessions
- User-Driven
* User-Driven will allow us to scale-in hosts when all users log-off in x minutes. It will also allow session limit per host, load balacing (breadth first vs depth first) and scale-in restrictions.
For this demo I will use the CPU usage trigger with default settings.
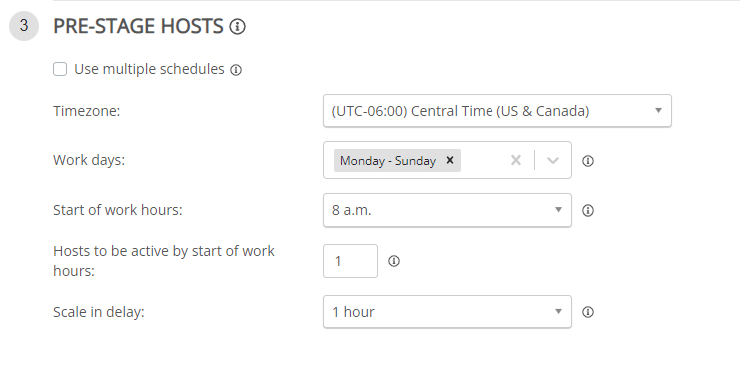
Pre-stage Hosts
Pre-stage host pool capacity by powering on or creating session hosts before the start of business hours to avoid a logon storm.
I will not use these options for this demo.
Here is a screenshot of the configurable options, if you would like to use it:
Messaging
After business hours, the system will find session hosts with no active sessions or the smallest amount of sessions. If there are still users connected to a session host that has been selected for scale in, a message will be sent to the user. The session host will be placed in drain mode to prevent new connections and it will be stoppped or removed after a predefined delay.

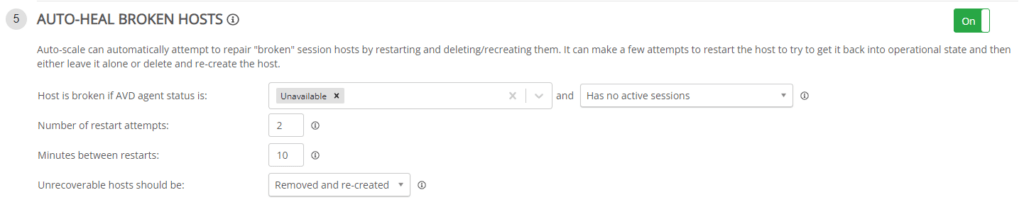
Auto-Heal Broken Hosts
Nerdio Manager can detect and attempt to repair broken session hosts VM’s that are not being seen by the AVD service as “Available”. The auto-heal operations will run when all scale out activity is complete and the system is in otherwise steady-state.
These are the configurable options, if enabled:
Click the Save & Close button.
Once these settings are saved, Nerdio Manager will automatically process the auto-scale settings.
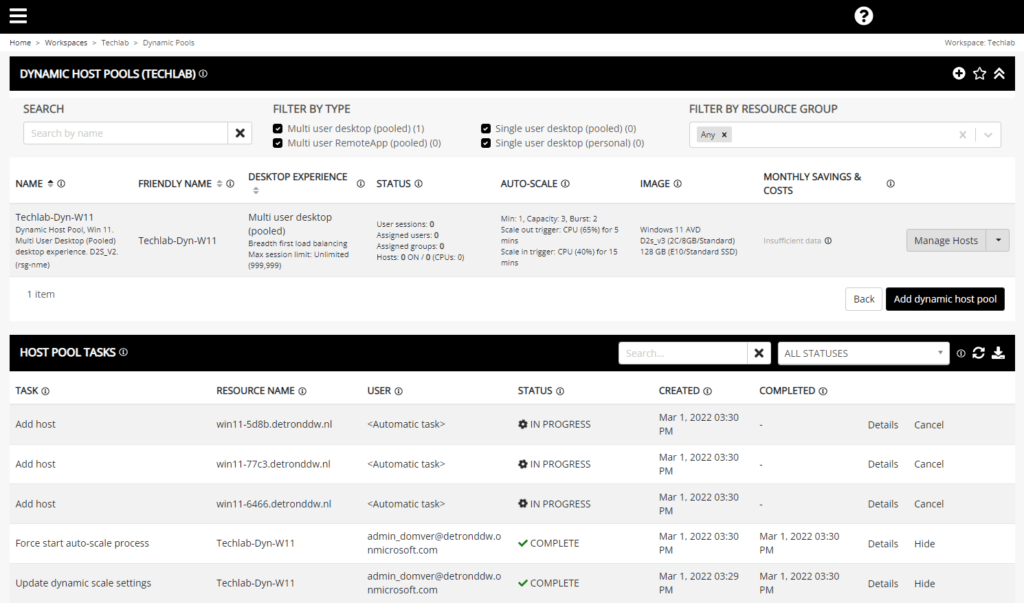
Nerdio will add the required hosts. Click on Details to get more information on the deployment. If something goes wrong, this might be a good place to start troubleshooting.
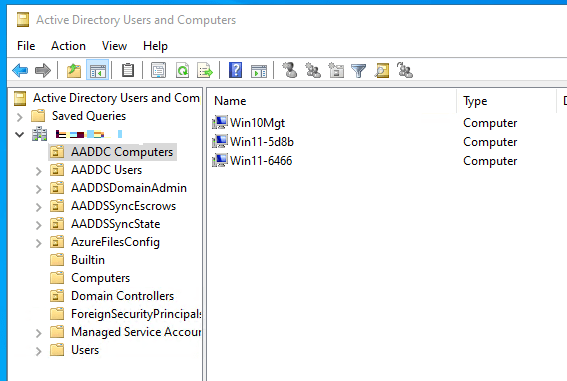
Once completed, we can see the computerobjects in Azure AD DS.
So what to do if the Join AD (OU:) step fails?
Check out the details for the step. Click on Request AD join logs. This may take a bit of time, but it will give some information why joining the domain failed.
If the credentials the cause, remember we can edit the credentials in the Settings, Integrations menu. Click on the connected domain.
If you used Azure AD DS like me, remember to use the domain you selected for Azure AD DS (so do not use the Azure AD domain).
Remember that the password hash for the account is not automatically synchronized to Azure AD DS. This will only happen for a useraccount if the password was reset after you created Azure AD DS. If you are unsure, reset the password for the account, wait for 30 minutes and try again.
If you left the Organization Unit blank in the configure directory profile, the default Computers container will be used. Unless you used Azure AD DS. In that case check the AADDC Computers OU.