
What’s up, everyone!
I’ve written a post on how to change the random generated URL that Nerdio Manager for MSP uses. Let’s see if we can do the same for Nerdio Manager for Enterprise.
Requirements
- You need to have Nerdio Manager for Enterprise up and running.
- Access to your DNS environment.
- An SSL certificate for your custom URL.
- Certificate requirements that are mentioned in this Microsoft doc.
Step 1: Add a custom domain and add DNS records
Log into the Azure portal and open the App Service used by Nerdio Manager for Enterprise (NME from now on). You can find the App Service pretty fast by going to the resource group used by NME. By default the app service uses the naming convention nme-app-somethingrandom.
Next go to Settings, Custom domains.
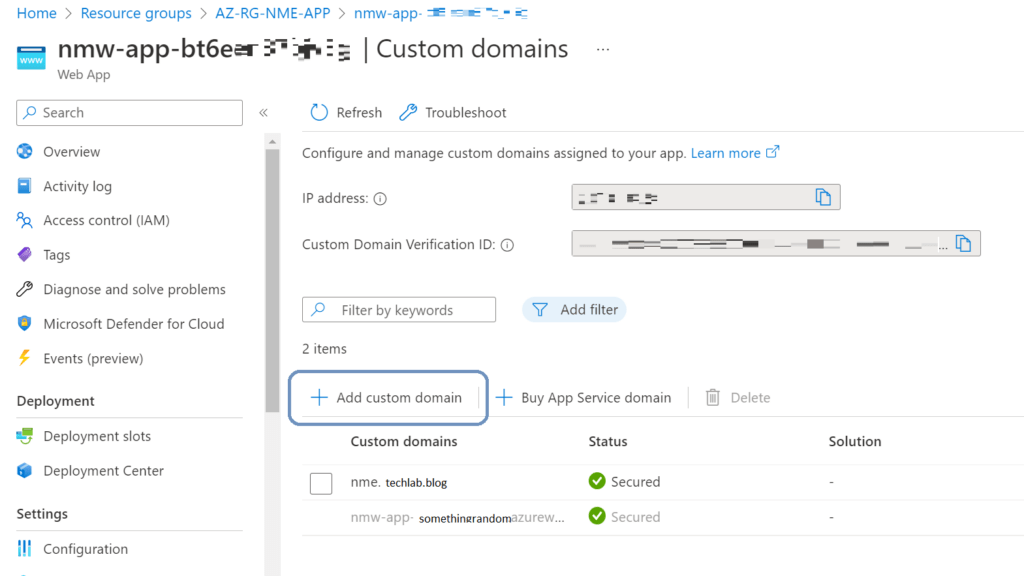
For this demo I’ll pretend to add nme.techlab.blog. Click the + Add custom domain button in the ribbon.
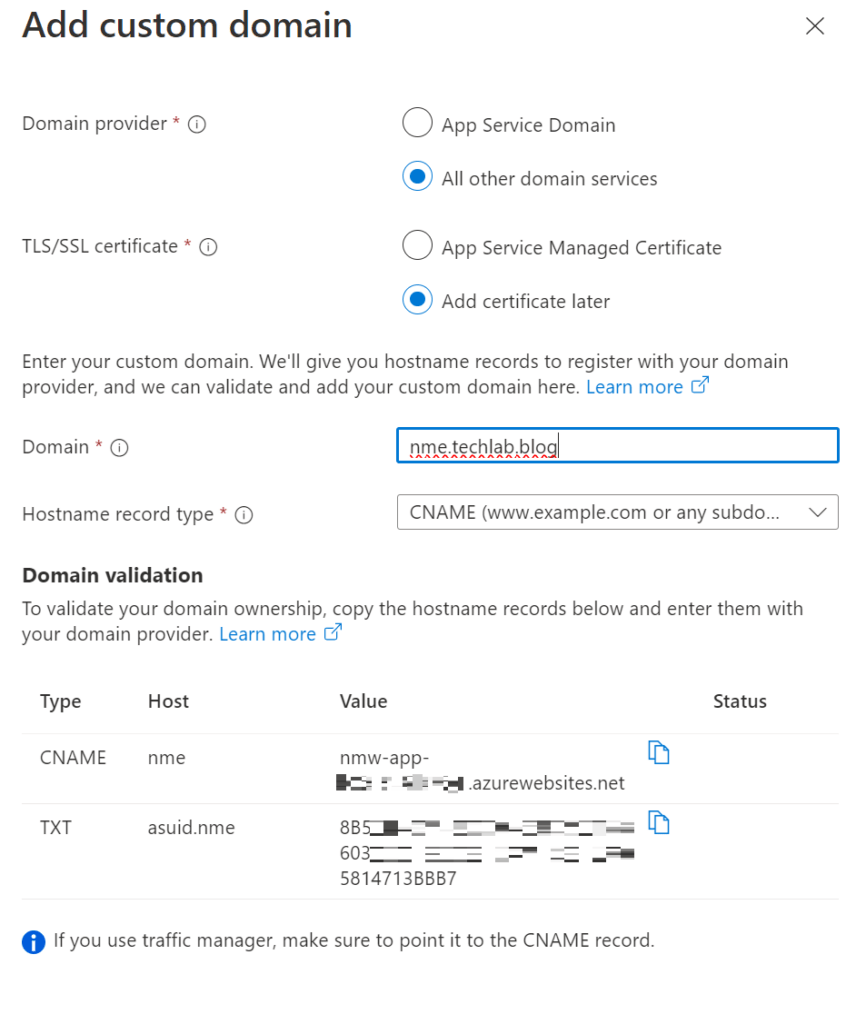
Make sure to check the correct boxes and type in the desired domain.
You’ll get a CNAME and TXT record that you need to add to your DNS zone.
Once done, you can click on the validate button. If everything is correct, you can continue to the next step which is to assign the certificate.

Click on the Add binding text next to your custom domain.
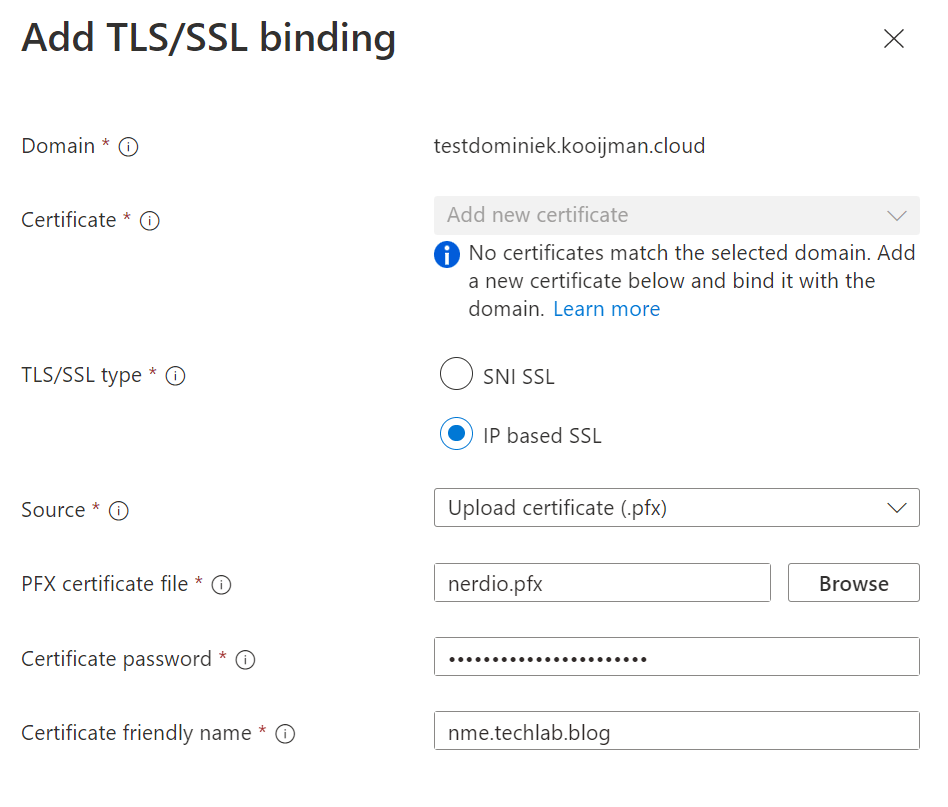
If everything checks out you’ll see that the status changes to secured.
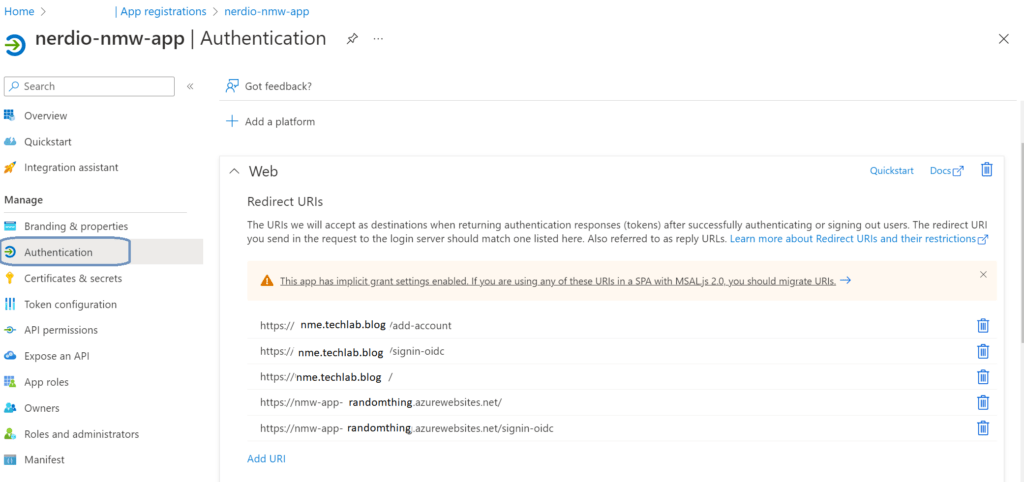
Step 2: Add redirect URL's
Open the Azure AD portal, Manage, App registrations. Click the All applications tab.
Select the app registration for NME. (Probably named nerdio-nmw-app).
Make sure to keep the existing values and add the same values containing your custom domain. You should end up with something like:
Unlike Nerdio Manager for MSP we do not need to change an application setting named Deployment:WebAppUrl. This setting is not present in Nerdio Manager for Enterprise.
You can now login to NME using your new shiny URL.