What’s up, everyone!
So lately I’ve been seeing all kinds of posts and notifications that we have a new way to communicate with our end users using organizational messages. It got me curious to see it in action and find out why using organizational messages is a good idea and how it stacks up against other forms of communication, like sending an e-mail or use collaboration options like posting in Teams or Teams chat.
Let’s take a look!
Header image credit: Jesse Stein (Microsoft)
Requirements
If you want to get started using organization messages, you’ll need to look at the following requirements:
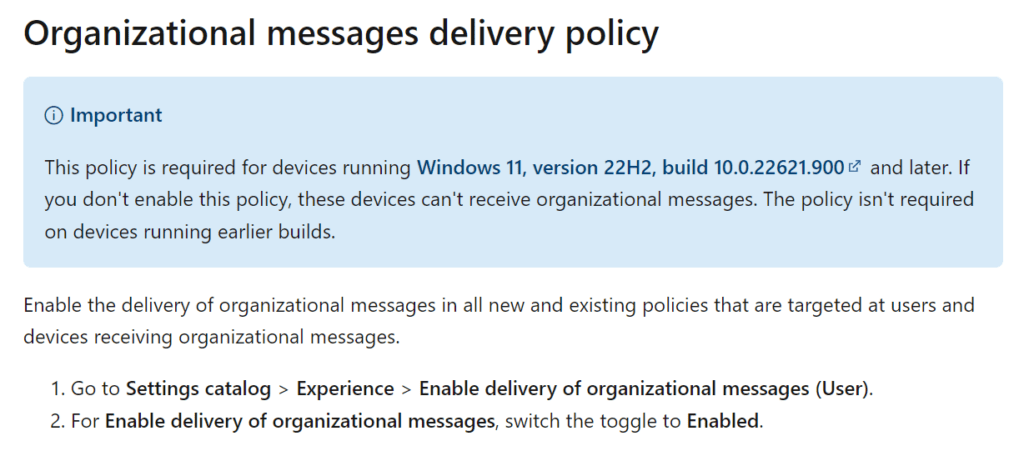
- Windows 11 version 22H2 or later
- It’s included in Microsoft E3 or E5 or…
- EMS E3 with Windows Enterprise E3
- EMS E5 with Windows Enterprise E5
How To Setup Organizational Messages
Once logged into Intune, go to Tenant administration, End user experiences, Organizational messages (preview). This will be your starting point and it will look something like this:

As you can see from the screenshot, we have three ways of passing on messages to our end users. Just pick the type of message for you use case.
The overview lets us know that we need to do three things to get this working.
Step 1: Enable Delivery Of Organizational Messages
The legends from Microsoft made this easy for us and direct us to the learn site with all the necessary information:
Alright, we should be able to get that up and running. Go to Devices, Policy, Configuration Profiles. Create a new profile for the Windows 10 or later platform and choose Settings Catalog as the profiles type.
Just search the catalog for Experience and you’ll find the setting you need in no time.
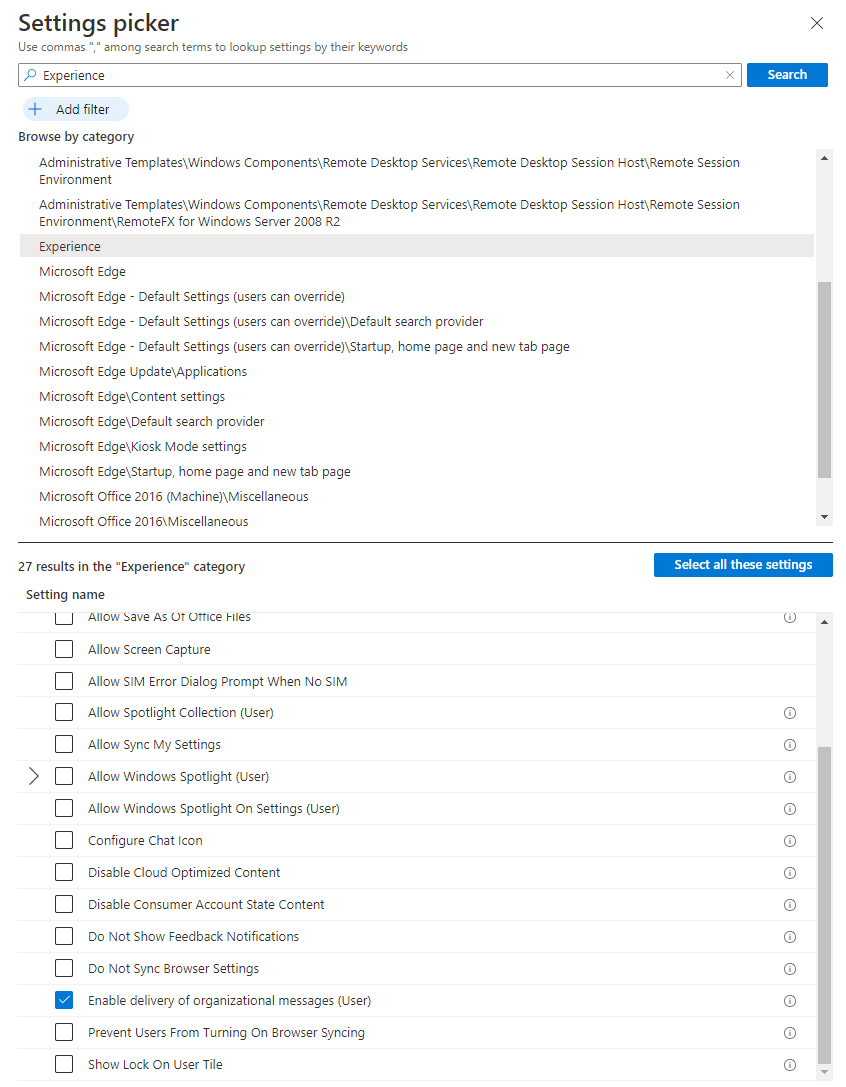
According to the Microsoft documentation, you’ll need to add a couple of settings. Switch every setting to yes except for ‘Disable Cloud Optimized Content’.
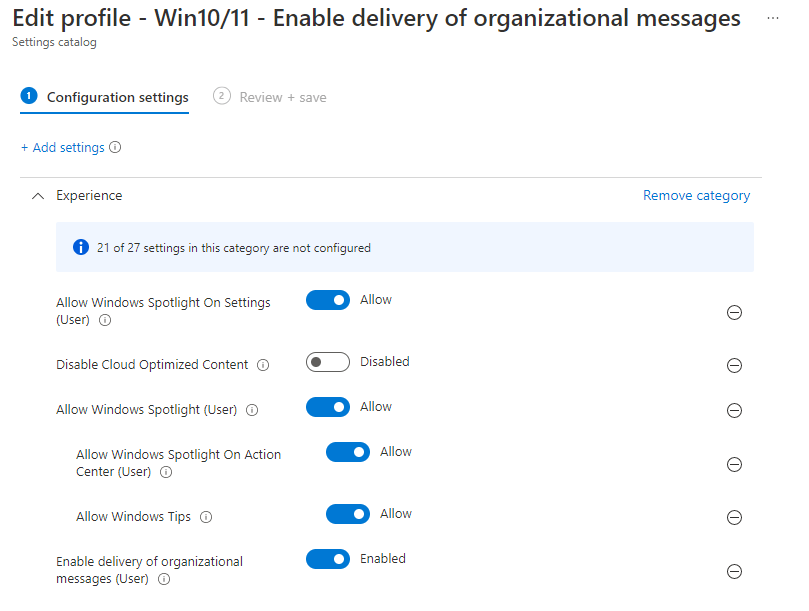
Once done, you should end up with something like this:
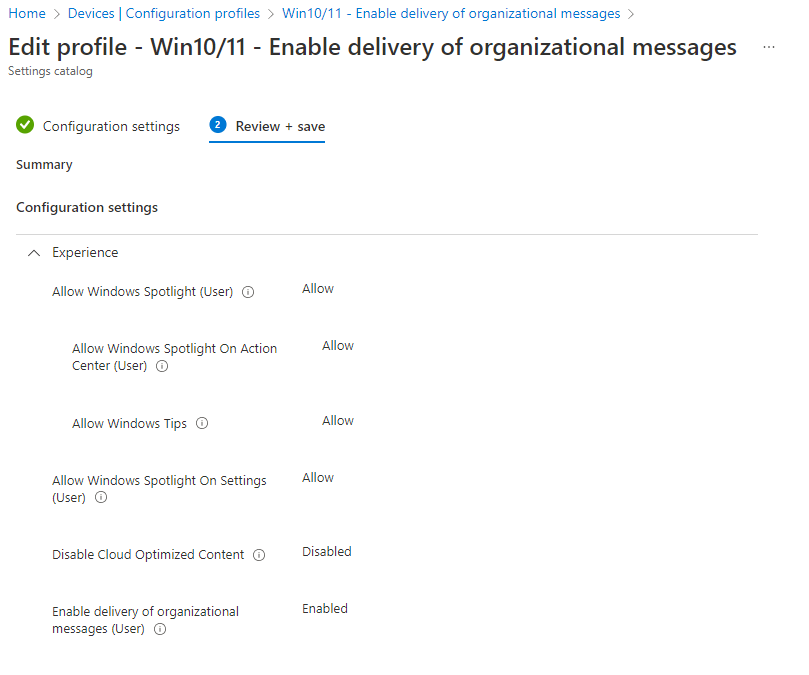
Make sure to take a second to admire your brilliance and if you’re happy with the config, go ahead and save it. But wait, there was another thing that we should take a look at….
Step 2: Decide Who Can Message Your Users
Your admins can send messages to your users. But you can also allow or deny Microsoft that same possibility. The option is set to enabled by default. Just switch the slider to Block if you want to disable it.

Step 3: Branding
Prepare the company branding by creating the following images:
- 48 x 48 pixels (for the notication area)
- 64 x 64 pixels (Messages on the taskbar)
- 50 pixels high x 50 -100 wide (used for the Get Started app messages)
How To Create Messages
Creating messages is pretty easy to do. There are three areas where you can display your messages. Each area has their own message theme, or intended use if you will.
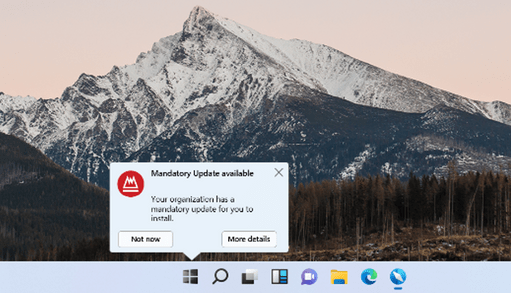
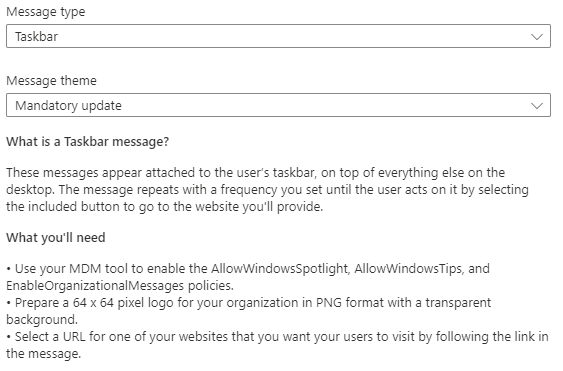
Taskbar
A taskbar message appears attached to the users taskbar. It will appear on top of everything else and it will appear on the schedule that you as an admin can define.
The only theme that you can use at this time of writing is called Mandatory Update.
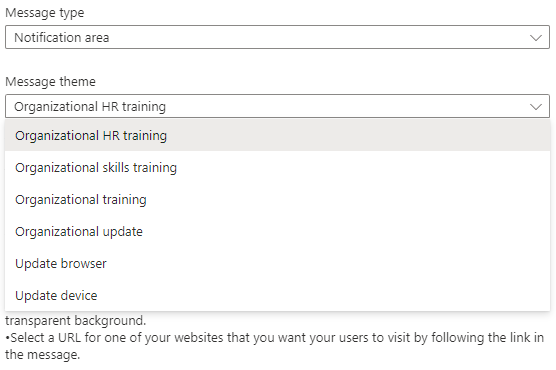
Notification Area
The message will appear in the notification area of Windows 11 (the right side above the clock). It will appear on a schedule as defined by you as an admin until the users interacts with it.
You can use this notification for the following themes:
- Organizational HR training
- Organizational skills training
- Organizational training
- Organizational update
- Update browser
- Update device
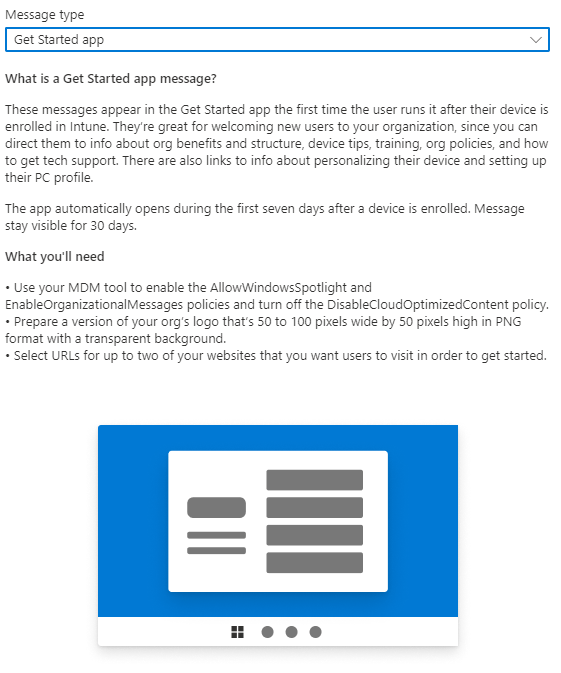
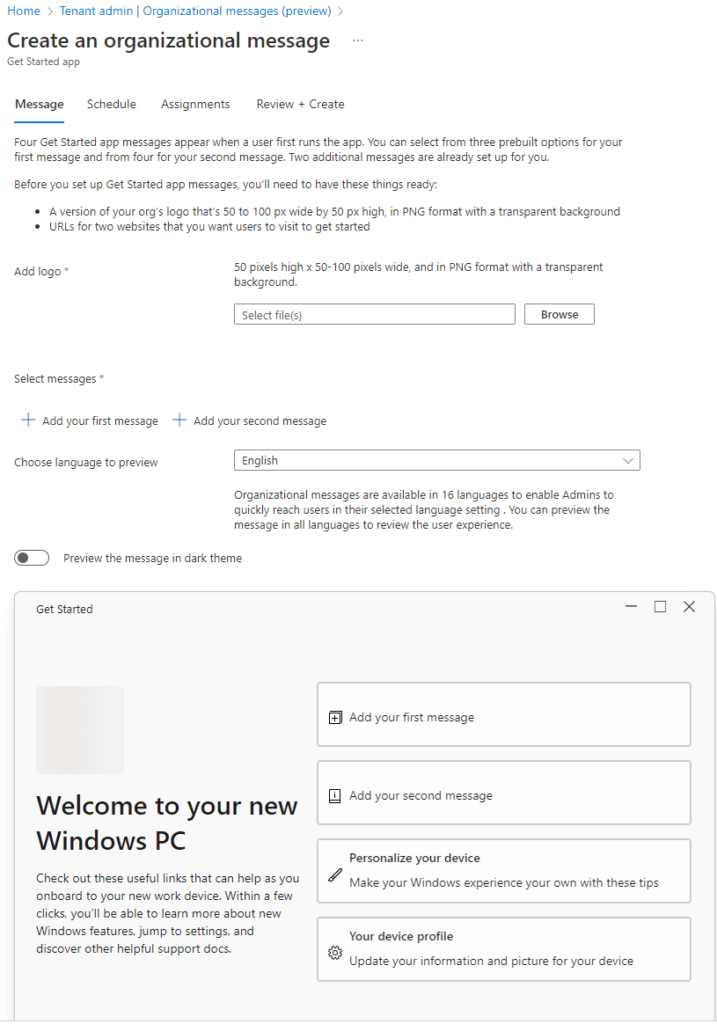
Get Started App
The Get Started app runs only the first time that a user logs into their endpoint. The app has a couple of fields that you can personalize so this is a great way to onboard your users.
Creating messages is a really easy process. Choose the correct message type, add logo’s, provide a link to the message and preview the message.
Here are screenshots where you can see how each message is configured:
The thing I really like is how easy Microsoft made this. Each time you create a message, you’ll see which settings are needed for this to work. So if for some reason these messages do not popup where they should, just create a new message of the same type and check the prerequisites.
You can find all the messages in Intune under the Message tab. It has some excellent reporting so you know if the messages are shown to users and if they interact with the message.

I really like the Get Started app. I mentioned before that it can be personalized. Here is a screenshot how to set it up:
Wrapping Up
I really like how Microsoft basically adds Windows to the admins toolbox to communicate with their users. Organization Messages has a lot of potential! One thing I would like to see is more flexibility, being able to configure your own messages instead of just the default themes.
Resources
I used the following resources for this blog:
Microsoft Learn documentation on Organizational Messages
Deliver organizational messages with Windows 11 and Microsoft Intune